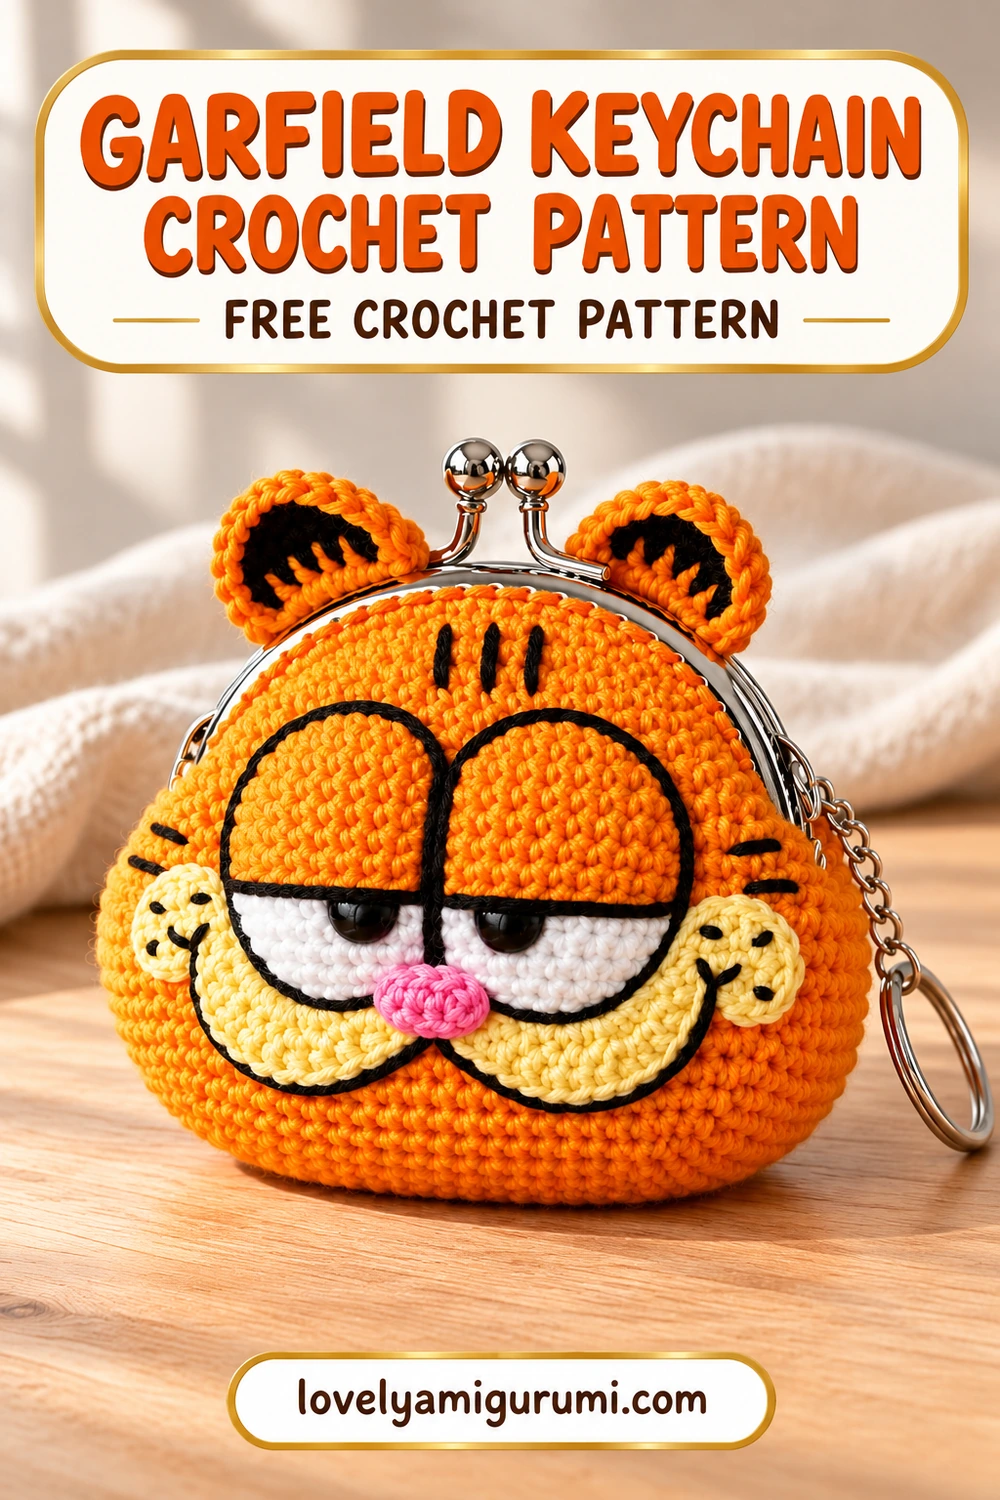
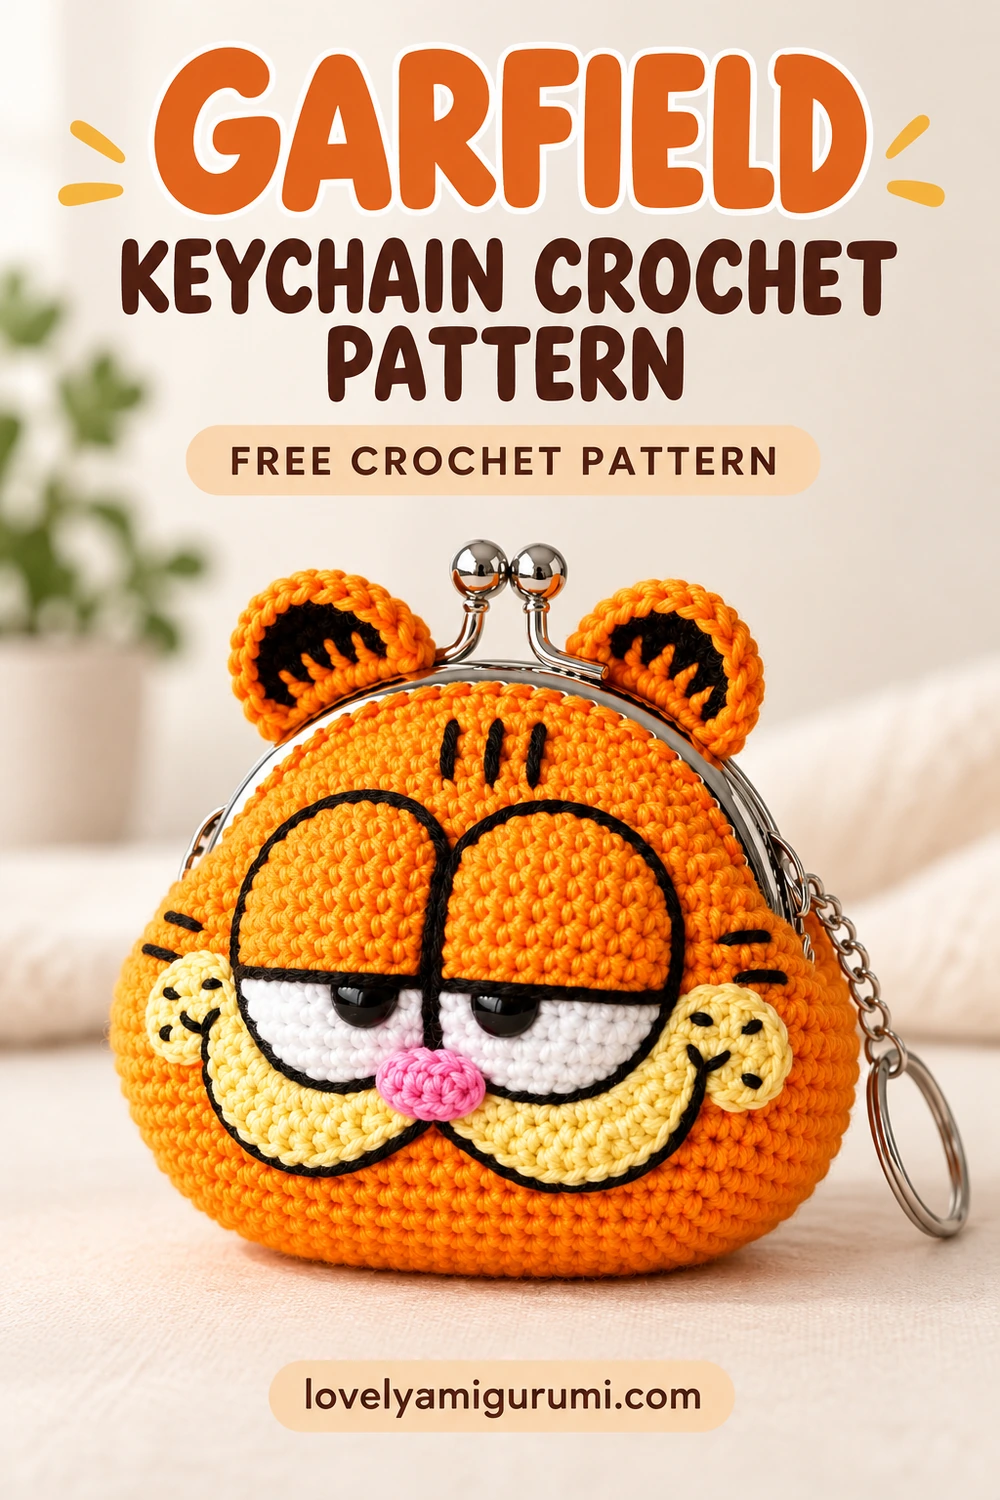
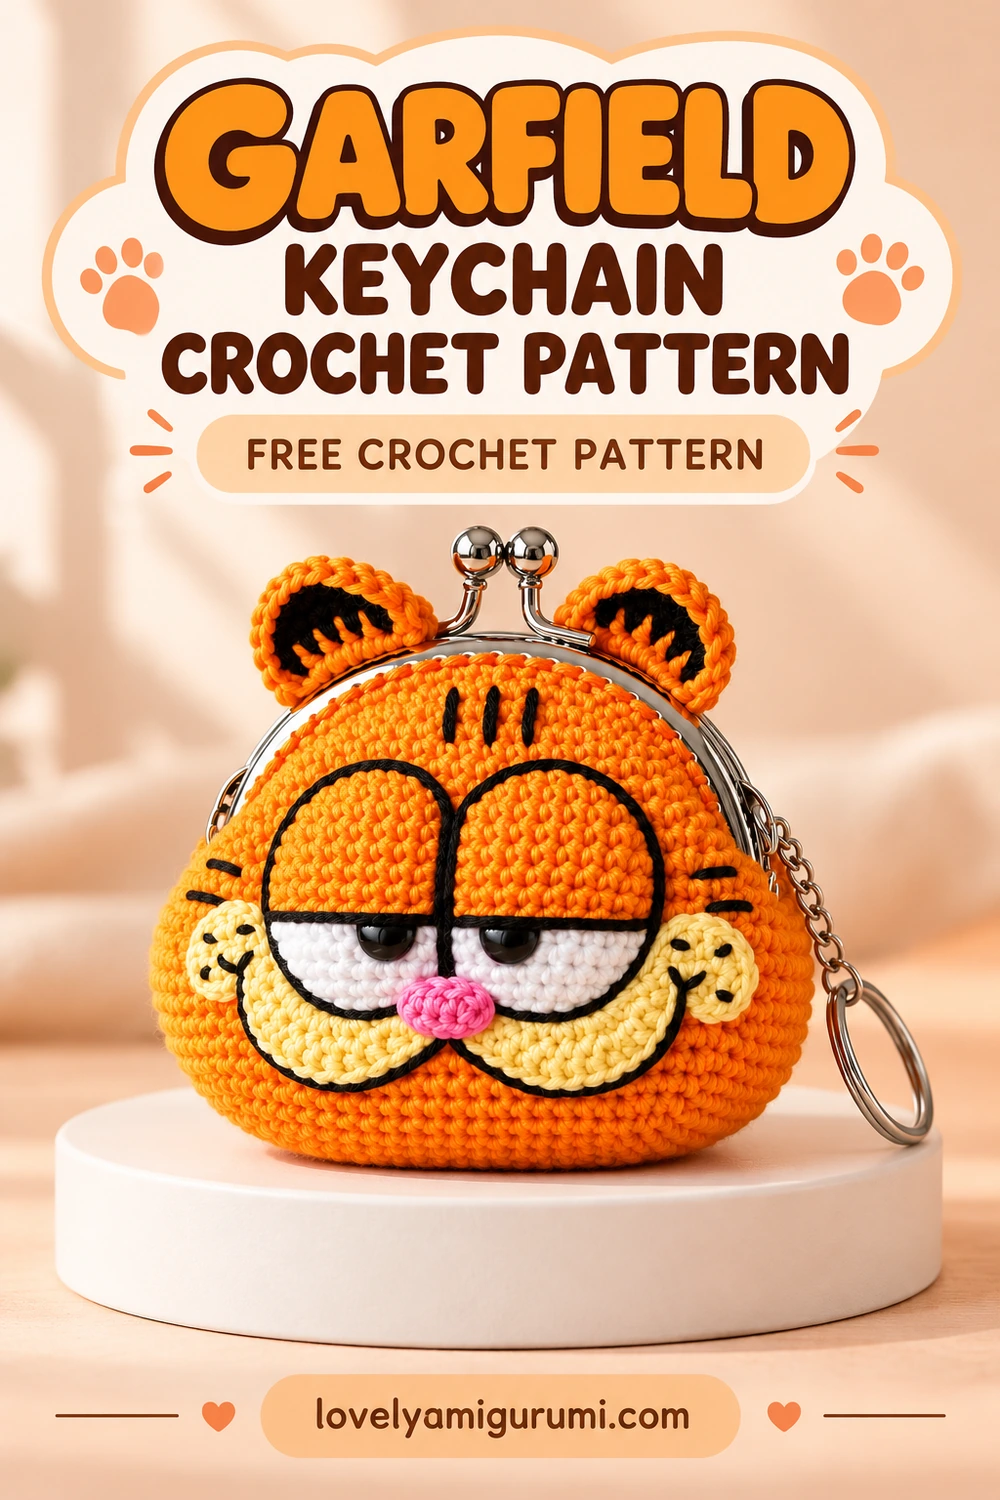
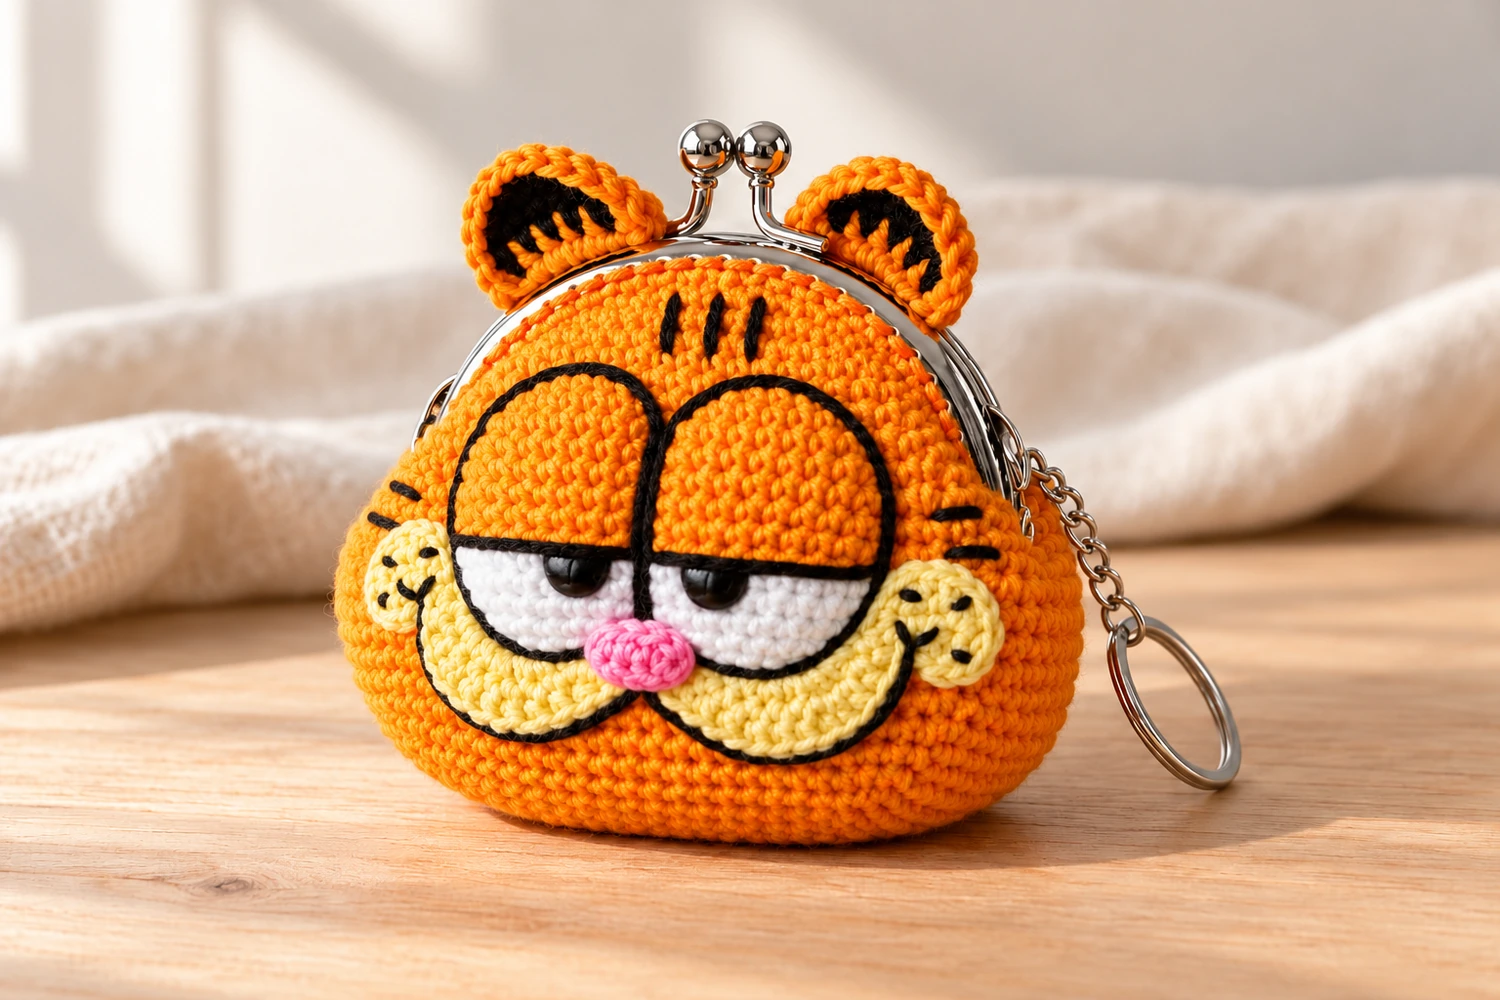
The half-closed eyes are my favorite part of this Garfield keychain crochet pattern. A little orange over each white eye, a pink nose and a curved yellow muzzle give a plain orange pouch its familiar expression. I recommend pinning the face while the pouch is held in its frame, because a flat pouch and a closed clasp can change how the features sit.
This is a hollow mini coin purse with a sew-on kiss-lock frame and an optional keychain attached to the frame. Crochet the pouch first, check the mouth against your hardware, then sew on the flat facial appliques. There is no stuffing inside the coin compartment.
Materials for the Garfield keychain crochet pattern
- Fingering or fine cotton yarn in orange, white, pale yellow and pink.
- Black embroidery thread for the pupils, outlines, stripes and whiskers.
- A 2 mm hook, adjusted to your yarn and tension.
- A sew-on metal kiss-lock frame; about 5 cm is a starting reference, but choose the frame to fit your actual opening.
- A thin strong sewing needle that fits the frame holes, matching sewing thread, scissors, marker and pins.
- Optional small split ring or lobster clasp attached to a suitable loop on the metal frame; optional fabric lining.
Frame fit matters more than a stated purse size. Make the pouch and measure its mouth before choosing or attaching the clasp. The frame must open and close freely without stretching the crochet or gathering it into deep folds.
Stitches and pattern notes
MR = magic ring; ch = chain; sc = single crochet; hdc = half double crochet; dc = double crochet; sl st = slip stitch; inc = 2 sc in the same stitch; dec = single crochet two stitches together; st(s) = stitch(es). FLO and BLO mean front loops only and back loops only. For an invisible decrease, pick up the front loop of each of the next two stitches, yarn over and pull through both front loops, then complete the single crochet.
Work the round sections in a continuous spiral without joining unless a section says otherwise. Move the marker to the first stitch of each round. Numbers in parentheses are the counts after completing the round. Repeat only the bracketed sequence the stated number of times. Turning chains and joining slip stitches do not count as stitches. Leave sewing tails on separate parts and secure all ends inside the work.
Garfield keychain crochet pattern: hollow pouch
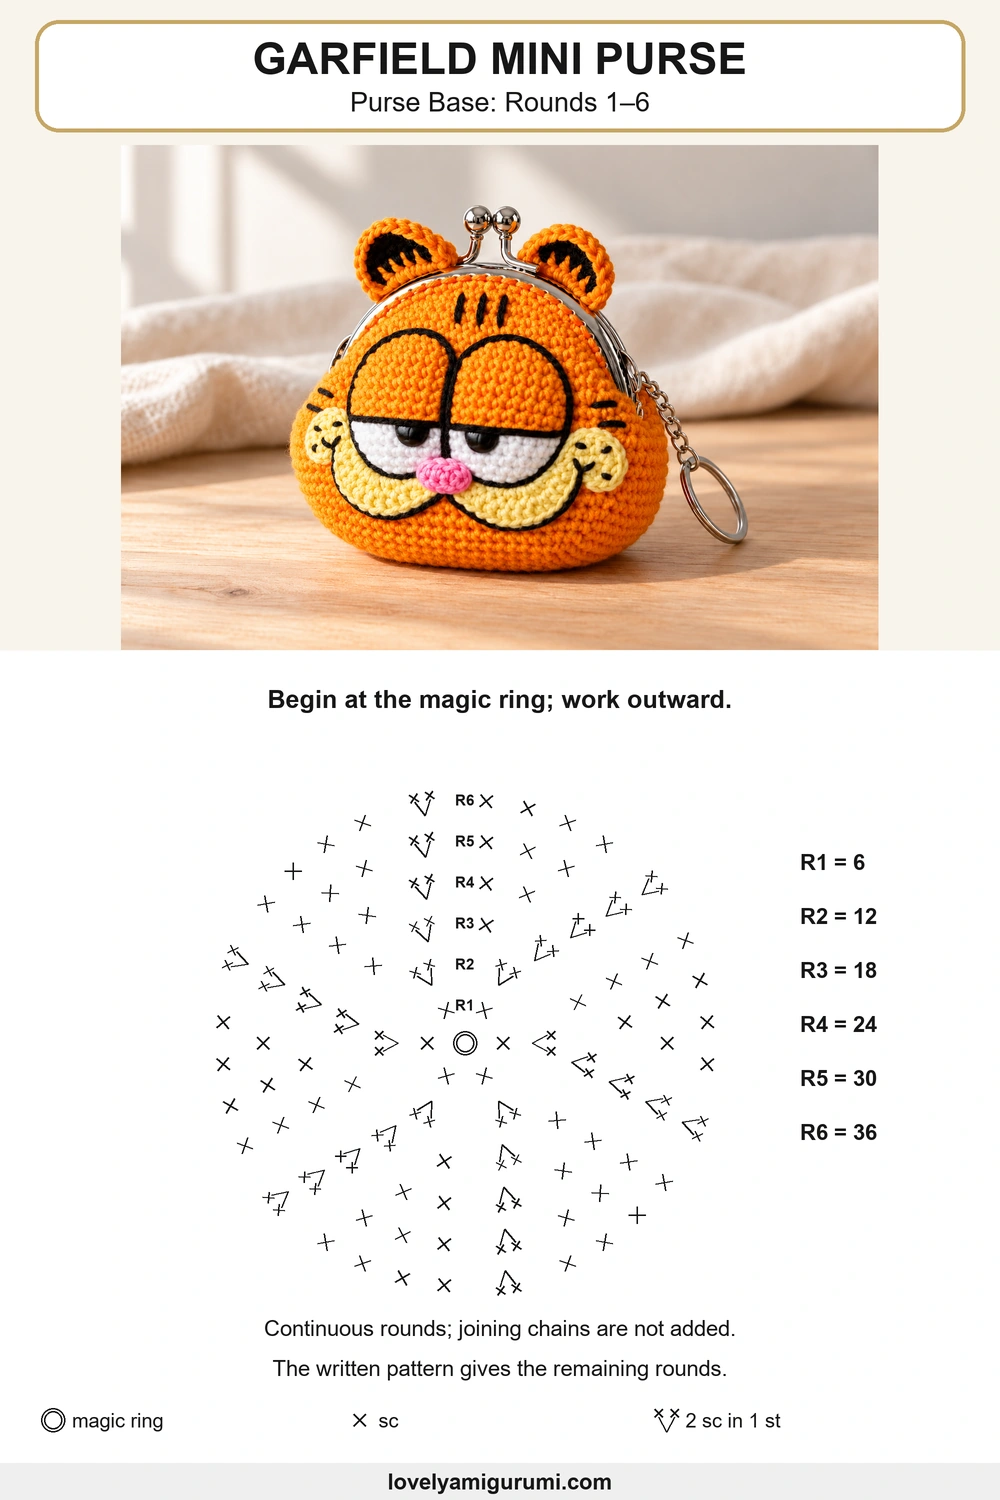
Use orange yarn. Start at the bottom and keep the final mouth opening unclosed.
R1: 6 sc in MR. (6)
R2: inc × 6. (12)
R3: [sc, inc] × 6. (18)
R4: [2 sc, inc] × 6. (24)
R5: [3 sc, inc] × 6. (30)
R6: [4 sc, inc] × 6. (36)
R7–18: 36 sc in each round. (36; 12 rounds)
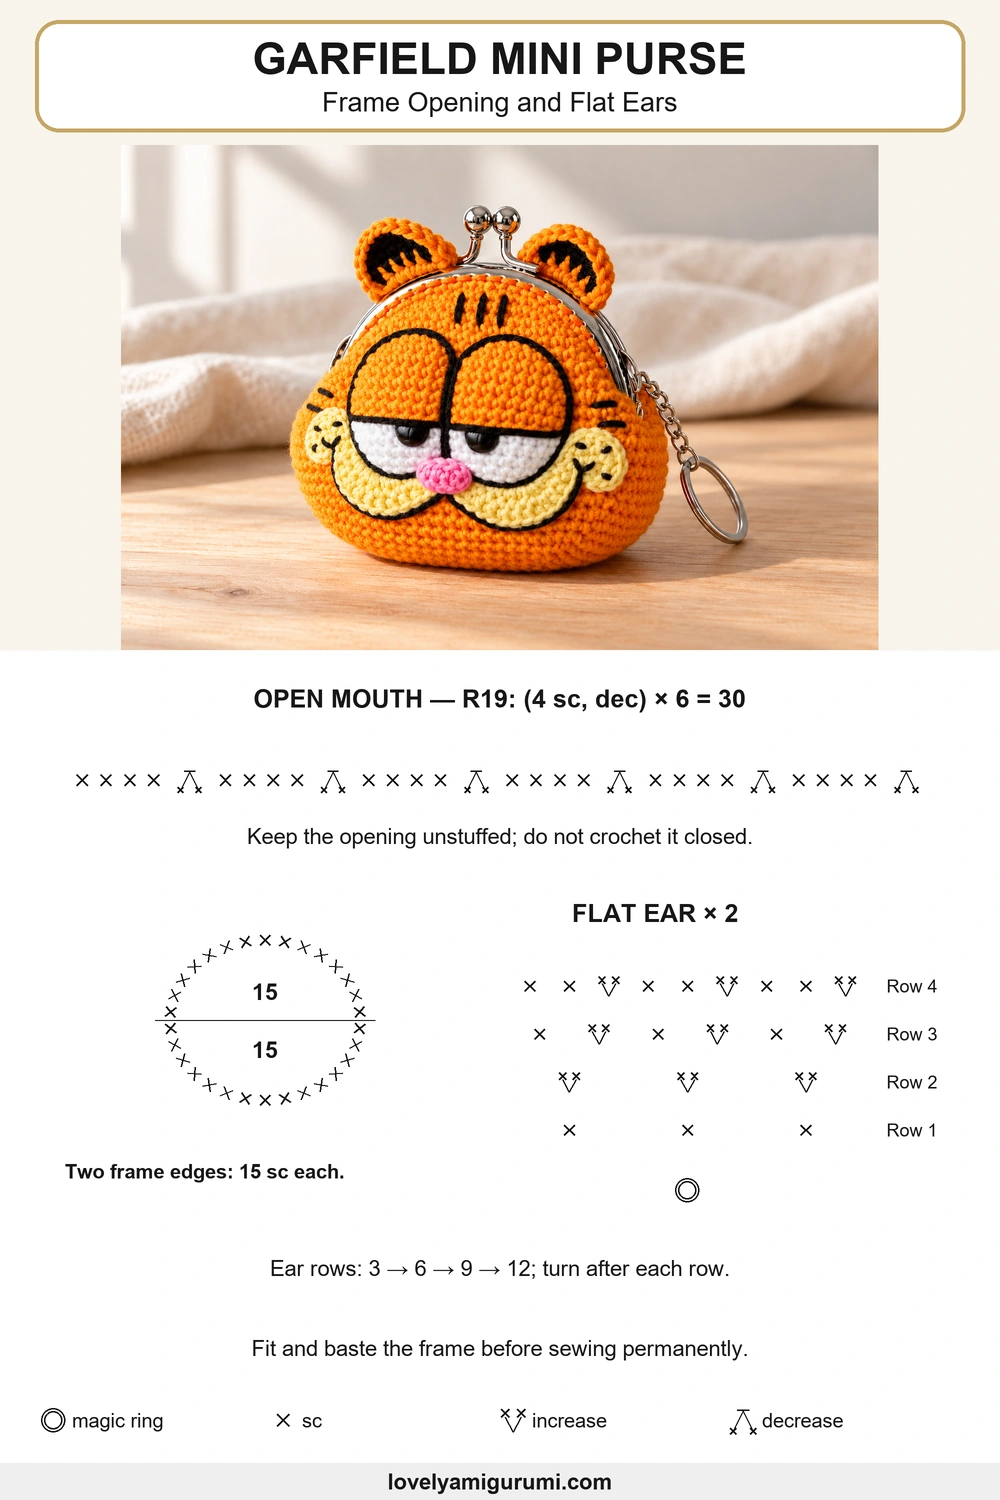
R19: [4 sc, dec] × 6. (30)
Fasten off with a long tail. Flatten the mouth into two sides of fifteen stitches and mark the midpoint of each side. Do not sew those two sides together. The rounded lower section is the purse base; its top edge goes into the frame channels.
Fit the kiss-lock frame
Open the clasp and place one half of the crochet mouth into each frame channel. Align the two side folds with the frame hinges and the marked midpoints with the centers of the two frame arches. Temporarily baste the crochet in place, then gently close and reopen the frame.
If the mouth pulls tight or bunches heavily, stop and use a better-fitting frame or adjust your yarn and hook before making a replacement pouch. A 5 cm frame is not a guaranteed fit for every tension. The metal hinges should not catch the crochet.
Once the fit is even, sew through the frame holes and the top crochet edge with strong matching thread. Spread the fifteen mouth stitches evenly along each half rather than assuming one stitch per hole. Work back through the holes for a secure seam, hide the knots inside and check the clasp again.
Flat cat ears: make 2
With orange yarn, make a magic ring and work 3 sc into it without joining. Pull the ring snug to form a small half-circle. Ch 1 and turn for each next row.
Row 1: 3 sc in MR. (3)
Row 2: inc × 3. (6)
Row 3: [sc, inc] × 3. (9)
Row 4: [2 sc, inc] × 3. (12)
Fasten off and leave a sewing tail. Embroider a small black inner-ear curve on each orange panel. Sew the straight lower edge beside the frame on each upper corner of the pouch, keeping all yarn clear of the clasp hinges.
White oval eyes: make 2
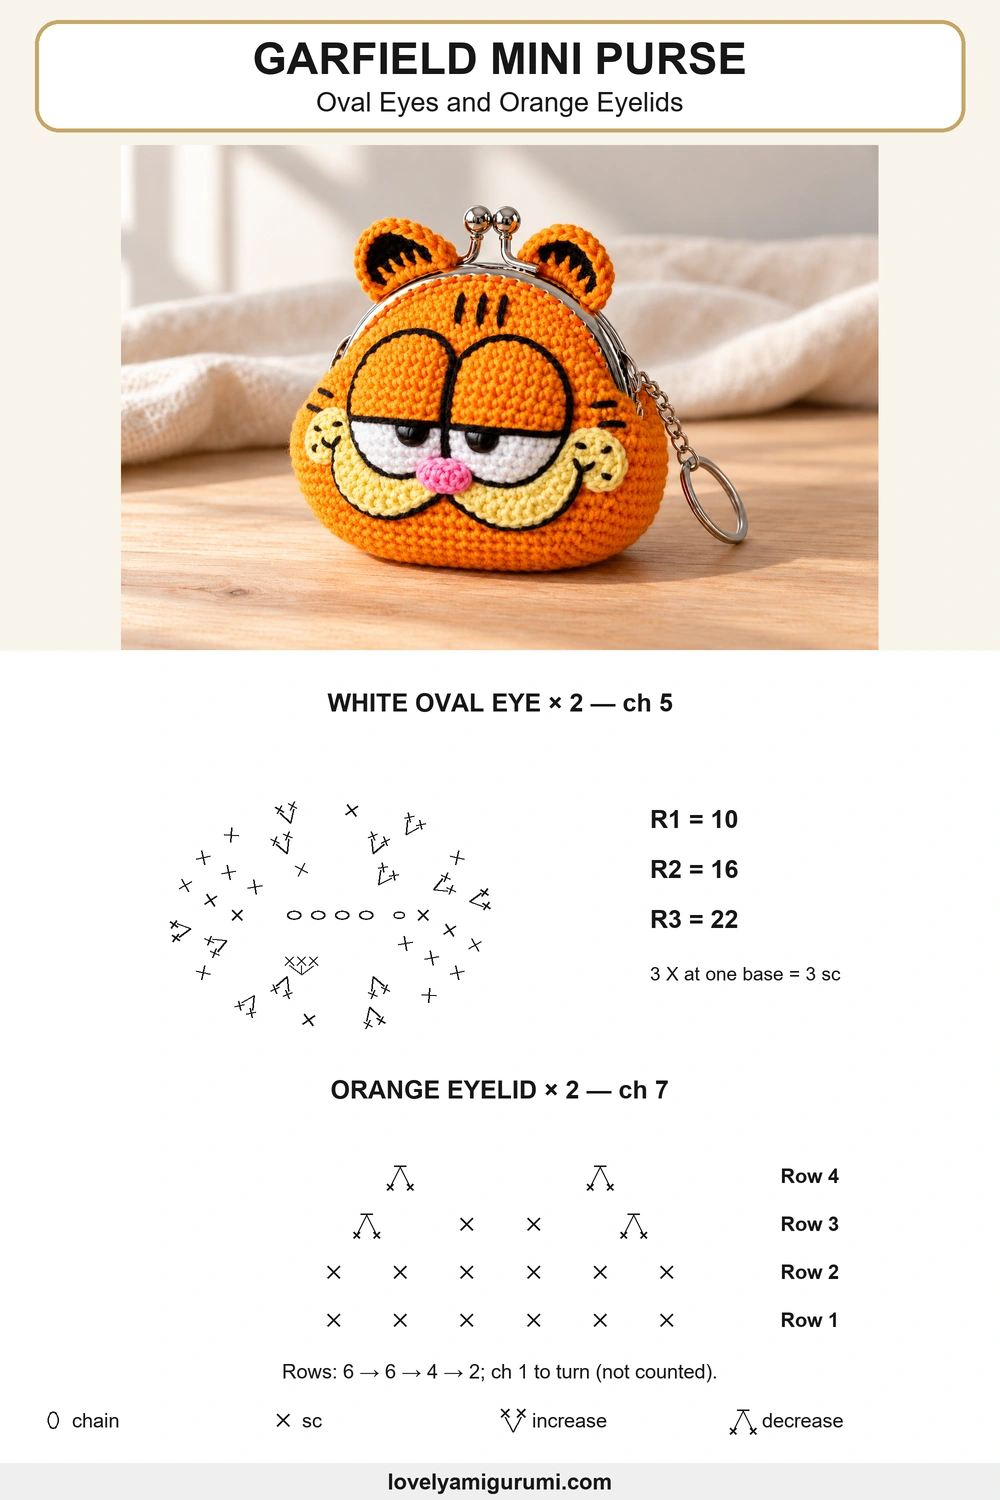
The eyes are flat appliques. Ch 5 in white and work around both sides of the four usable chains.
R1: 2 sc in the second chain from the hook, 2 sc, 3 sc in the last chain; rotate, 2 sc, then 1 sc in the first worked chain. (10)
R2: inc × 2, 2 sc, inc × 3, 2 sc, inc. (16)
R3: [sc, inc] × 2, 2 sc, [sc, inc] × 3, 2 sc, sc, inc. (22)
Join with a sl st and leave a tail. Position the oval with its chain axis upright so each eye is taller than it is wide. Pin both eyes just below the frame, close together at their inner edges.
Orange half-lids: make 2
Ch 7.
Row 1: sc in the second chain from the hook and in the next five chains. (6)
Row 2: ch 1, turn; 6 sc. (6)
Row 3: ch 1, turn; dec, 2 sc, dec. (4)
Row 4: ch 1, turn; dec × 2. (2)
Fasten off with a tail. Place the six-stitch straight edge across the middle of a white eye, with the tapered rows pointing upward. Sew the orange panel over the upper half, leaving the white lower half visible. Use black thread to outline the eye and lid edge and add a small black pupil directly beneath the lid.
Pale yellow muzzle curves: make 2
Row 1: 3 sc in MR, do not join. (3)
Row 2: ch 1, turn; inc × 3. (6)
Row 3: ch 1, turn; [sc, inc] × 3. (9)
Fasten off with a tail. Pin the two half-circles beneath the eyes, with their curved edges facing downward and their inner corners touching below the nose. Sew them flat with pale yellow yarn. A short black outline along the lower curves defines the smile without pulling the pouch fabric tight.
Side cheeks and pink nose
For each small yellow side cheek, work 6 sc in a magic ring, join with a sl st and leave a sewing tail. Make two. Sew one near each outer muzzle corner and embroider two or three tiny black whisker dots on it.
For the pink nose, work 5 sc in a magic ring and join with a sl st. Sew this small disk at the meeting point of the eyes and yellow muzzle. Add a short black vertical stitch below it if desired.
Stripes, whiskers and keychain
Embroider three short black stripes on each side of the orange pouch and two or three small stripes near the upper front, avoiding the frame seam. Add a few short whisker stitches beside the yellow cheek disks. Keep embroidery tails inside the pouch, where a lining can cover them.
For an optional lining, sew a small fabric pouch to the inside below the clasp seam so it does not interfere with the hinges. Leave the coin space empty. Attach the split ring to a metal loop on the frame; do not hang the purse by one crocheted ear or one face applique.
Final checks for your Garfield keychain crochet pattern
- Open and close the kiss lock several times after sewing, checking that yarn stays outside the hinge mechanism.
- The mouth remains two separate edges, each attached to one frame half.
- Both eyelids should meet the white eye panels at the same height.
- The yellow cheeks are flat decorations, not stuffing pockets.
- Hide the embroidery ends and check that the lining, if used, does not catch in the clasp.
Using the three Garfield charts
Chart 1 shows the pouch base R1–6. Chart 2 shows the final six decrease repeats and the two fifteen-stitch frame edges, plus the row-worked ear shape. Chart 3 shows the oval eye foundation and the orange lid rows. The written instructions describe the muzzle, embroidery and hardware fitting.
Can I make a stuffed head instead?
The instructions here are for an opening coin purse. Filling that compartment removes its storage function. For a decorative bag charm, you can omit the frame, but it needs a separate closure rather than the frame-fitting steps.
Will it fit a 5 cm frame?
It depends on the yarn and tension. Test the fit with temporary basting before attaching the face or finishing the frame seam. Choose a sew-on frame with holes and a channel suitable for your crochet fabric.
Is this an official character pattern?
This is a fan crochet project inspired by Garfield, not an official branded pattern. The name identifies the character design and does not imply affiliation or commercial permission.
More small crochet accessories
Try the mini crochet bag keychain or Hello Kitty keychain for another small accessory. The bunny amigurumi is a separate seated animal project.
Save this Garfield keychain crochet pattern and its charts to Pinterest. I recommend keeping a note of the yarn, hook and frame you choose so you can repeat the same fit later.