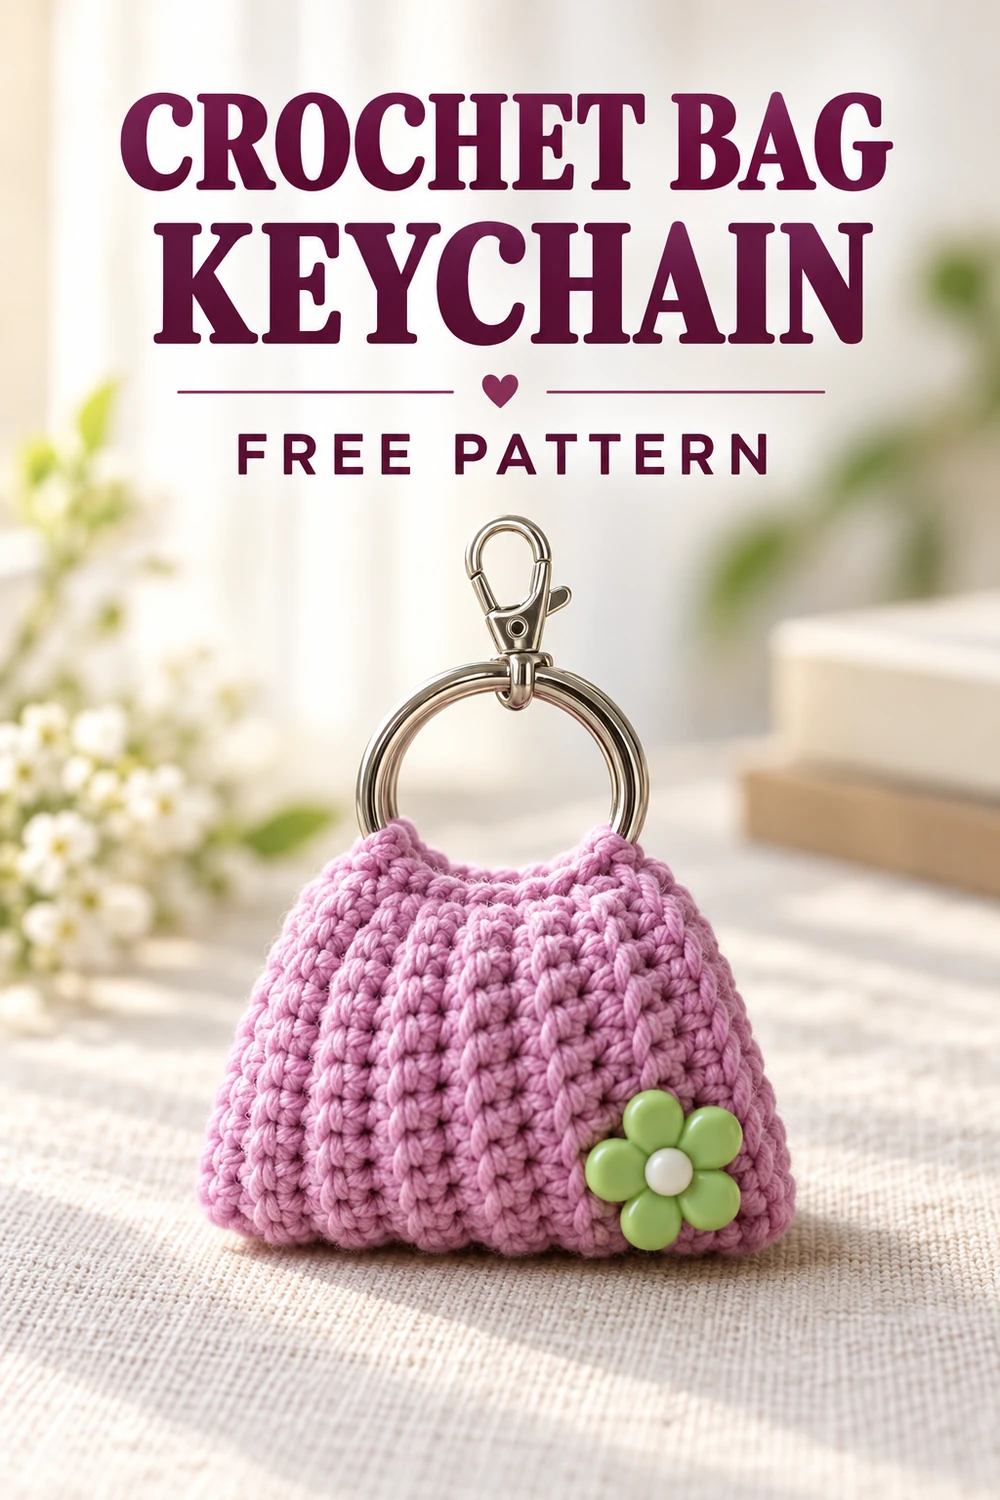
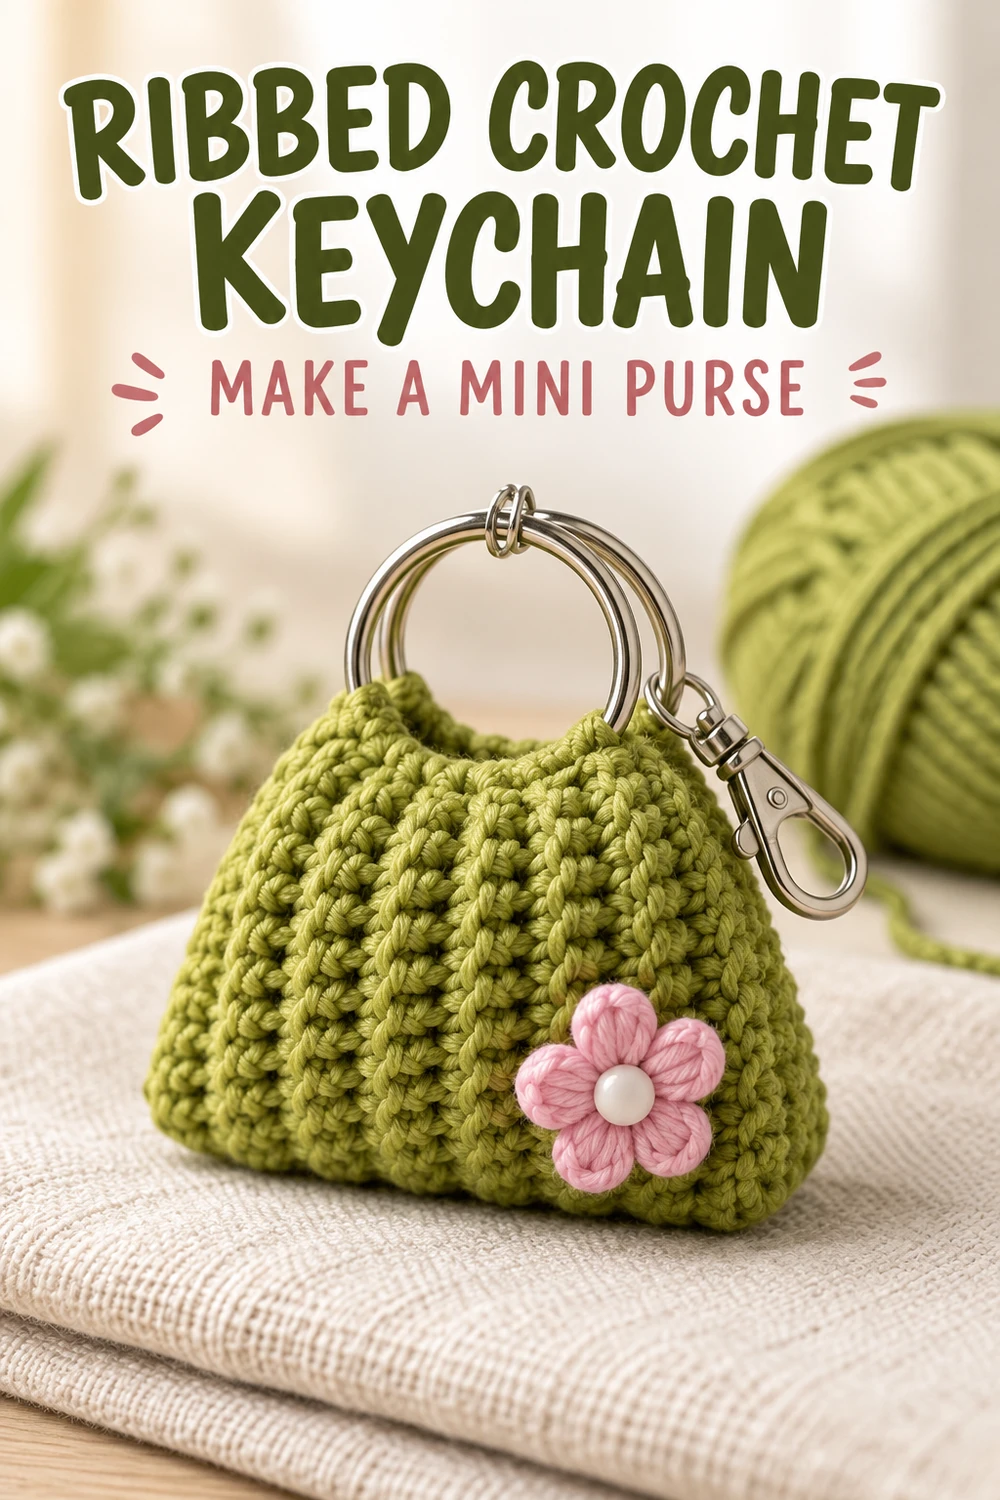
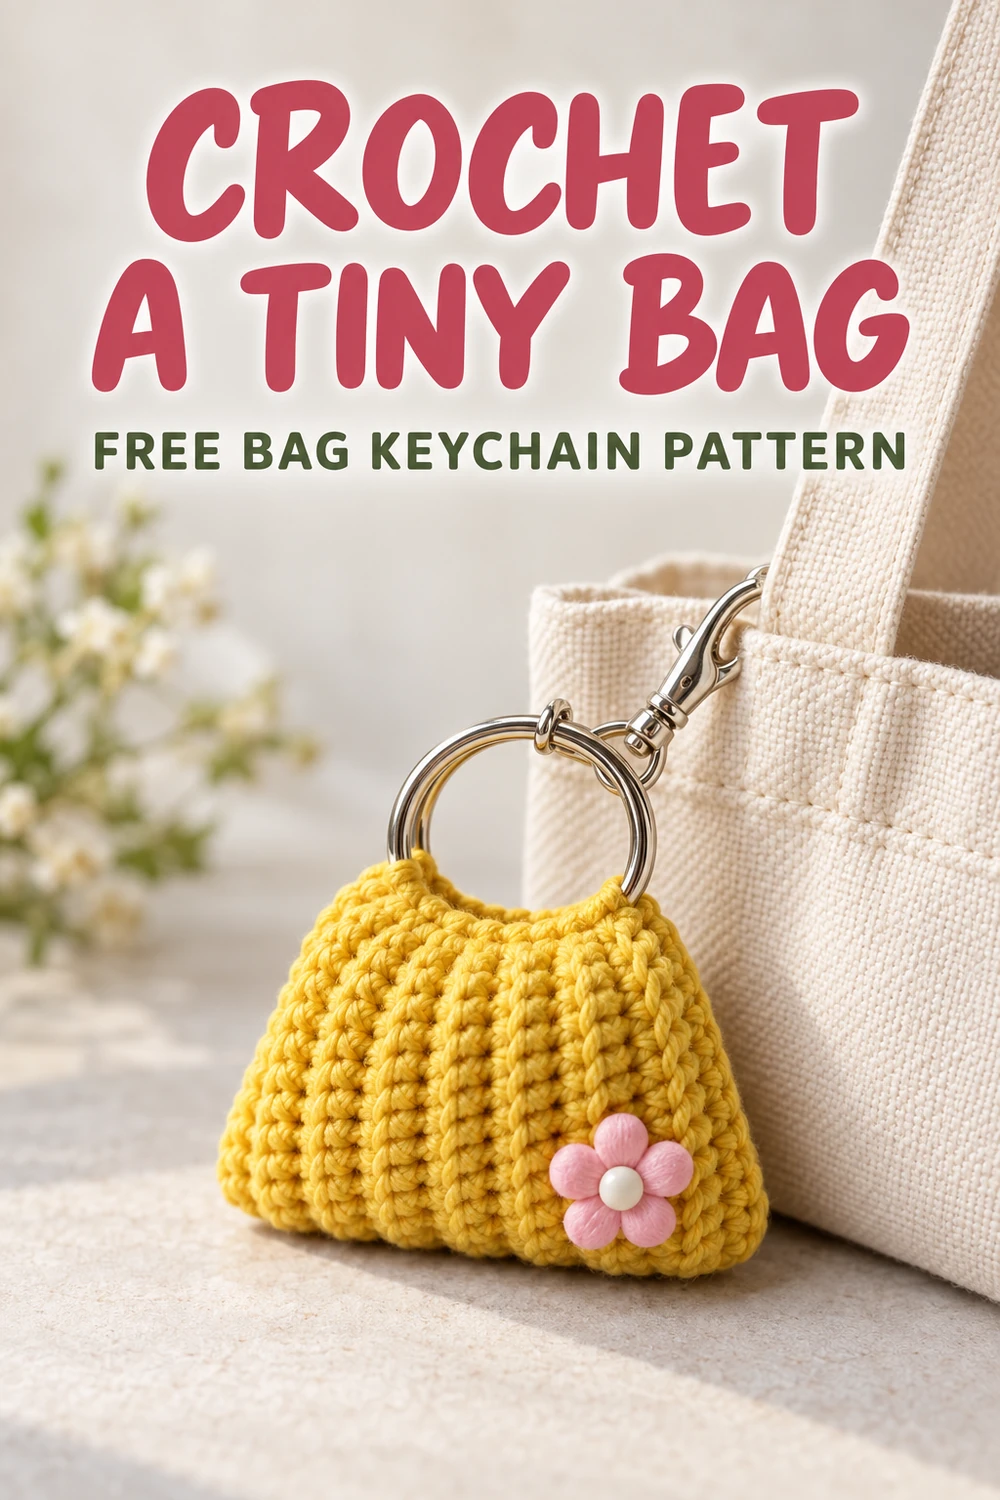
What I like about this crochet bag keychain pattern is how much character comes from a simple texture. The vertical ribs give the little purse its shape, while a flower decoration adds a small splash of contrasting color.
For a charm that travels on a bag or a set of keys, I pay close attention to the finishing: secure seams, neatly woven ends, and hardware that closes properly. Those details matter just as much as the crochet stitches.
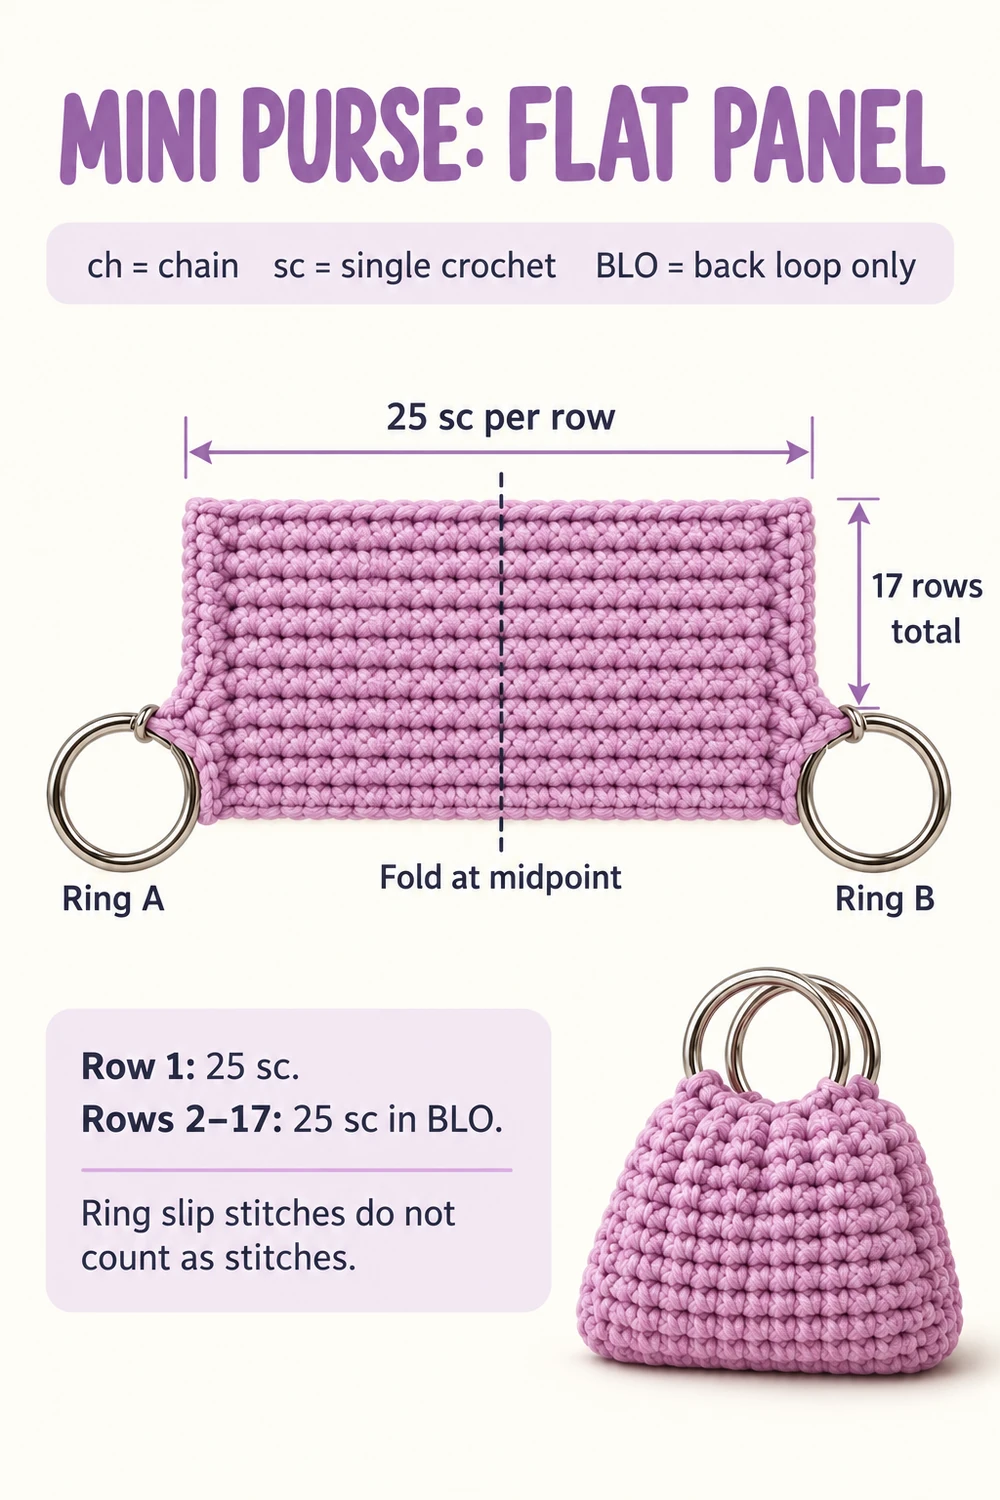
This miniature purse starts as one rectangular panel. Back-loop single crochet creates the ribbing, two metal rings form the handles, and a separate clasp connects the finished charm to your bag.

Pattern Information
- Skill level: Confident beginner
- Terminology: US crochet terminology
- Construction: A ribbed panel folded and sewn into a miniature purse
- Stitch count: 25 single crochets per row
- Panel length: 17 rows
- Finished size: Depends on yarn, tension, and handle size
- Use: Decorative keychain or bag charm
Pattern status: The written instructions have been reviewed for construction and stitch-count clarity. The revised version has not been sample-tested, so finished measurements and an exact match to the reference image remain unverified.
Materials for the Crochet Bag Keychain Pattern
- Fine cotton yarn in your chosen color
- 2.2 mm crochet hook, or a hook suitable for your yarn
- Two matching circular metal rings for the purse handles
- One lobster clasp with a connector that can hold both handle rings
- A small amount of polyester fiberfill, optional
- A sew-on flower button or other small decoration
- Yarn needle
- Scissors
- Two stitch markers
- Measuring tape
Check that both handle rings fit through the clasp connector before crocheting. “4-ply” can describe different yarns in different countries. Choose a fine cotton that produces a compact, flexible fabric with your hook rather than relying on the ply description alone.
Abbreviations
- ch: Chain
- sc: Single crochet
- sl st: Slip stitch
- BLO: Back loop only
- st / sts: Stitch / stitches
What Does BLO Mean?
Look at the two loops forming the top of a stitch. The back loop is the loop farther away from you as you work. Insert the hook through that loop only, then complete the single crochet normally.
Before You Begin
In this crochet bag keychain pattern, the rows travel from one handle ring to the other. The panel is folded halfway along that distance, bringing the rings together at the top.
- The foundation length spans the front, folded bottom, and back.
- Each side of the finished purse is approximately half that length.
- The number of rows controls the width of the purse.
The slip stitches worked around the metal rings are attachments. They do not count toward the 25 single crochets.
No turning chain is used between the ring-attached rows in this version. After attaching to a ring, turn and work into the last single crochet of the previous row. Mark the first and last single crochet to make the row boundaries easier to recognize.
Crochet Bag Keychain Pattern Instructions
1. Prepare the Handle Rings
Use smooth rings without sharp edges. If you use split rings, keep the yarn away from the overlapping opening while crocheting. Lay the rings apart on your work surface. Call them Ring A and Ring B.
2. Make the Foundation
Attach the yarn to Ring A with a slip stitch around the metal. Ch 25.
Without twisting the chain, work a slip stitch around Ring B. Insert your hook through the ring, catch the working yarn, and pull it through the loop on your hook. Turn the work. The chain now connects the two rings.
3. Work Row 1
Starting with the chain closest to Ring B, work 1 sc into each of the 25 foundation chains, moving toward Ring A. (25 sc)
Work a slip stitch around Ring A. Turn.
The ring attachment provides the transition at the row end, so do not skip a foundation chain as you would when working into an ordinary starting chain.
4. Work Row 2
Work 1 sc in BLO of each of the 25 single crochets, moving toward Ring B. (25 sc)
Do not work into the slip stitch attached to the ring. Work a slip stitch around Ring B. Turn.
5. Work Rows 3–17
Repeat Row 2, alternating between the rings. Every row contains 25 sc worked in BLO.
After completing Row 17, attach to the ring at that end with one slip stitch. Fasten off, leaving a long sewing tail. Do not add a second ring attachment after the final row.
Check Your Panel
- You have 17 rows.
- Each row contains 25 single crochets.
- Both ends are attached to their respective rings.
- The panel has no accidental twist.
- The ribbing runs along the foundation-chain direction.
Crochet Bag Keychain Pattern Assembly
Fold the Panel
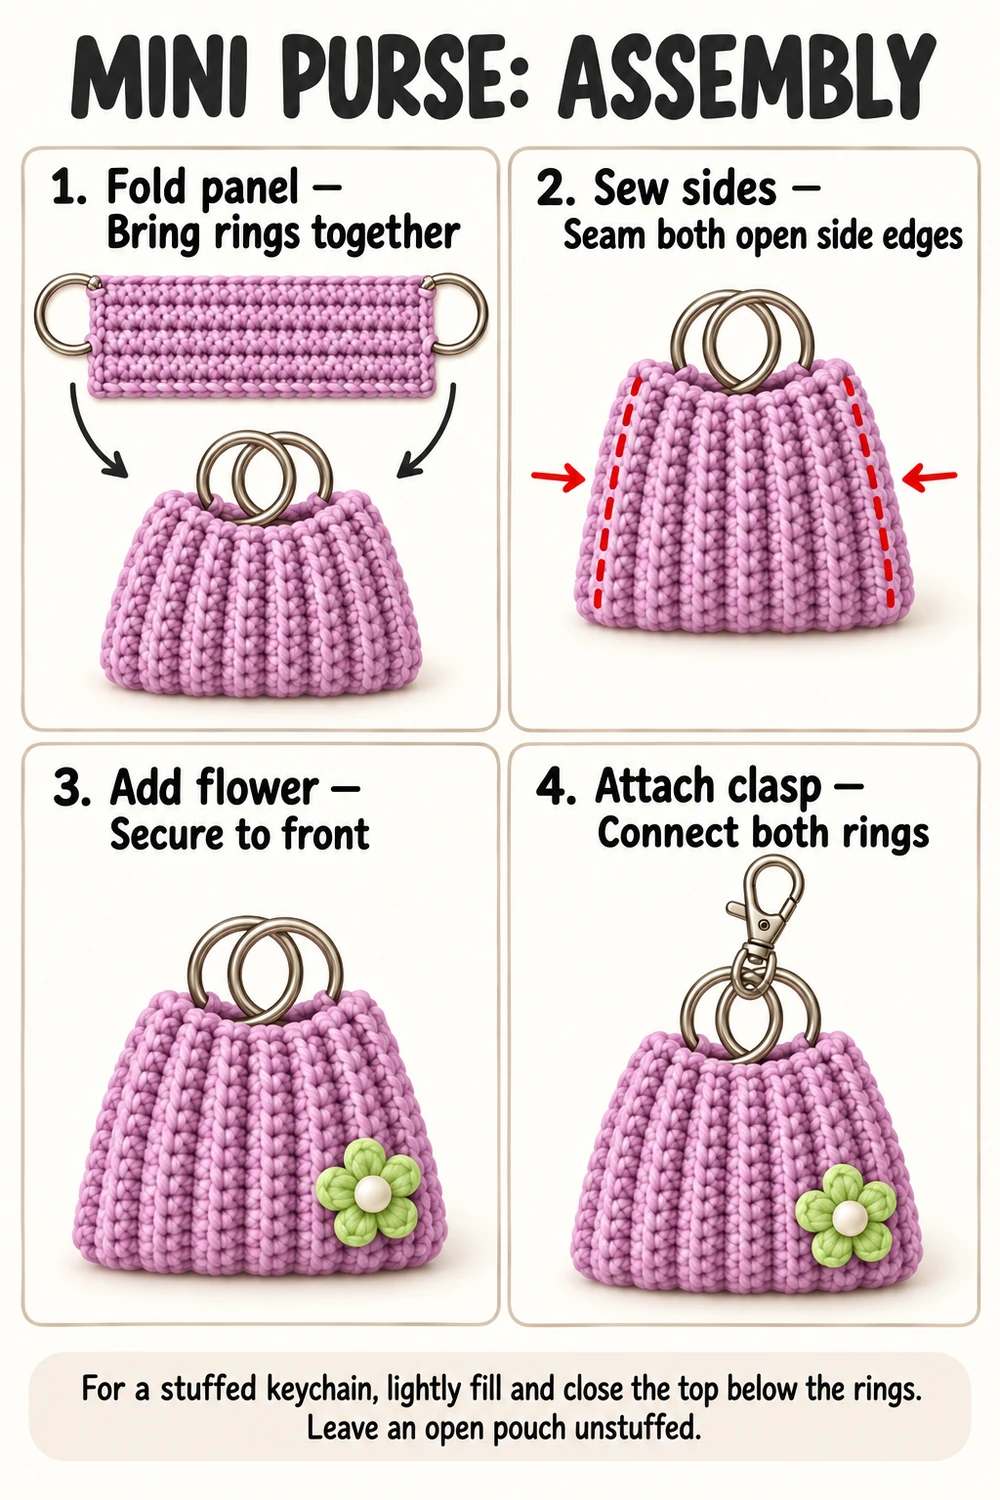
Bring Ring A and Ring B together. Fold the panel halfway along the 25-stitch direction. The fold becomes the bottom of the purse, and the rings become the front and back handles.
With an odd stitch count, the central stitch sits around the bottom fold. Align the two halves without forcing a sharp crease. Choose which face you want on the outside, then fold with that face inward for sewing.
Sew the Side Seams
The two exposed side edges correspond to the first and last rows of the panel. Starting beneath the handles, sew the matching front and back edges together down to the bottom fold. Use small whipstitches or a mattress stitch.
Repeat on the other side. Keep the seam tension even. Overly tight sewing can make the purse twist or narrow unevenly. Turn the purse right side out.
Add the Flower
Position the flower near a lower corner on the front. Sew it securely through the front layer only. Attaching it before stuffing makes it easier to reach the inside. If you prefer, replace the button with a small embroidered flower.
Add Optional Padding
For a softly padded charm, insert a small amount of fiberfill through the top opening. Spread it evenly. Stop before the purse becomes round or the ribs stretch apart.
Close the Top
For the stuffed version, sew the front and back fabric edges together across the opening immediately below the handles. Keep both metal rings exposed and free to move.
Do not leave loose stuffing inside an open purse. If you want an open miniature pouch, omit the fiberfill and leave the top unsewn.
Attach the Keychain Clasp
Pass the clasp connector through both handle rings. Close the connector fully and check that neither ring can slip out. Open and close the clasp, then gently tug the assembled charm to check the seams and hardware.
Finishing Tips for a Crochet Bag Keychain
Keep the Ribs Visible
Use consistent BLO stitches from Row 2 onward. Switching between both loops and BLO changes the surface texture.
Check the Last Stitch
It is easy to mistake the ring attachment for the final stitch. Count the 25 single crochets before attaching to each ring.
Match the Yarn to the Hardware
If the crocheted ends crowd the rings excessively, use larger rings or finer yarn. Hardware size affects the gathered shape at the top.
Keep the Sewing Neat
Weave yarn tails through several stitches inside the purse. Avoid bulky knots along the side seams.
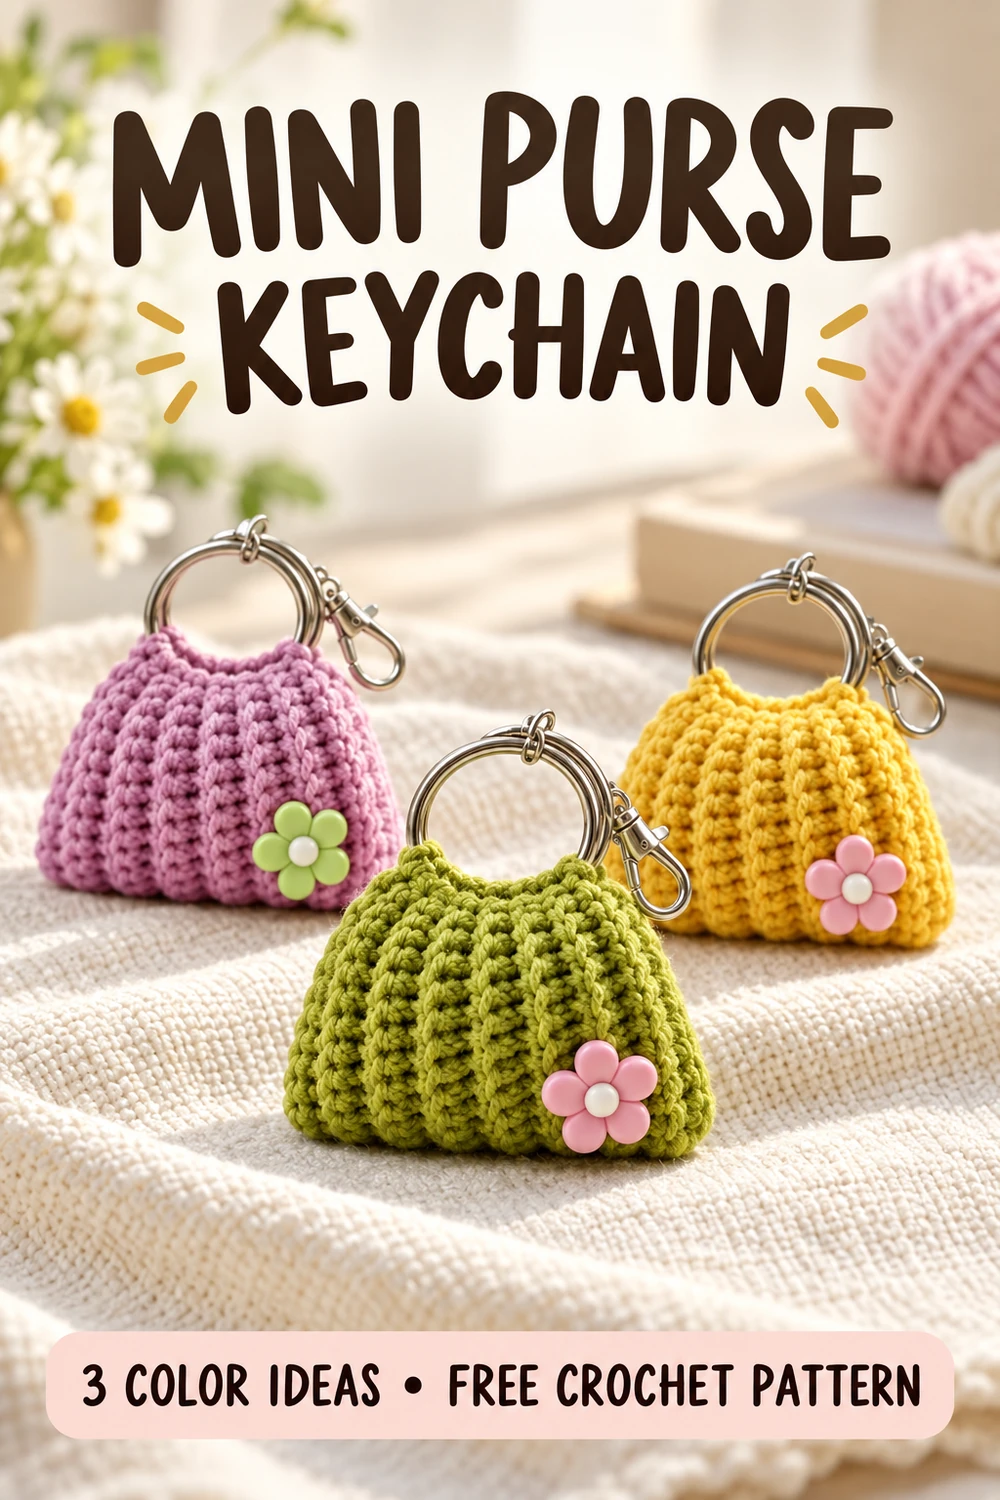
Color Ideas
- Lilac with a green flower
- Olive green with a pink flower
- Yellow with a pink flower
You can also try cream with a blue flower or dusty rose with cream embroidery. For a set, use matching yarn weights and hardware sizes so the purses have similar proportions.
Adjusting the Crochet Bag Keychain Pattern Size
To modify this crochet bag keychain pattern:
- Change the foundation length to adjust the front-to-back panel length and approximate finished height.
- Change the number of rows to adjust the width.
- Change the yarn and hook together to scale the entire fabric.
When changing the foundation, keep the same stitch count in every row. For example, a 29-chain foundation requires 29 single crochets per row using this ring-to-ring construction. Check the panel against the handles before sewing. A wider panel may need larger rings.
FAQ – Crochet Bag Keychain Pattern
Is This Crochet Bag Keychain Pattern Suitable for Beginners?
It is suitable for confident beginners who can work chains, single crochet, and slip stitches. Working around hardware and sewing the panel require some care.
Why Are There Two Handle Rings?
One ring supports the front top edge, and the other supports the back. They overlap when viewed from the front, so a photograph may make them appear to be a single handle.
Is Stuffing Required?
No. Leave the purse unstuffed for an open miniature pouch. For a padded charm, add a little fiberfill and sew the opening closed.
Why Does My Purse Look Too Round?
Too much filling can push the sides outward. Remove some fiberfill before closing the top and reshape the purse gently.
Can I Use Acrylic Yarn?
Yes, provided the yarn works with your hook and hardware. Texture, flexibility, and finished dimensions may differ from cotton.
How Long Does It Take?
The time depends on your crochet speed, familiarity with ring attachments, and finishing choices. There is no verified completion time for the revised instructions.
Can I Wash the Finished Keychain?
Follow the yarn’s care instructions and consider the hardware and decoration. Spot cleaning may be more practical than soaking metal parts.
More Small Crochet Projects
For a flat decoration, try the Cute Flat Bee Appliqué Crochet Pattern.
For another small project with a playful shape, explore the Crochet Pig Coaster Pattern.
Save This Crochet Bag Keychain Pattern
Save this crochet bag keychain pattern to Pinterest for your next small crochet project. If you share your finished purse, include the yarn, hook, ring diameter, and final measurements. Those details help other crocheters compare materials and proportions.
Crochet Bag Keychain Reference Gallery