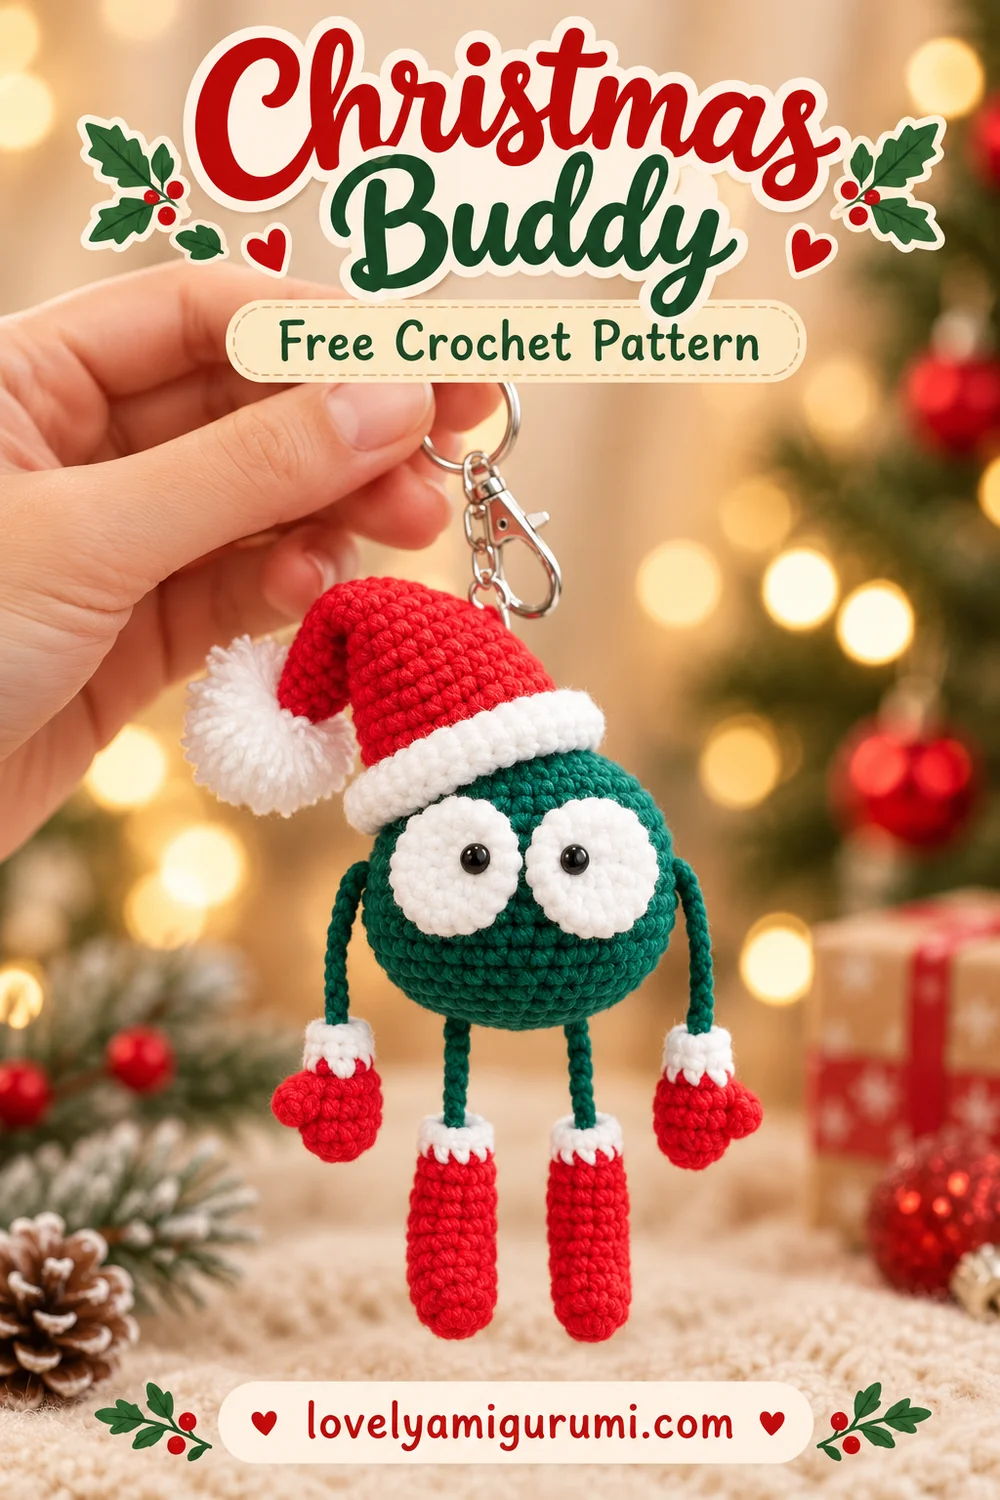
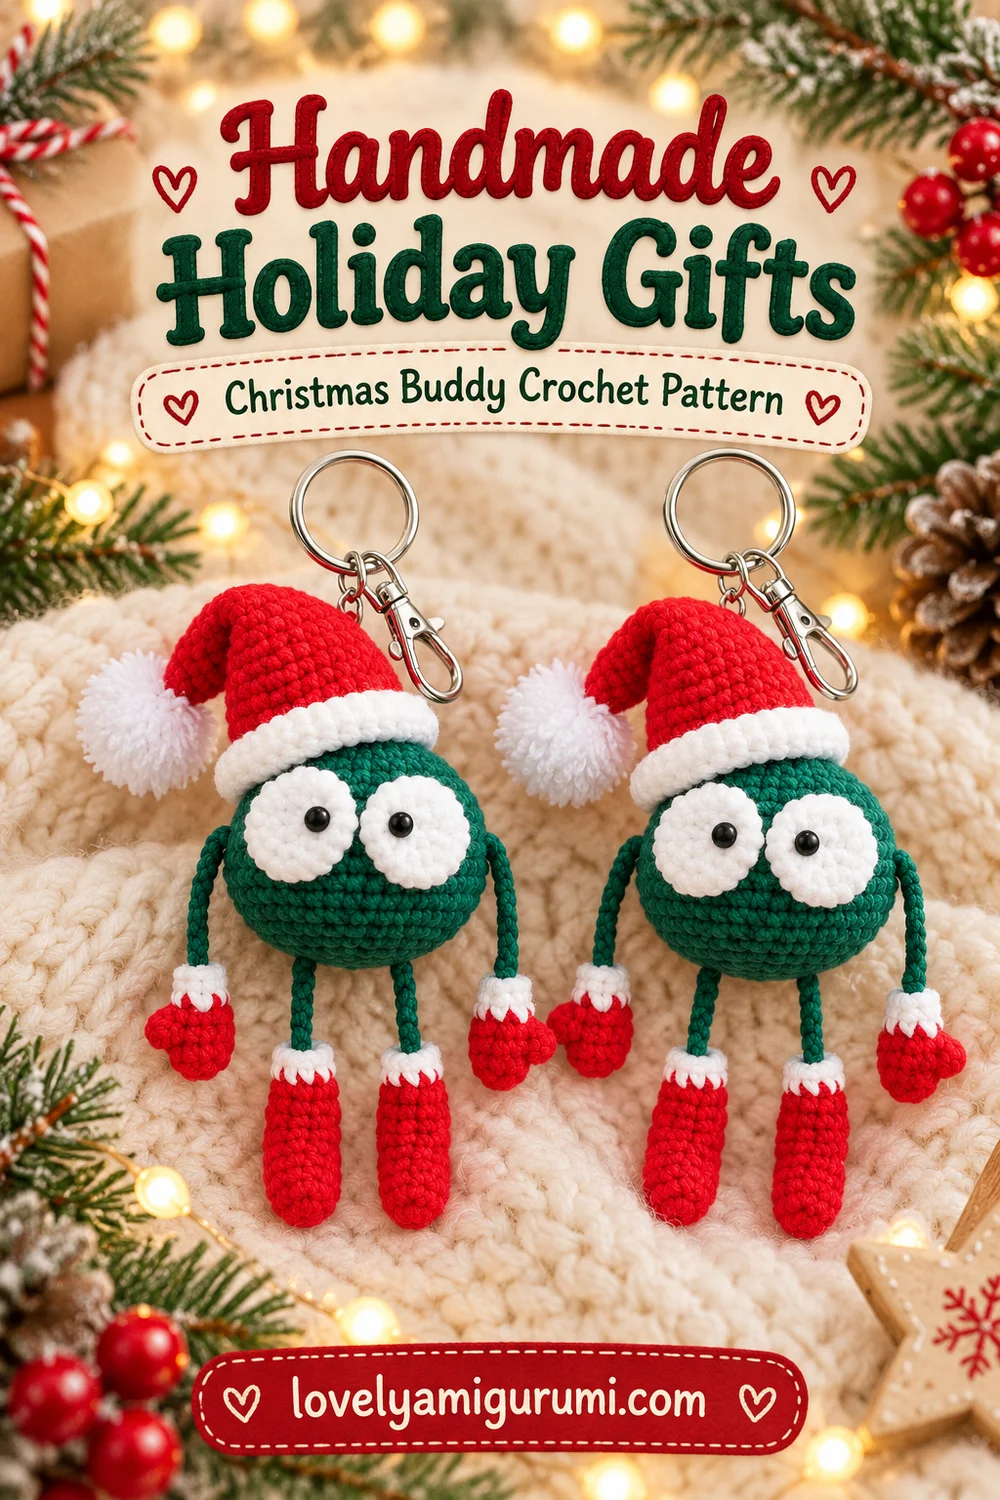
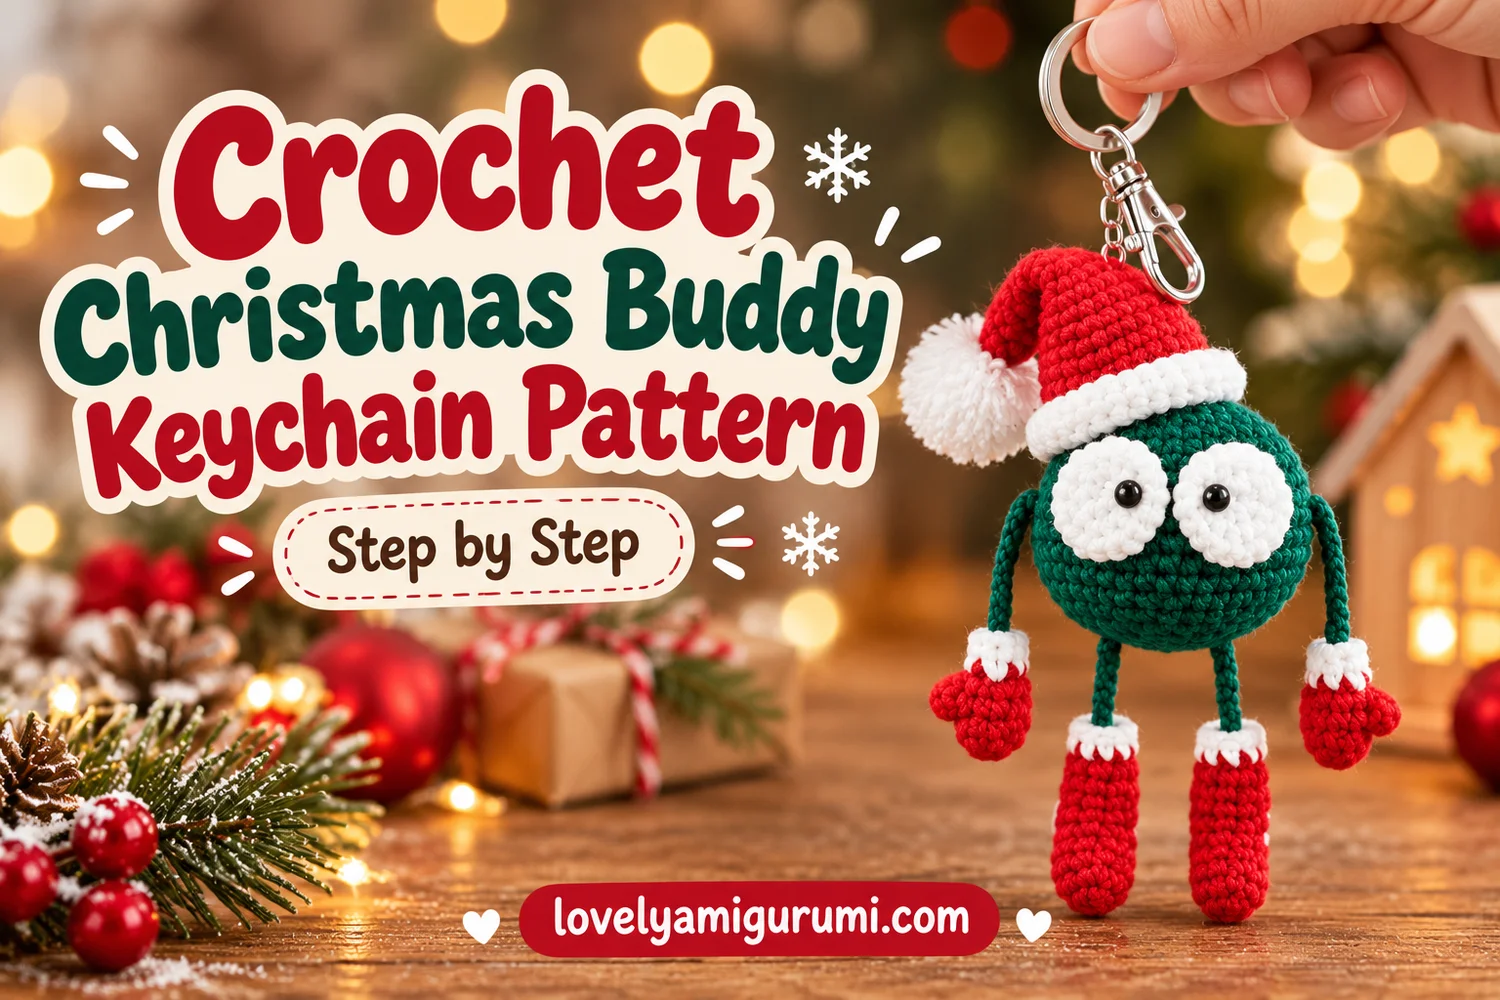
This Christmas Buddy Keychain Crochet Pattern turns a green ball into a cheerful little holiday companion. Two oversized white eyes, a floppy Santa hat, and four dangling green limbs give it the playful proportions of the reference photo.
The red mittens and long red boots have small white cuffs to match the hat brim. Make the pieces separately, then sew them together and add a silver keyring for a festive bag charm or handmade gift.
Pattern Information
- Skill level: Confident beginner to intermediate, with small-piece sewing.
- Terms: US crochet terminology.
- Construction: Stuffed round body, two flat eye patches, four cord limbs, separate mittens, boots, and Santa hat.
- Estimated size: About 11–14 cm from hat to boot, excluding hardware, with fine cotton yarn. The body is approximately 4.5–5.5 cm wide. Yarn, hook, and tension change the size.
- Reference details: Emerald green body, large white eyes with black pupils, no mouth, red hat and accessories, white trim, and silver hardware.
This is an image-inspired pattern adaptation. Stitch counts have been checked, but the pattern has not been physically crocheted or independently tested. Use the written directions for the exact counts; the visual tutorials illustrate the main construction steps.
Materials for the Christmas Buddy Keychain Crochet Pattern
- Fine cotton yarn in emerald green, red, and white; roughly 10 g green, 8 g red, and 5 g white as a starting allowance.
- Black embroidery yarn for the pupils.
- A 2–2.5 mm crochet hook, or a size that creates firm stitches without gaps.
- Polyester toy stuffing.
- Silver split keyring and small clasp or connector.
- Tapestry needle, scissors, stitch marker, and pins for assembly.
- Optional two 6 mm safety eyes instead of embroidered pupils.
Embroidered pupils are the default in these instructions. If using safety eyes, install them through both the white patches and green body before stuffing and closing the body. This is a decorative accessory with small parts; keep it away from babies and young children.
Stitches and Abbreviations
| Abbreviation | Meaning |
|---|---|
| MR | magic ring |
| ch | chain |
| sc | single crochet |
| sl st | slip stitch |
| inc | 2 sc in the same stitch |
| dec | single crochet decrease over 2 stitches |
| BLO | back loop only |
| st(s) | stitch(es) |
Work in continuous spiral rounds unless told to join. Mark the first stitch of each round. Numbers in square brackets are the total stitch count. An instruction followed by × 6 means repeat it six times. Use invisible decreases on stuffed pieces where practical.
Before You Begin
Start the body at the top of the head and close it underneath. Keep the round marker toward the back. The eyes sit on the upper front, the arms leave the sides, and the legs leave the underside. The hat covers the starting rounds.
Use the same yarn weight for the body, eyes, and hat. Keep the cords narrow and flexible: the reference has thin dangling limbs rather than stuffed arms and legs. Leave long sewing tails on every small piece.
Christmas Buddy Keychain Crochet Pattern
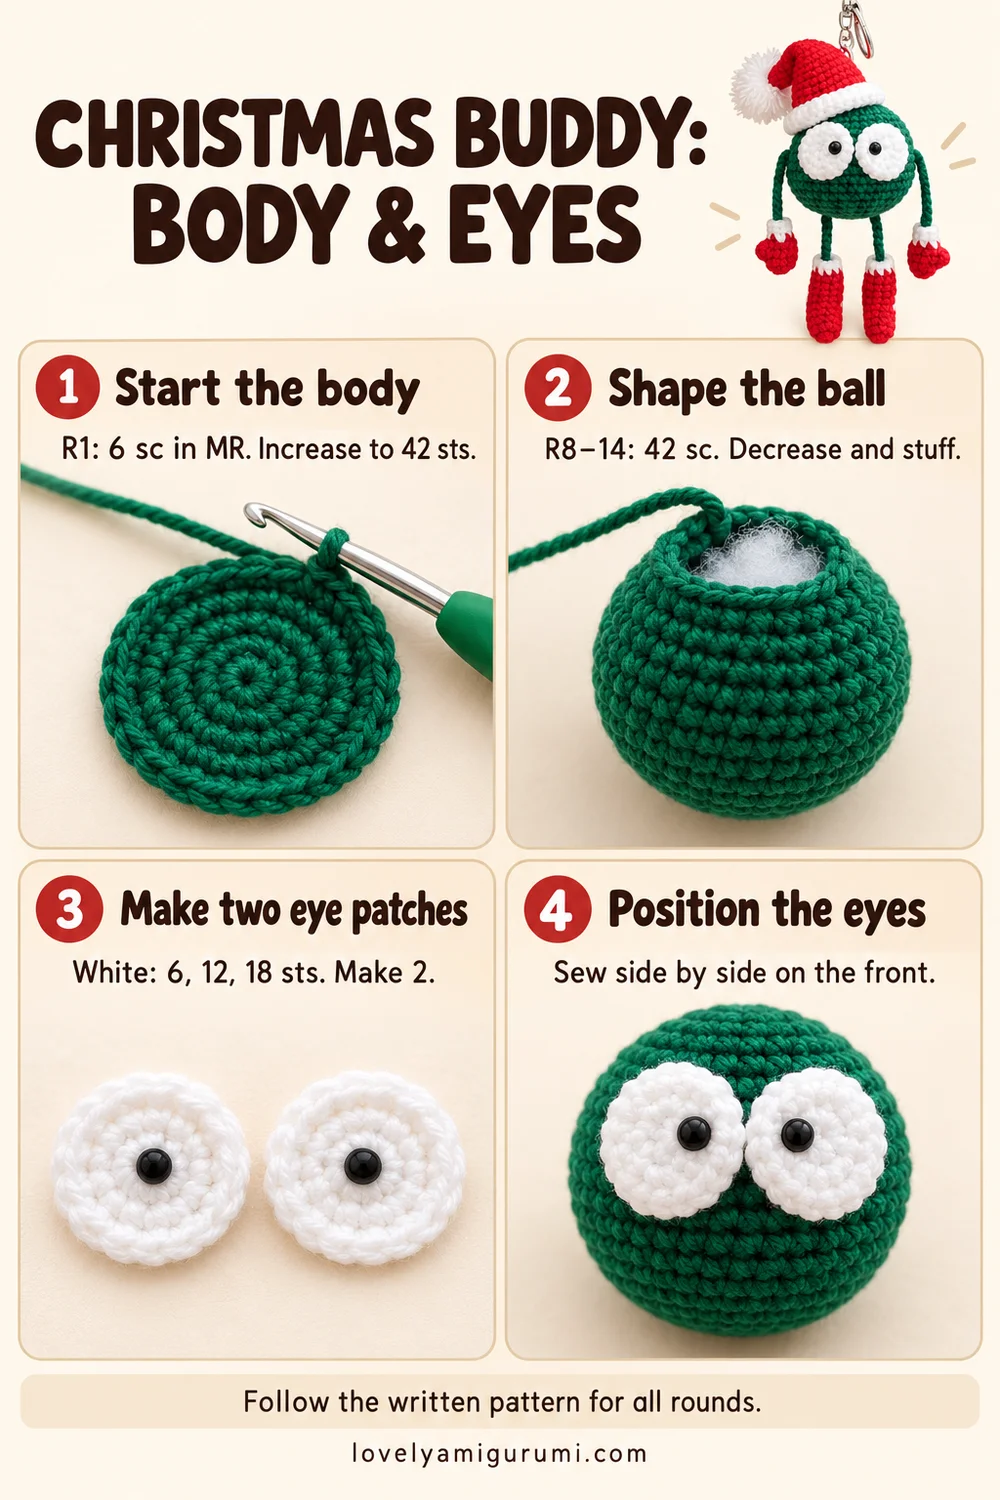
1. Green Round Body
With emerald green:
- R1: 6 sc in MR. [6]
- R2: Inc × 6. [12]
- R3: (1 sc, inc) × 6. [18]
- R4: (2 sc, inc) × 6. [24]
- R5: (3 sc, inc) × 6. [30]
- R6: (4 sc, inc) × 6. [36]
- R7: (5 sc, inc) × 6. [42]
- R8–14: 42 sc each round. [42]
- R15: (5 sc, dec) × 6. [36]
- R16: (4 sc, dec) × 6. [30]
Pause here if you plan to use safety eyes. Make the white patches below, position them on the front, and install the eyes through both layers while the opening is still large enough. If embroidering pupils, finish the body first.
- R17: (3 sc, dec) × 6. [24]
- R18: (2 sc, dec) × 6. [18]
Stuff evenly to make a round ball. Fill the sides without stretching the stitches.
- R19: (1 sc, dec) × 6. [12]
- R20: Dec × 6. [6]
Fasten off. Thread the tail through the front loops of the final six stitches, draw closed, and hide the end inside the body.
2. Large White Eye Patches — Make 2
With white:
- R1: 6 sc in MR. [6]
- R2: Inc × 6. [12]
- R3: (1 sc, inc) × 6. [18]
Sl st in the next stitch and fasten off, leaving a sewing tail. Pull the center closed and flatten the patch; do not stuff it.
For embroidered pupils, use black yarn to make a small filled circle near the center of each patch. Keep both pupils the same size. Hide and secure the black ends on the back of the patch before sewing it to the body.
Pin the patches side by side across the front, approximately over body R8–13, with their inner edges nearly touching. Adjust them together until the expression matches the photo. Sew around each outer edge using small white stitches. Keep the body round while sewing.
3. Green Arm Cords — Make 2
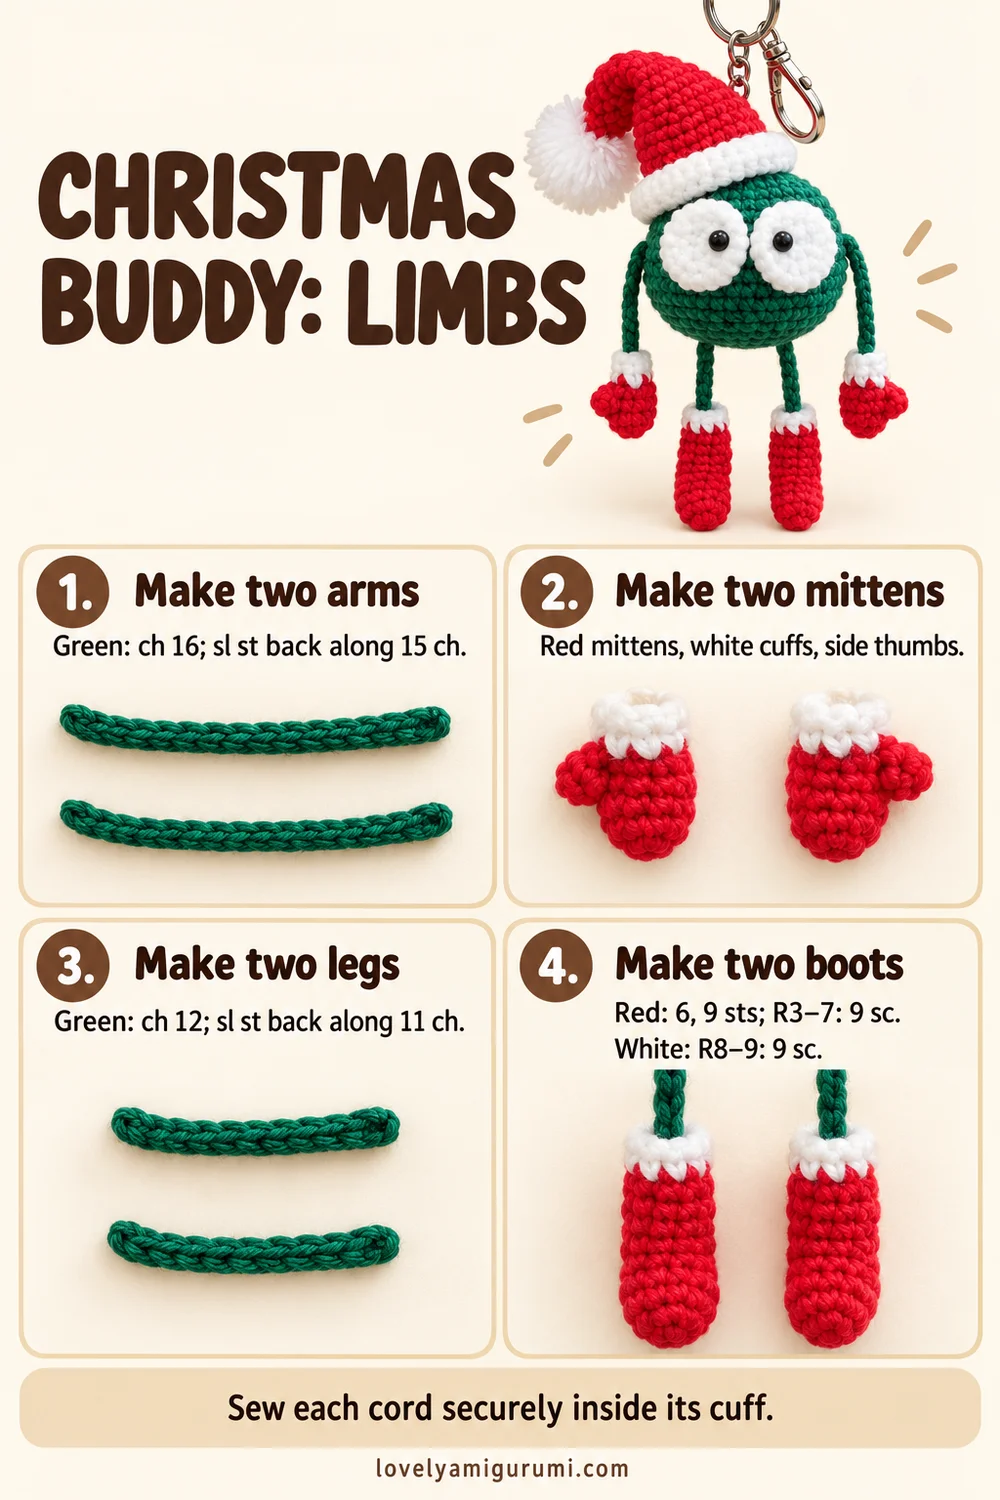
Leave a 15 cm starting tail. Ch 16. Starting in the second chain from the hook, sl st in each remaining chain. [15 sl st]
Fasten off with a 15 cm tail. Do not stuff. Make both arms the same length, approximately 3–4 cm before the mittens. If your chain gauge differs, adjust the starting chain equally on both arms.
4. Red Mittens — Make 2
Begin at the rounded fingertips with red:
- R1: 6 sc in MR. [6]
- R2: (1 sc, inc) × 3. [9]
- R3–4: 9 sc each round. [9]
- R5: (1 sc, dec) × 3. [6]
Add only a tiny amount of stuffing to round the mitten. Change to white on the last pull-through of R5.
- R6–7: 6 sc each round. [6]
Sl st and fasten off with a sewing tail. Leave the cuff opening for the arm cord.
Small Thumb — Make 2
With red, make 4 sc in MR. [4] Work one more round of 4 sc. Fasten off with a tail. Leave unstuffed, flatten the open end, and sew it to the side of a mitten just below the white cuff. Mirror the thumb placement on the second mitten.
Insert one arm cord end into each mitten cuff. Sew the cord to several red stitches inside the mitten, then gather the white cuff gently around it. Secure the tail without pulling the cuff inside out.
5. Green Leg Cords — Make 2
Leave a 15 cm starting tail. Ch 12. Starting in the second chain from the hook, sl st in each remaining chain. [11 sl st]
Fasten off with a long tail. Keep these cords shorter than the arms, approximately 2–3 cm before the boots. The red boots supply most of the lower-leg length in the reference.
6. Long Red Boots — Make 2
Begin at the rounded toe with red:
- R1: 6 sc in MR. [6]
- R2: (1 sc, inc) × 3. [9]
- R3–7: 9 sc each round. [9]
Stuff lightly, keeping an elongated shape. Change to white on the final pull-through of R7.
- R8–9: 9 sc each round. [9]
Sl st and fasten off with a sewing tail. Insert one leg cord end into the top of each boot. Anchor it to several red stitches inside, then gather the white cuff around the cord. Keep the two boots equal in length.
7. Floppy Red Santa Hat
Work from the pointed tip toward the brim with red:
- R1: 6 sc in MR. [6]
- R2: 6 sc. [6]
- R3: (1 sc, inc) × 3. [9]
- R4: 9 sc. [9]
- R5: (2 sc, inc) × 3. [12]
- R6: 12 sc. [12]
- R7: (3 sc, inc) × 3. [15]
- R8: 15 sc. [15]
- R9: (4 sc, inc) × 3. [18]
- R10: (2 sc, inc) × 6. [24]
- R11: (3 sc, inc) × 6. [30]
- R12: (4 sc, inc) × 6. [36]
- R13: (5 sc, inc) × 6. [42]
- R14–15: 42 sc each round. [42]
Try the hat over the body’s crown before adding the brim. It should sit above the white eye patches with the open edge following the green body’s upper curve. Keep the cone unstuffed so the tip can flop to the side.
Change to white on the final pull-through of R15:
- R16: 42 sc in BLO. [42]
- R17–18: 42 sc each round. [42]
Sl st and fasten off, leaving a long sewing tail. Fold or roll the white section upward along the back-loop ridge to form the soft brim. Tack the fold discreetly at several points.
White Pom-Pom
Wind white yarn around two fingers until you have a small, full bundle. Slide it off, tie the middle very tightly with a separate strand, cut the loops, and trim into an approximately 1.5–2 cm ball. Leave the tying strands long and use them to sew the pom-pom securely to the hat tip.
Bend the tip toward the viewer’s left, as in the reference, and add a small hidden red stitch to hold the fold. Let the white pom-pom hang beside the brim.
Assembly and Placement
- Check the face: Keep the two white patches side by side and the black pupils small. Leave the green area below them plain, without a mouth or nose.
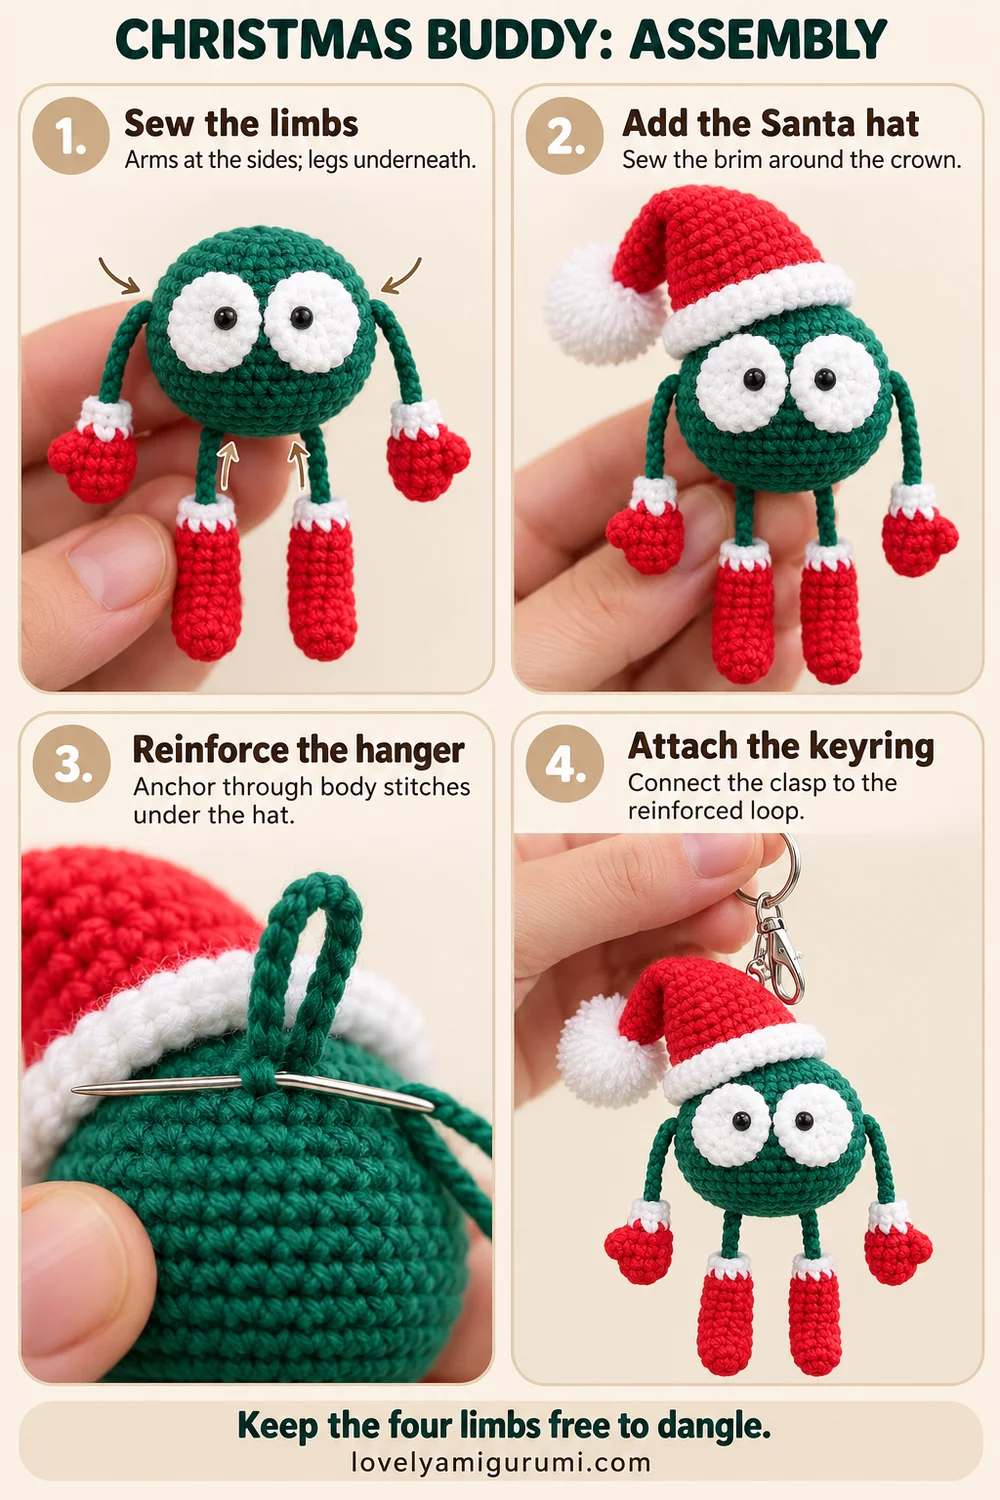
- Sew the arms: Attach one cord to each side of the body near R10–12, just behind the outer edge of the eye area. Pass each tail through several green body stitches, change direction, and secure it. Let the mittens hang beside the ball.
- Sew the legs: Attach the two leg cords to the underside near R17–19, on opposite sides of the closing point. Leave a small gap between them. Keep the boots at the same height.
- Position the hat: Place the brim above the eyes and tilt the red tip to one side. Sew the lower white brim to several body stitches around the crown, keeping stitches small and even.
Pin every piece before sewing. Hold the character upright and check the four hanging limbs from the front. Avoid pulling the attachment tails so tightly that they flatten the body or shorten one limb.
Reinforce and Attach the Keyring
Before the last part of the brim is sewn down, use doubled green yarn to make a short reinforced hanging loop at the top-back of the body. Anchor it through several body stitches under the hat, passing through the same area at least three times.
Bring the loop out behind the hat, keep it just large enough for the clasp, and hide the ends securely inside the body. Finish sewing the brim without trapping the loop. Attach the silver clasp and split ring, then check that the connector is fully closed.
The body should carry the weight of the keyring. Do not hang the whole character from the pom-pom or an unsupported stitch in the hat tip. Give the connection a gentle pull and check each mitten and boot attachment.
Visual Tutorial Guides
The three photo guides at the end of this post show the body and eyes, the four limbs and their accessories, and the final assembly. Read the written rounds alongside the images for the full hat and shaping instructions.
Tips and Troubleshooting
The eyes look too far apart
Move the white patches inward so their inner edges nearly meet. Position both patches together before sewing either one permanently.
The body looks tall instead of round
Check that R8–14 contains seven rounds of 42 stitches. Spread stuffing into the sides rather than packing it only from top to bottom.
The limbs are too thick
Use the narrow chain-and-slip-stitch cords described here. Keep them unstuffed and use matching fine green yarn.
The hat will not flop
Leave it unstuffed. Fold the narrow section gently and tack it in place with one hidden red stitch before attaching the pom-pom.
FAQ
Can I use safety eyes?
Yes. Position them through the white patches and the green body before closing the body, then attach the washers inside. Do not try to fit washers after the ball is closed.
Can I make it larger?
Use thicker yarn and a matching hook for all pieces. The keychain will be larger and heavier, so check the strength of the hanging loop and hardware.
Can I make it an ornament?
Replace the silver ring and clasp with a hanging cord attached to the same reinforced body loop.
More Free Christmas Crochet Patterns
- Snowflake Keychain Crochet Pattern
- Christmas Star Keychain Crochet Pattern
- Christmas Penguin Keychain Crochet Pattern
Save This Pattern
Save this Christmas Buddy Keychain Crochet Pattern for your next holiday crafting session. Happy crocheting from Lovely Amigurumi!
Christmas Buddy Visual Tutorials and Pinterest Gallery
These three visual tutorial guides and three Pinterest images are grouped here for easy reference.