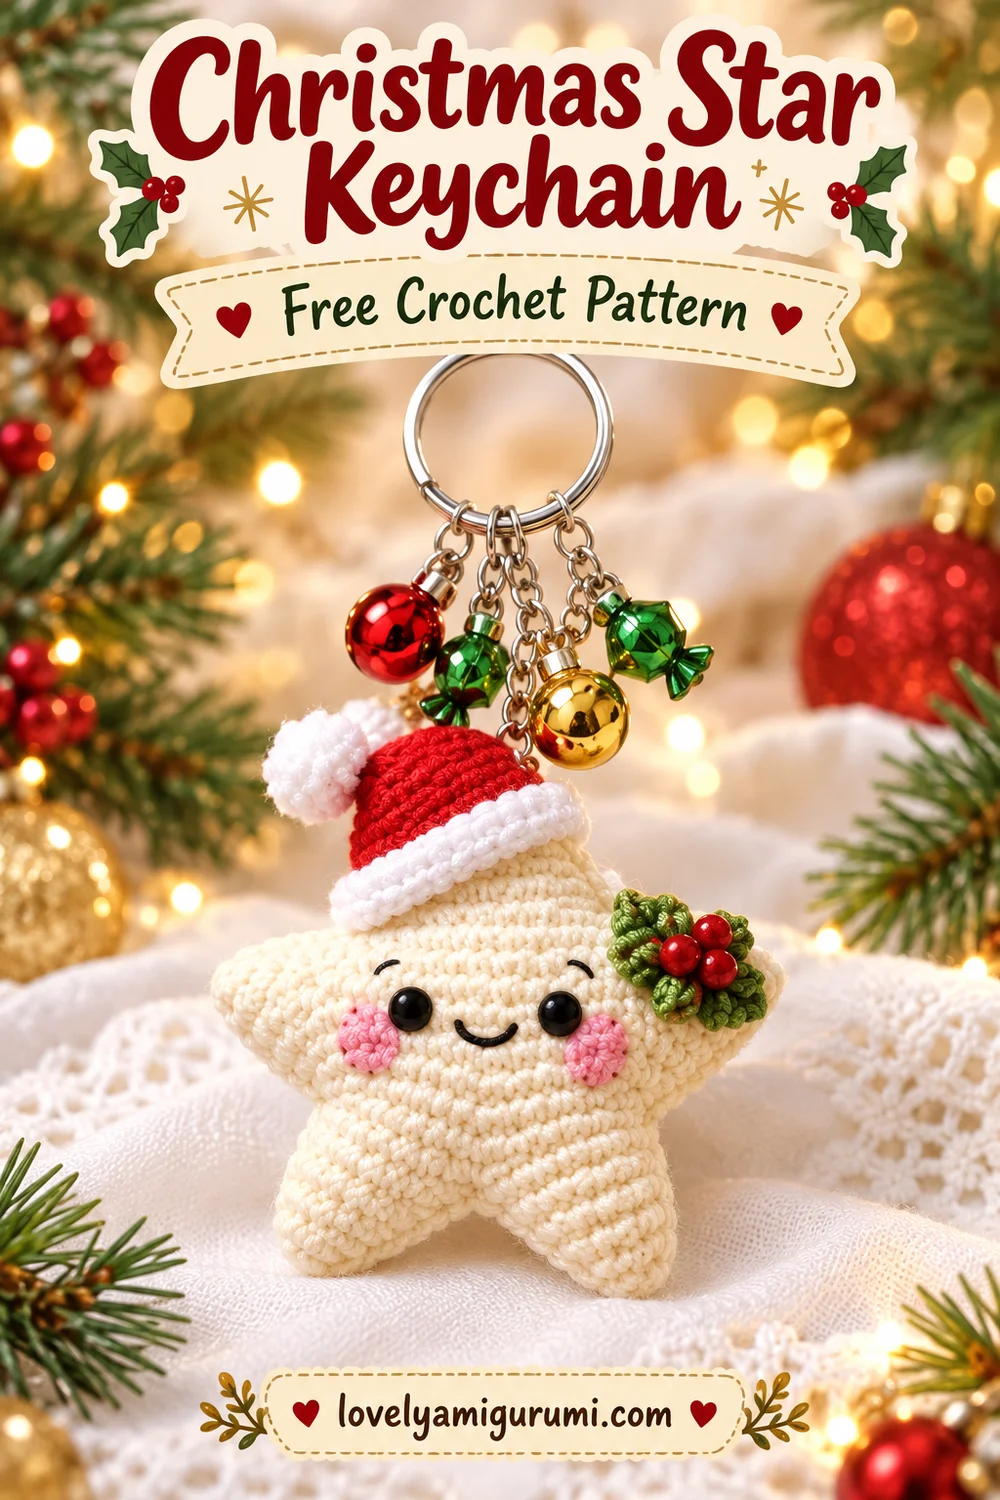
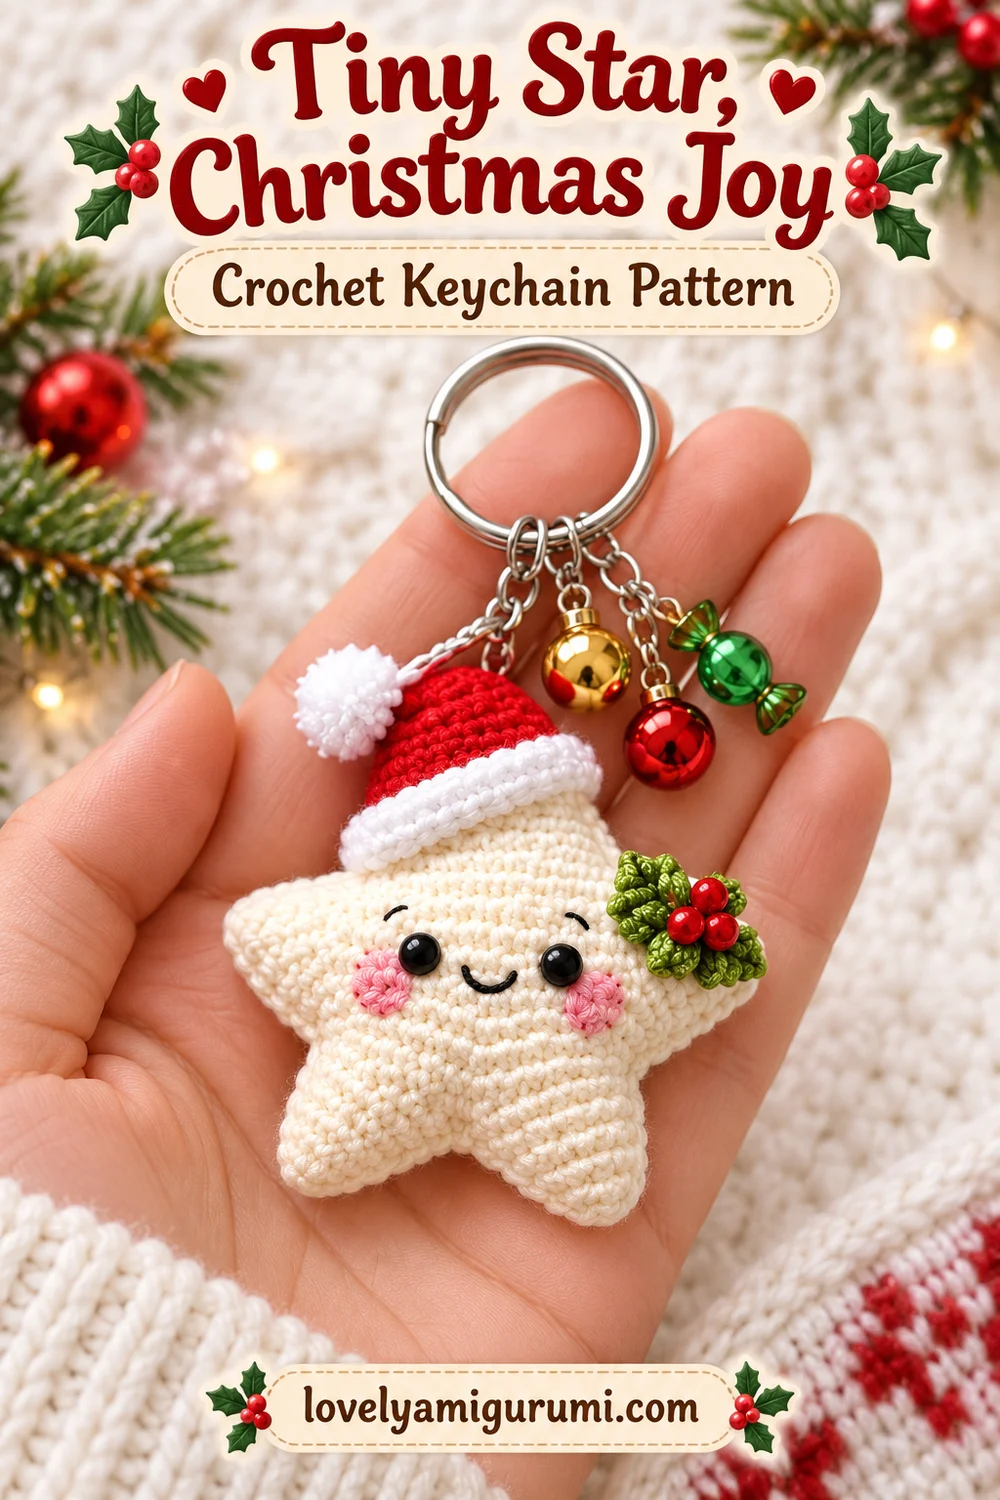
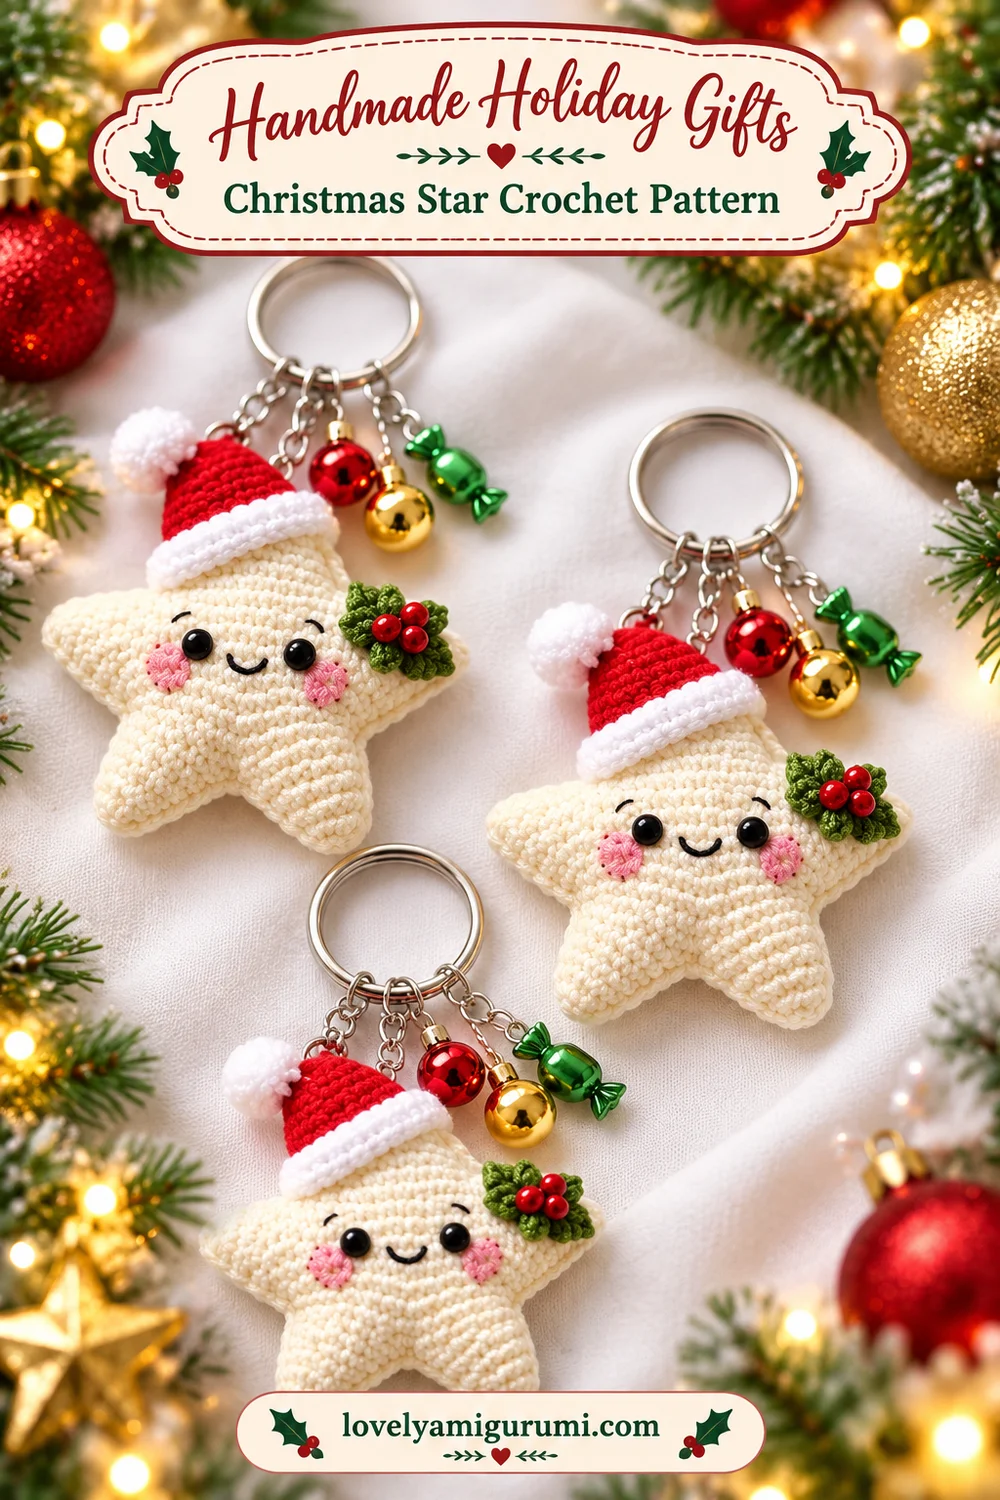
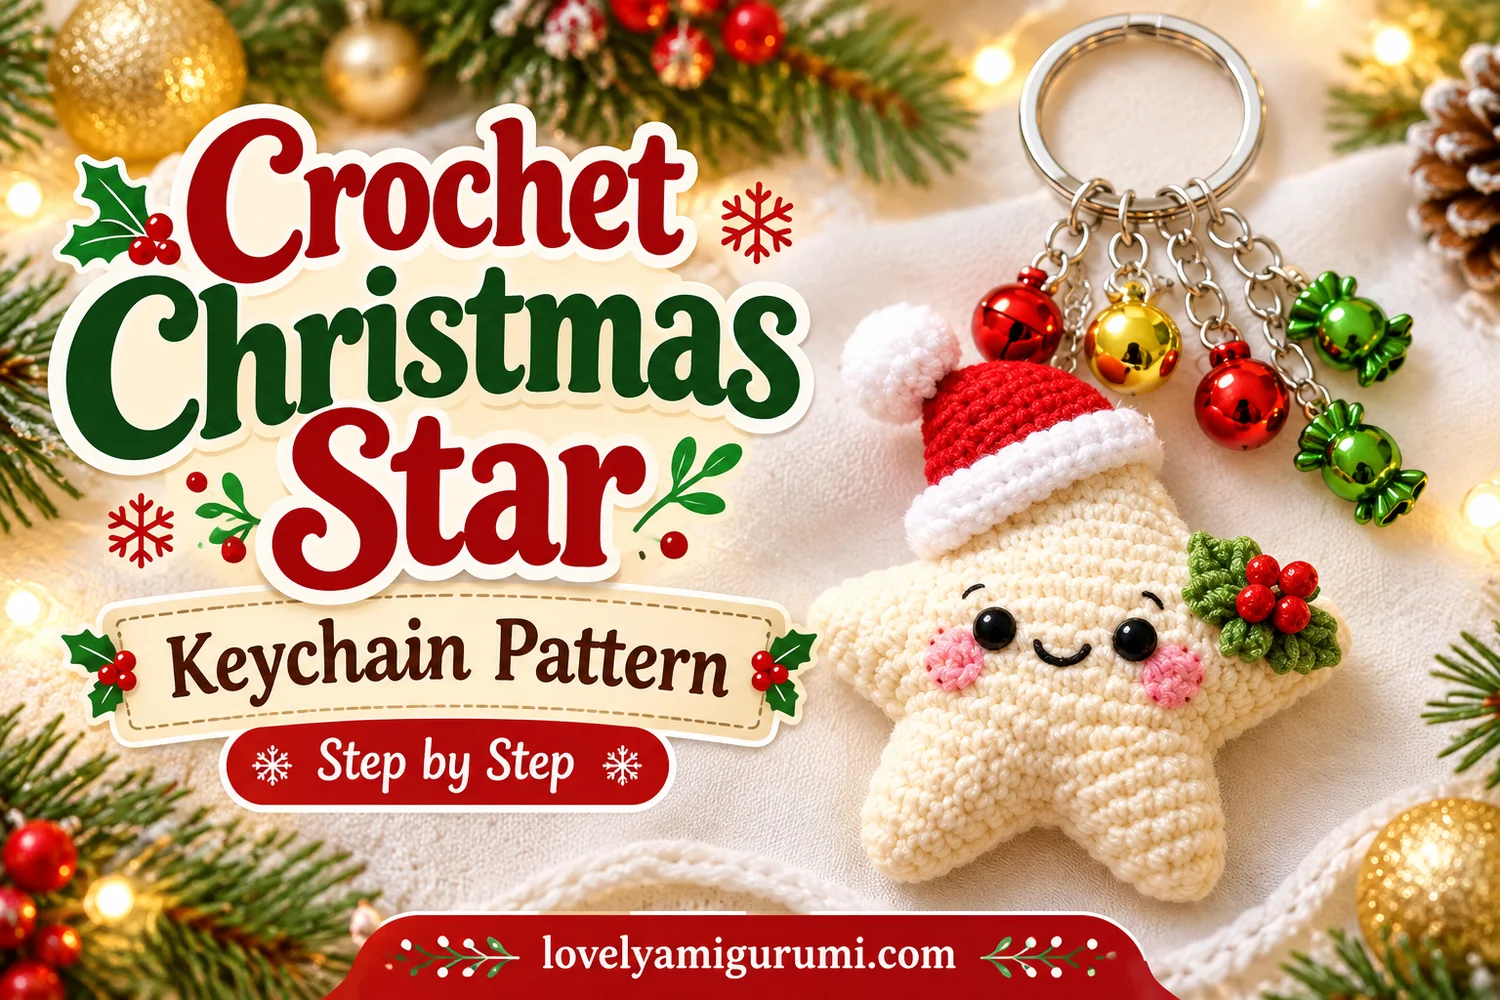
This Christmas Star Keychain Crochet Pattern makes a little cream star with five softly padded points, a smiling face, pink cheeks, and a red Santa hat. A green holly cluster with three red berries sits on the right side, following the festive details in the supplied reference.
A silver keyring, short chains, and dangling holiday charms complete the design. Use it as a seasonal bag charm, a handmade gift topper, or a small decoration for your Christmas crochet collection.
Pattern Information
- Skill level: Confident beginner with basic shaping and sewing experience.
- Terms: US crochet terminology.
- Construction: Two matching star panels, each with a round center and five points worked in rows. The panels are sewn together and lightly stuffed.
- Estimated size: Approximately 6–8 cm across with fine cotton yarn. This is an estimate; yarn and tension change the final size.
- Reference details: Cream star, black eyes and smile, pink cheeks, red-and-white Santa hat, green leaves and red berries, silver hardware, and separate dangling charms.
Pattern note: This is an image-inspired adaptation. Stitch counts have been checked, but this pattern has not been physically crocheted or independently tested. The tutorial images illustrate the stages and should be used with the written directions.
Materials for the Christmas Star Keychain Crochet Pattern
- Fine cotton yarn in cream, approximately 10–15 g as a starting allowance.
- Small amounts of red, white, green, pink, and black yarn.
- A 2–2.5 mm crochet hook as a starting point; adjust for dense stitches.
- A small amount of fiberfill.
- Two black safety eyes, approximately 5–6 mm, or black yarn for embroidered eyes.
- Three small red beads, approximately 3 mm, for the holly berries.
- Strong sewing thread and a fine needle that fits through the bead holes.
- A silver keyring with short chains and connector rings or clasps.
- Optional red and gold bauble charms and green candy-style charms with attachment loops.
- Tapestry needle, stitch marker, and scissors.
- Optional gold embroidery thread for a few small accents on the leaves.
This version is a decorative keychain with small parts. Use embroidered eyes and berries for a bead-free finish. Choose lightweight charms so they do not pull the star out of shape.
Stitches and Abbreviations
| Abbreviation | Meaning |
|---|---|
| MR | magic ring |
| ch | chain |
| sc | single crochet |
| hdc | half double crochet |
| sl st | slip stitch |
| inc | 2 sc in one stitch |
| dec | single crochet 2 stitches together |
| st(s) | stitch(es) |
Numbers in brackets show the completed stitch count. Repeat instructions in parentheses the stated number of times. Turning chains do not count as stitches. Use regular sc2tog decreases for the flat point rows.
Before You Begin
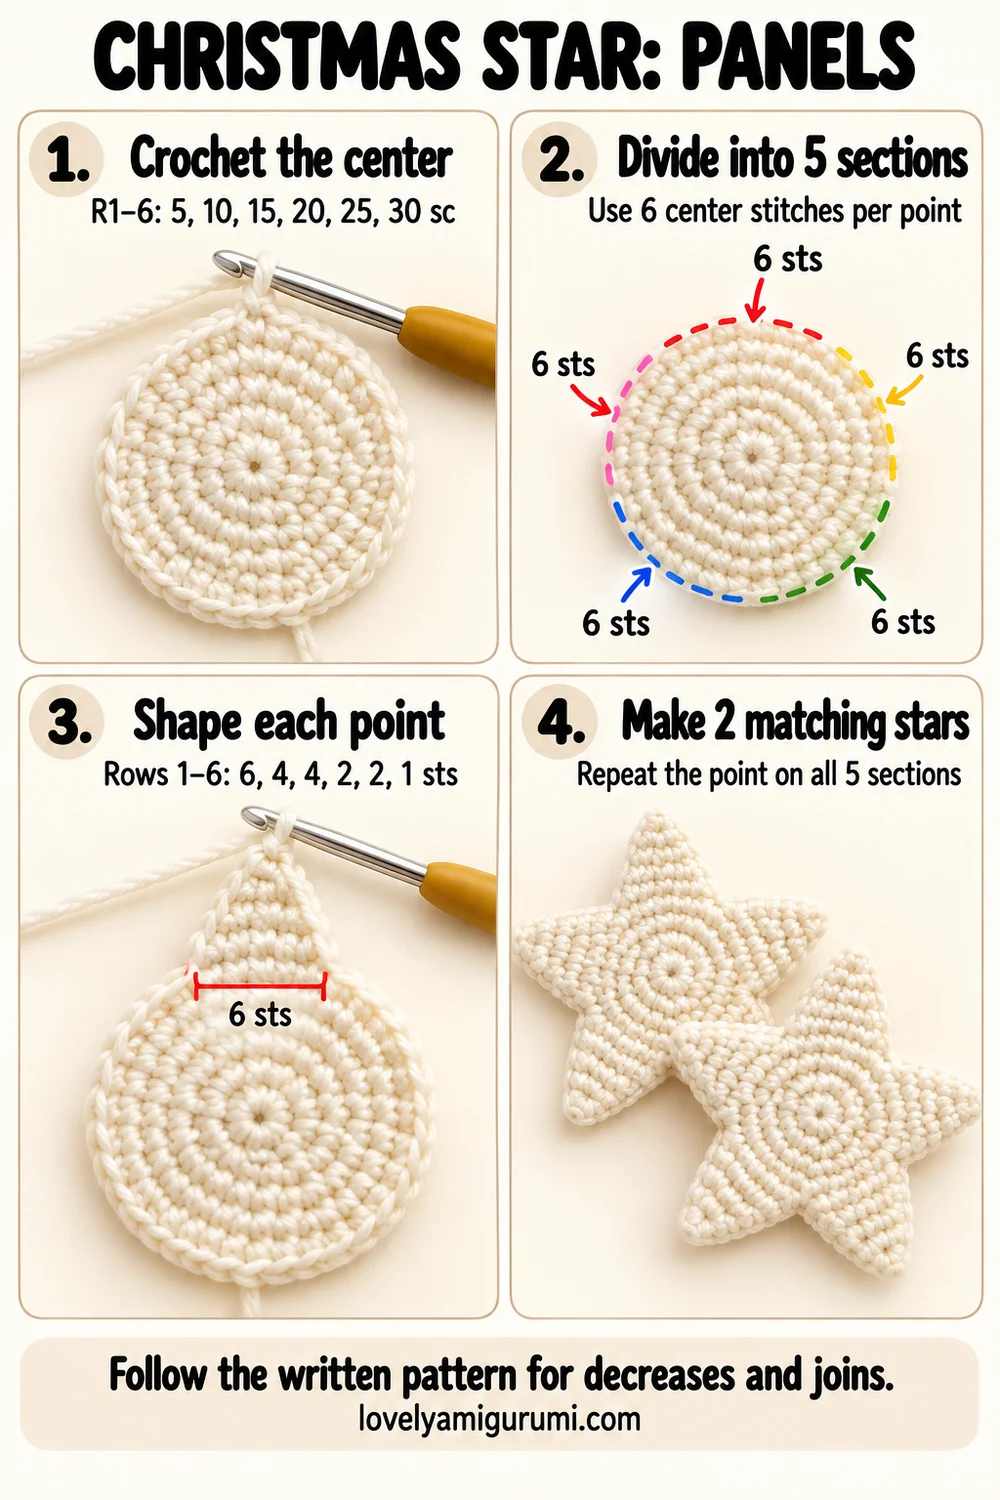
Each panel starts with a cream center worked in continuous rounds. After the center reaches 30 stitches, divide its edge into five consecutive groups of six stitches. Each group supports one star point.
Work each point separately in turned rows. Do not crochet around the entire panel when making a point, and do not use the side edges of an earlier point as the starting stitches for the next one. Make two identical panels so every point and valley can be matched during sewing.
Christmas Star Keychain Crochet Pattern
1. Cream Center — Make 2
With cream yarn:
- Round 1: 5 sc in MR. [5]
- Round 2: Inc in each stitch. [10]
- Round 3: (Sc, inc) × 5. [15]
- Round 4: (2 sc, inc) × 5. [20]
- Round 5: (3 sc, inc) × 5. [25]
- Round 6: (4 sc, inc) × 5. [30]
Sl st in the next stitch and fasten off. Mark the first stitch of each six-stitch section around Round 6: stitches 1, 7, 13, 19, and 25. The finishing slip stitch is not one of these 30 stitches.
2. Five Star Points on Each Panel
Join cream yarn to the first stitch of the first marked section. Work only over the six stitches in that section.
- Row 1: Ch 1, sc in the same stitch and the next 5 stitches. [6]
- Row 2: Ch 1, turn. Dec, 2 sc, dec. [4]
- Row 3: Ch 1, turn. Sc in each stitch. [4]
- Row 4: Ch 1, turn. Dec × 2. [2]
- Row 5: Ch 1, turn. Sc in each stitch. [2]
- Row 6: Ch 1, turn. Dec. [1]
Fasten off. Join fresh cream yarn to the first unused stitch of the next marked section and repeat Rows 1–6. Continue until all five six-stitch sections have a point. Repeat for the second panel.
Weave each point’s starting and finishing tails into the back of its panel without pulling the tips inward. Count five points on each panel. Gently flatten both pieces and compare their outlines before sewing.
Add the Face to the Front Panel
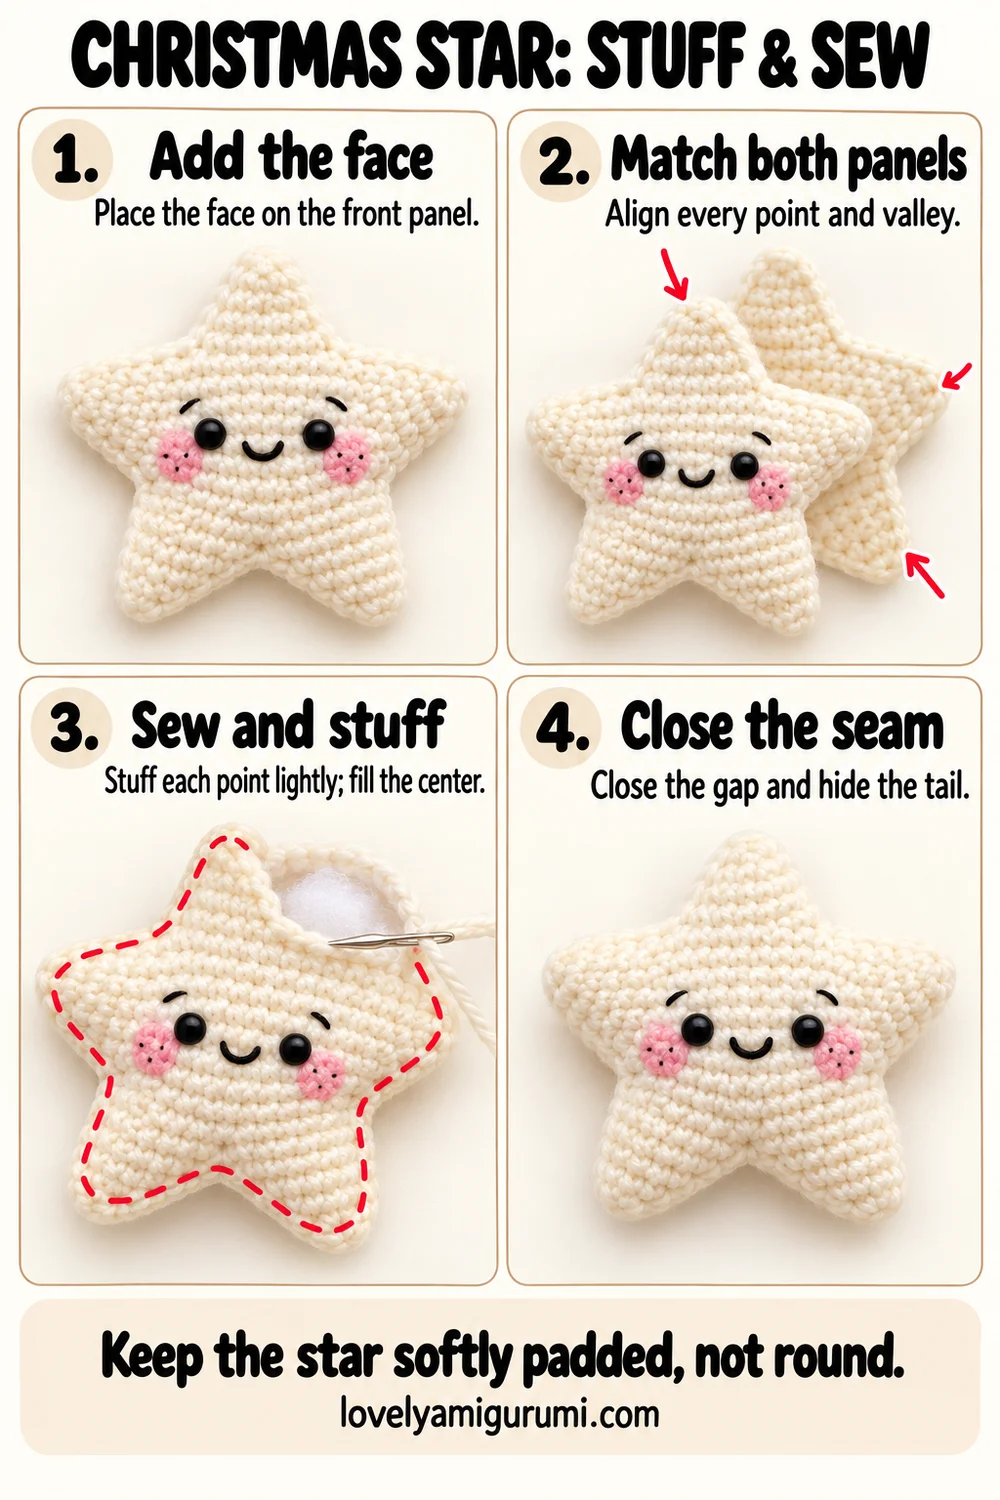
Choose one point as the top and place it at 12 o’clock. The two lower points should form the bottom of the star. This orientation follows the reference.
Place the two eyes across the center, approximately 5–6 stitches apart between their centers. Keep the eyes on the round center rather than the outer points. Check their position and fit the backs before joining the panels. If embroidering eyes, make two neat black circles instead.
With black yarn, embroider a small U-shaped smile between and slightly below the eyes. Add a short curved eyebrow above each eye. With pink yarn, embroider a small cheek patch just below and outside each eye. Use several short stitches and keep the patches light so the cream stitches remain visible.
Secure all facial embroidery on the back of the front panel. Keep knots small so they will sit neatly inside the stuffed star.
Sew and Stuff the Star
Place the panels together with their wrong sides facing inward. Align the top points, then all four remaining points and the five valleys. Use cream yarn to whipstitch corresponding edge loops and row ends together.
At each point, match the six row ends on one side, the tip, and the six row ends on the other side to the equivalent locations on the second panel. Do not skip a valley or sew different points together. Use small, even stitches without tightening the edge into a hard ridge.
As you finish each point, add a tiny wisp of stuffing to its tip. Leave a gap of approximately 2 cm near the final side and lightly fill the center. The star should be softly padded and slightly flat, with all five points visible.
Close the remaining gap, secure the thread, and hide the tail inside. Massage the filling gently into an even shape. Avoid overstuffing the center, which can round the star and hide its points.
Red Santa Hat with White Brim
With red, work in continuous rounds:
- Round 1: 6 sc in MR. [6]
- Round 2: Sc around. [6]
- Round 3: (Sc, inc) × 3. [9]
- Round 4: Sc around. [9]
- Round 5: (2 sc, inc) × 3. [12]
- Round 6: Sc around. [12]
- Round 7: (3 sc, inc) × 3. [15]
- Round 8: Sc around. [15]
- Round 9: (4 sc, inc) × 3. [18]
- Round 10: Sc around. [18]
- Round 11: (5 sc, inc) × 3. [21]
- Round 12: Sc around. [21]
Change to white on the final yarn-over of the last red stitch.
- Rounds 13–14, white: Sc around. [21 per round]
Sl st in the next stitch and fasten off, leaving a long white sewing tail. Keep the hat unstuffed so it can sit over the top point.
Make a tiny white pom-pom by winding white yarn around a small card or two fingertips, tying the bundle tightly at the center, cutting the folded ends, and trimming it into a small ball. Sew it securely to the red hat tip. Use a small size that suits the miniature star.
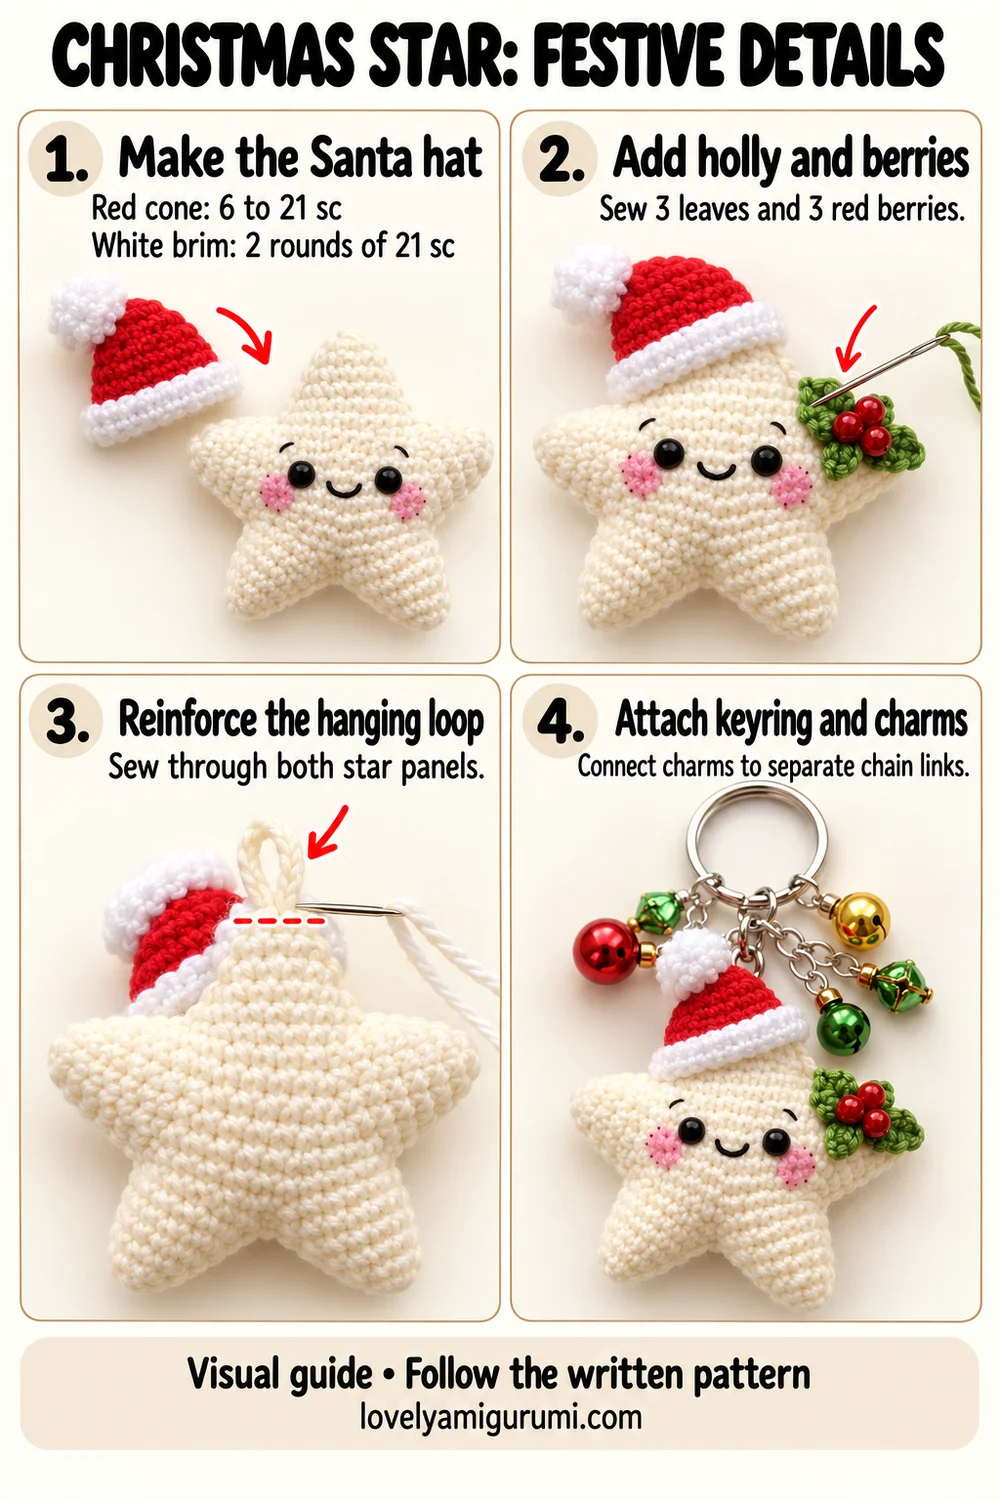
Fit the hat over the top point and tilt it slightly to the left. Sew the lower brim to several cream stitches on the front and back of the top point. Keep the face clear and the white brim visible. If your tension makes the hat too narrow, adjust its last red round and both white rounds to fit, keeping the brim count consistent.
Green Holly Leaves and Red Berries
Leaves — Make 3
With green, ch 5. Starting in the second chain from the hook, work sl st, sc, hdc, sl st across the four chains. Ch 1 at the tip, rotate the work, and crochet along the unused loops of the same foundation chain: sl st, hdc, sc, sl st. [8 stitches around the chain, plus the ch-1 tip]
Fasten off with a sewing tail. These small leaf shapes form the holly-style cluster in the reference. Arrange three leaves as a fan on the right side point, beside the face. Overlap their bases and sew them securely to the star. Add a discreet stitch through each leaf so it rests against the fabric.
If desired, add a few small gold embroidery stitches to the leaves for the reference’s festive sparkle. Keep them subtle.
Three Red Berries
Place three small red beads over the overlapping leaf bases. Sew each bead through several secure cream stitches using strong thread. Pass through the bead and fabric two or three times, secure the thread, and hide the end inside the star. Check each bead with a gentle tug.
For a bead-free version, embroider three small red berry clusters in the same positions. Keep the holly on the right when viewing the decorated front.
Attach the Silver Keyring and Festive Charms
Use a fresh length of cream yarn doubled to sew a short reinforced loop at the back of the top star point, behind the hat. Pass through stitches on both star panels and repeat the attachment at least three times. The loop should be only large enough for your connector ring or clasp.
Connect the star’s chain to this reinforced loop and attach the other end to the silver keyring. Position the chain behind the hat so it rises above the star. Check the connection with a gentle pull.
Attach the optional red and gold bauble charms and green candy-style charms to separate short chains from the keyring. Use their existing attachment loops and connector rings. Vary the chain lengths slightly so the ornaments hang separately, as in the reference. Keep their weight on the metal ring rather than on the hat, pom-pom, or holly leaves.
Close all connector rings fully and check that no sharp or open ends can catch on the crochet fabric.
Three Visual Tutorials
The final gallery shows how to make the two star panels, sew and stuff the body, and add the hat, holly, and hardware. Use the numbered panels as a visual overview and the written pattern for complete stitch placement and shaping instructions.
Practical Tips and Troubleshooting
The points do not match
Check that each point begins over its own six-stitch section of Round 6 and that both panels use the same rows. Match the panels before sewing, then align every tip and valley.
The star looks too round
Use less stuffing in the center. Add tiny amounts to the point tips and flatten the body gently with your fingers.
The hat covers the eyes
Move the brim upward on the top point and tilt the hat slightly left. Secure the brim only after checking the face from the front.
The charms pull on the hat
Attach all dangling charms to the metal keyring on separate chains. Attach the star’s chain to its cream reinforced loop behind the hat.
FAQ
Can I use yellow yarn?
Yes, but cream follows the supplied reference. Keep the hat red and white and the holly green for the same festive color balance.
Can this be a tree ornament?
Yes. Replace the metal ring and charms with a hanging cord attached to the reinforced loop.
Can I make it without beads or plastic eyes?
Yes. Embroider the eyes and berries with yarn. The star panels, hat, and leaf construction stay the same.
More Free Crochet Patterns
- Christmas Wreath Crochet Keychain Pattern
- Mini Christmas Mitten Crochet Pattern
- Christmas Hot Cocoa Mug Crochet Pattern
Save This Pattern
Save this Christmas Star Keychain Crochet Pattern to your Pinterest board for your next festive project. Happy crocheting from Lovely Amigurumi!
Christmas Star Visual Tutorials and Pinterest Gallery
Keep these three visual tutorial guides and three Pinterest images together for your next crochet session.