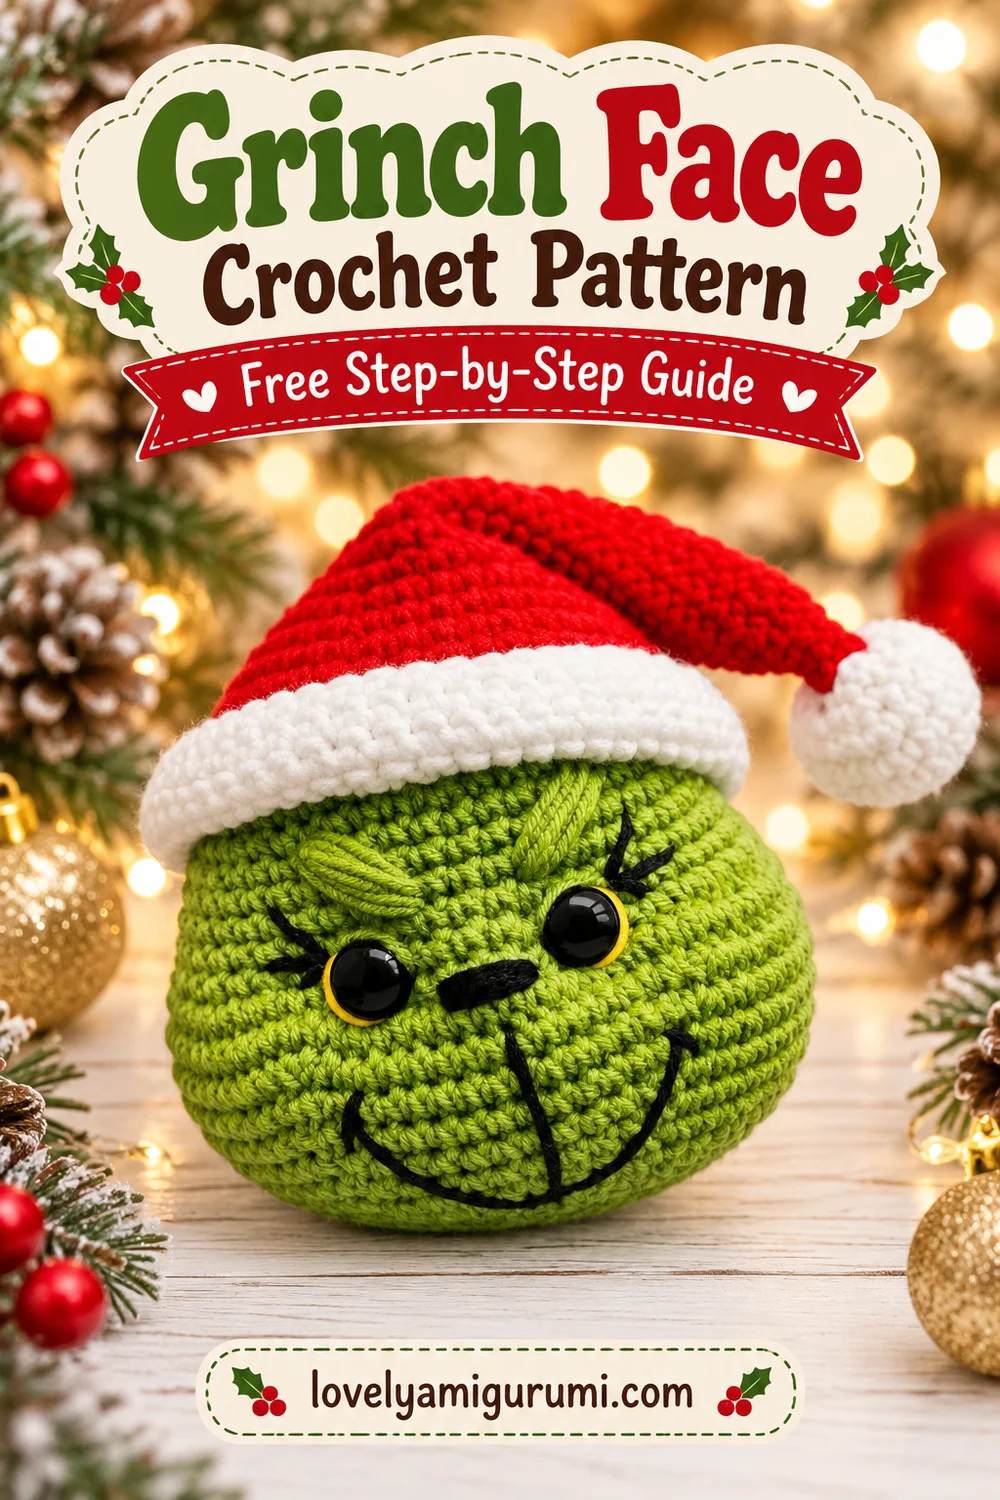
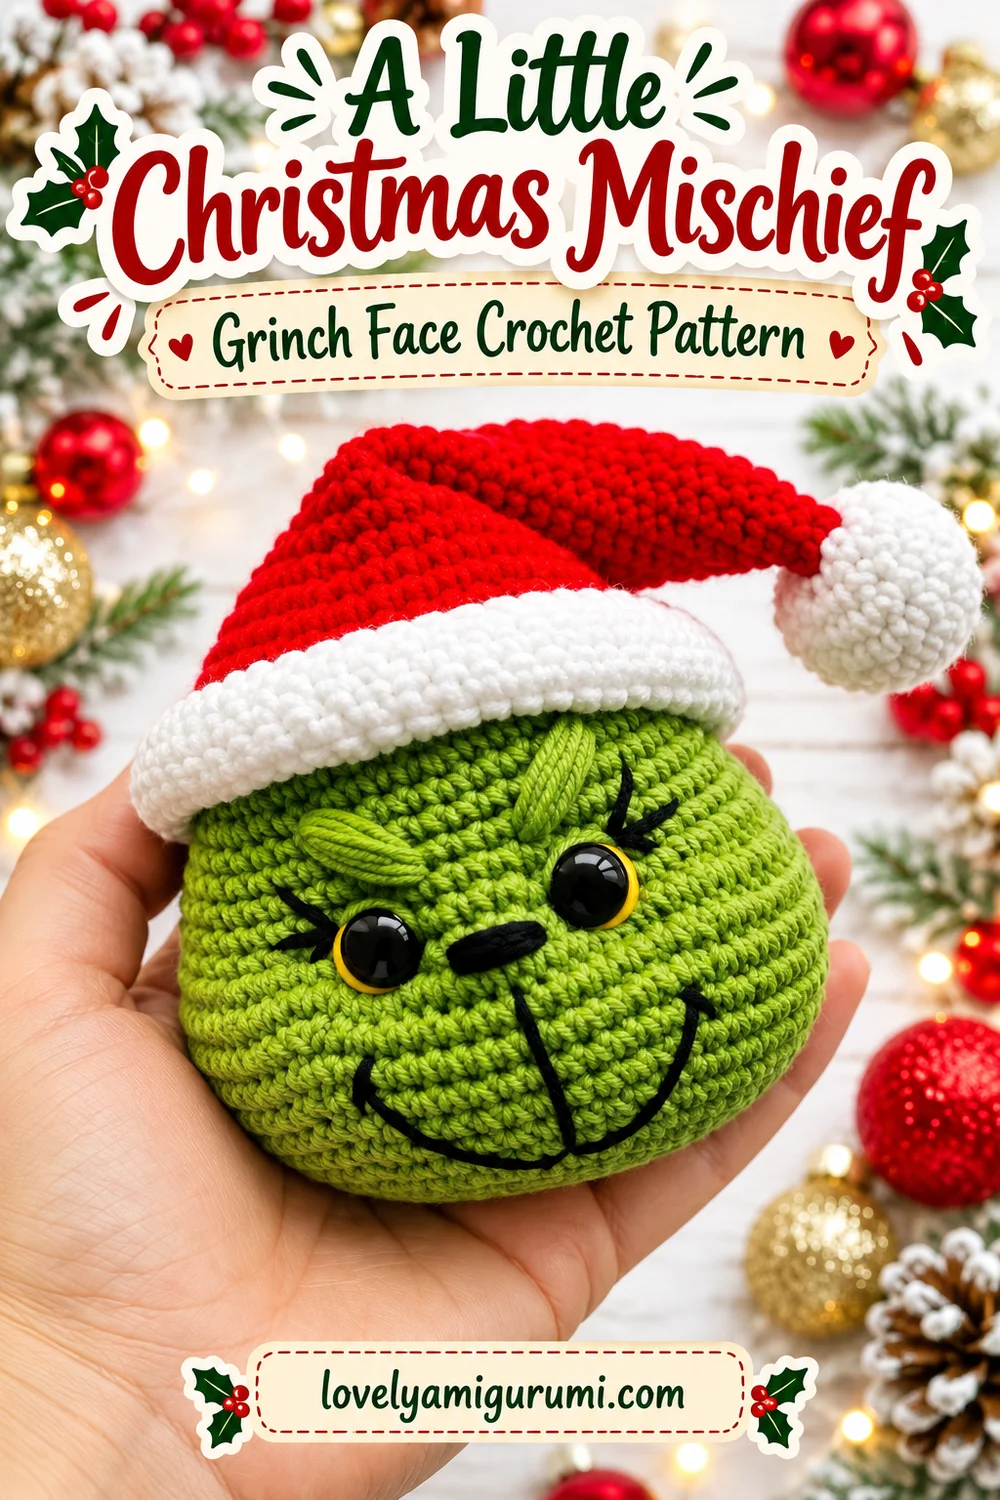
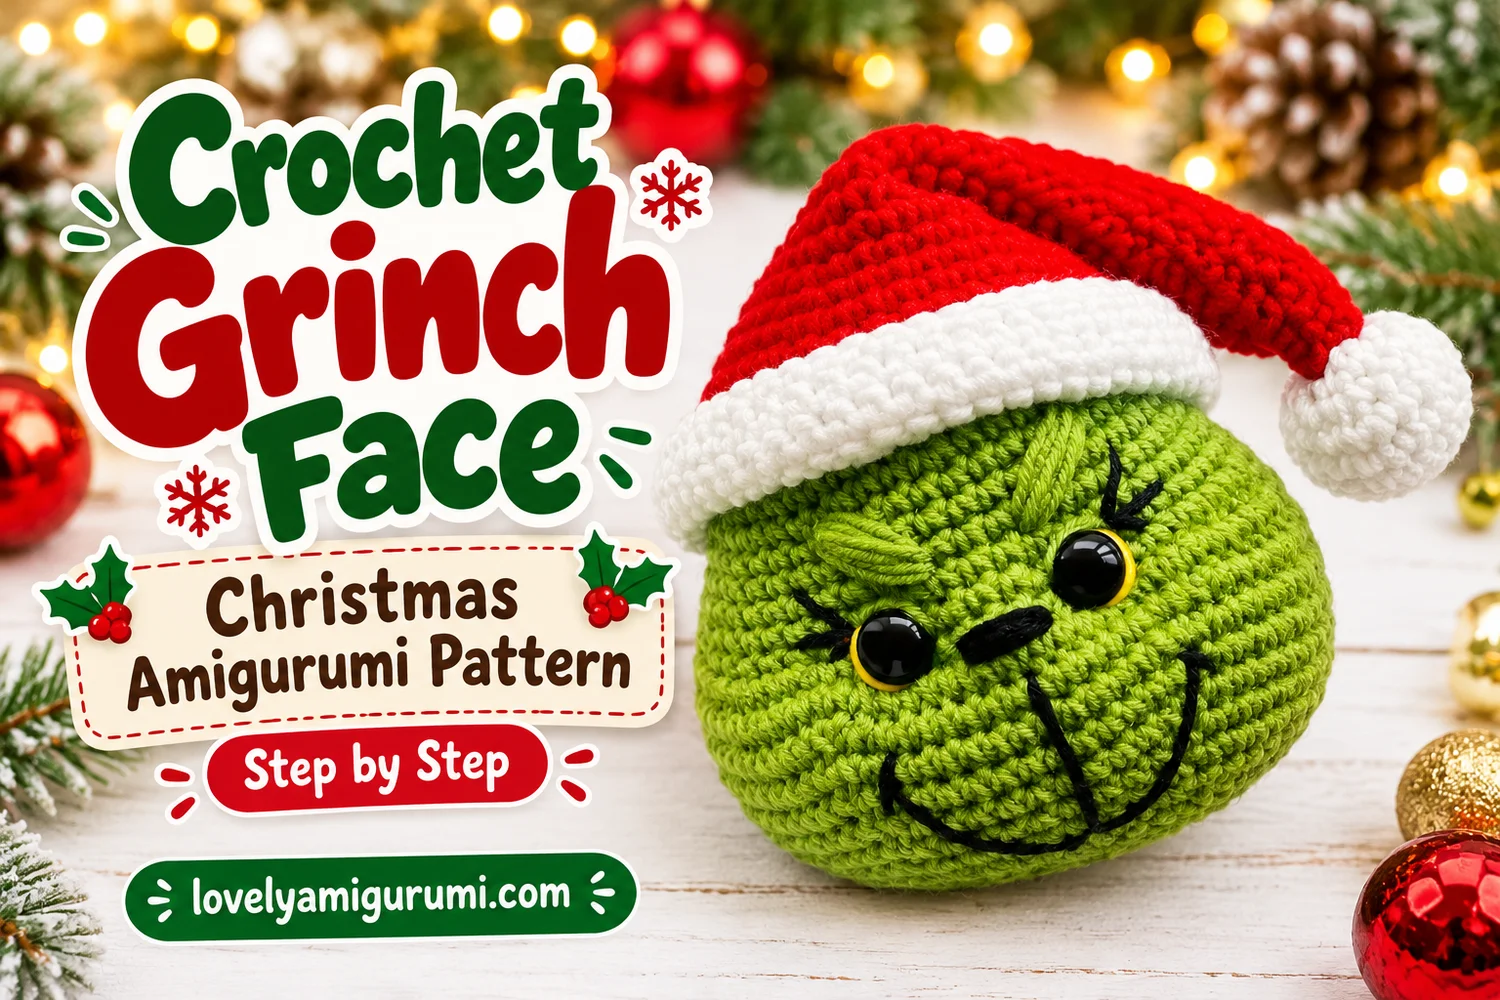
This Grinch Face Crochet Pattern makes a green Christmas head with a broad oval shape, raised green eyebrows, glossy eyes with yellow edging, and a long embroidered smirk. A floppy red Santa hat with a thick white brim and a white pom-pom completes the reference-inspired design.
Make it as a small stuffed holiday decoration for a shelf or festive display. This project focuses on the head and expression, with no body or limbs.
Pattern Information
- Skill level: Intermediate, with shaping, embroidery, and sewing.
- Terms: US crochet terminology.
- Construction: A green head worked from the crown downward in continuous rounds, plus a separate long Santa hat.
- Estimated size: About 9–11 cm across with sport-weight cotton yarn. Actual dimensions depend on yarn, tension, and stuffing.
- Reference details: Green oval face, black nose and smirk, yellow-edged eyes, green brows, and a red-and-white hat with its tip falling to the right.
Pattern note: This is an image-inspired adaptation. Stitch counts have been checked, but it has not been physically crocheted or independently tested. The tutorial images illustrate the construction stages. Adjust the shaping and embroidery to suit your yarn and the reference.
Materials for the Grinch Face Crochet Pattern
- Sport-weight cotton yarn in bright green, approximately 25–40 g as a starting allowance.
- Red yarn, approximately 15–25 g, and white yarn, approximately 10–15 g, for the hat and pom-pom.
- Black yarn or embroidery thread for the nose, smile, and lashes.
- A small amount of yellow yarn or embroidery thread for the eye edging.
- A 2.5–3 mm hook as a starting point; adjust for dense stitches.
- Two black safety eyes, approximately 10–12 mm, or black yarn for embroidered eyes.
- Fiberfill, stitch marker, tapestry needle, scissors, and removable pins.
Use embroidered eyes for a version intended for a young child. The yellow eye edging can be sewn with thread rather than made from a separate plastic part.
Stitches and Abbreviations
| Abbreviation | Meaning |
|---|---|
| MR | magic ring |
| sc | single crochet |
| sl st | slip stitch |
| inc | 2 sc in one stitch |
| dec | invisible single crochet decrease over the next 2 stitches |
| st(s) | stitch(es) |
Work in a spiral without joining or turning unless directed otherwise. Numbers in brackets give the completed stitch count. Repeat parentheses the stated number of times. Move the marker at the start of every round.
Before You Begin
The head starts at the crown, which will sit beneath the hat. The face goes on the front of the middle rounds. Install safety-eye backs before stuffing and closing the head; facial embroidery can be added after shaping.
Keep the head broad and softly filled. Too much stuffing will make it spherical and distort the expression. The hat remains unstuffed so its long tip can fold to the right.
Grinch Face Crochet Pattern
1. Green Head
With green yarn:
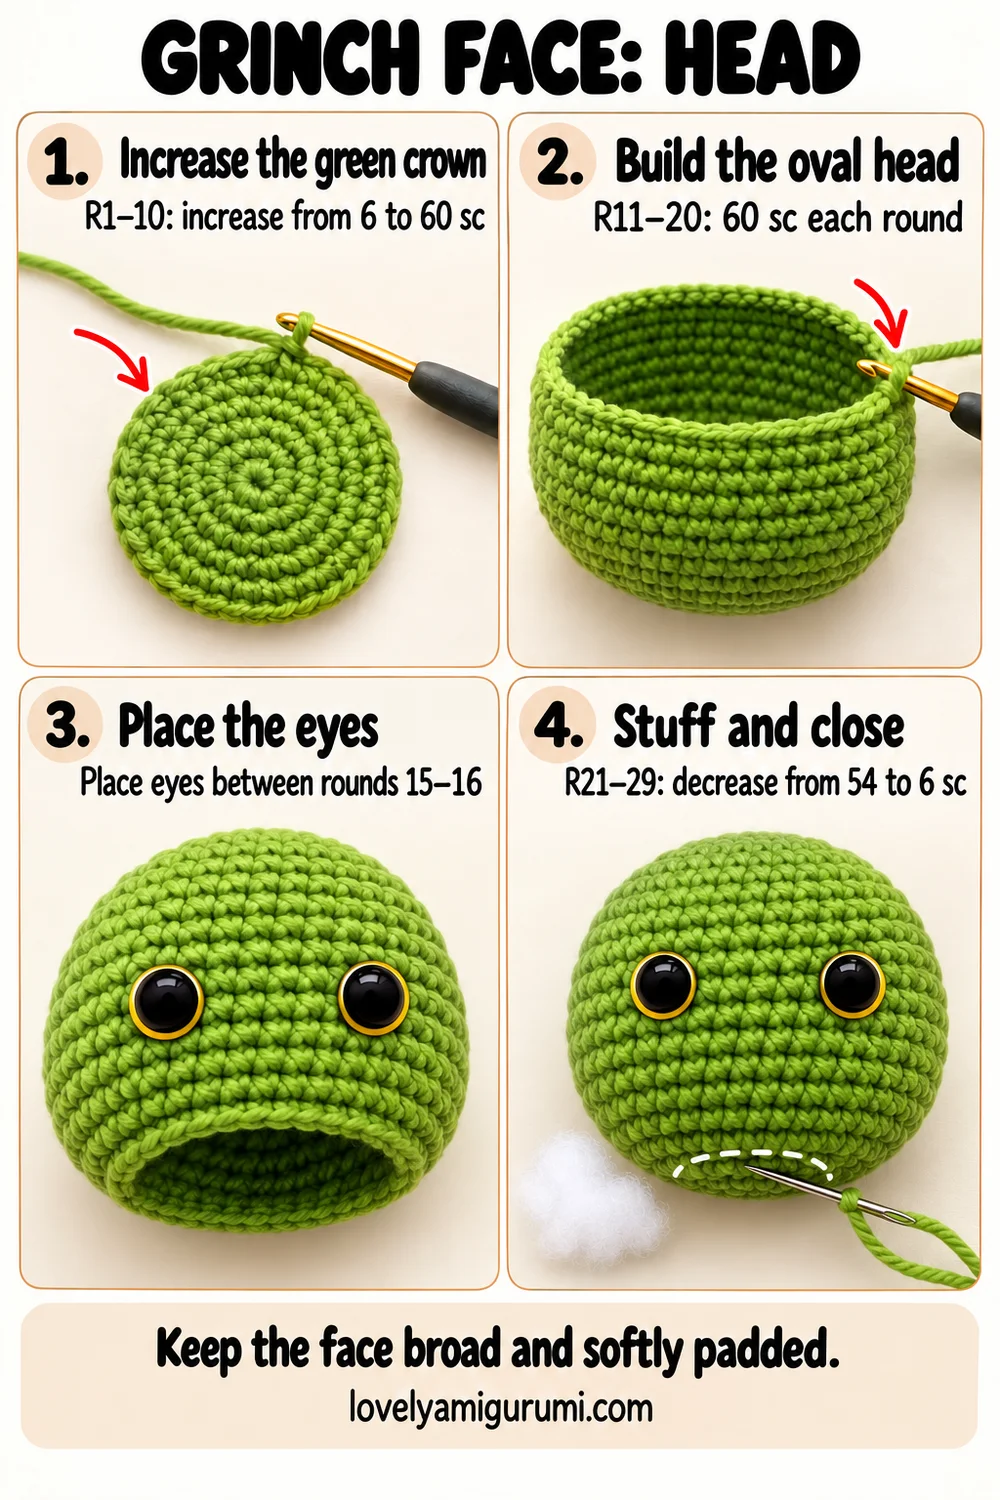
- Round 1: 6 sc in MR. [6]
- Round 2: Inc in each stitch. [12]
- Round 3: (Sc, inc) × 6. [18]
- Round 4: (2 sc, inc) × 6. [24]
- Round 5: (3 sc, inc) × 6. [30]
- Round 6: (4 sc, inc) × 6. [36]
- Round 7: (5 sc, inc) × 6. [42]
- Round 8: (6 sc, inc) × 6. [48]
- Round 9: (7 sc, inc) × 6. [54]
- Round 10: (8 sc, inc) × 6. [60]
- Rounds 11–20: Sc in every stitch. [60 per round; 10 rounds]
Choose the front of the head. Place the eyes between Rounds 15 and 16, approximately 9–11 stitches between their centers. Angle their visual placement slightly to echo the reference, while checking the face from the front. Fit the backs securely before continuing. Use small pins to mark the nose and smile positions temporarily.
- Round 21: (8 sc, dec) × 6. [54]
- Round 22: (7 sc, dec) × 6. [48]
- Round 23: (6 sc, dec) × 6. [42]
- Round 24: (5 sc, dec) × 6. [36]
- Round 25: (4 sc, dec) × 6. [30]
- Round 26: (3 sc, dec) × 6. [24]
- Round 27: (2 sc, dec) × 6. [18]
- Round 28: (Sc, dec) × 6. [12]
- Round 29: Dec × 6. [6]
Add small wisps of stuffing as the opening narrows, especially before Rounds 27–29. Spread the filling evenly toward the sides without packing the center hard. Fasten off with a long tail, pass it through the remaining six front loops, and draw closed. Secure and hide the end.
Massage the head into a wide oval, gently flattening the front and back. Keep the closure underneath and the crown above the eyes. Remove all temporary pins as you complete the face.
Embroider the Expression
1. Yellow Eye Edging and Lashes
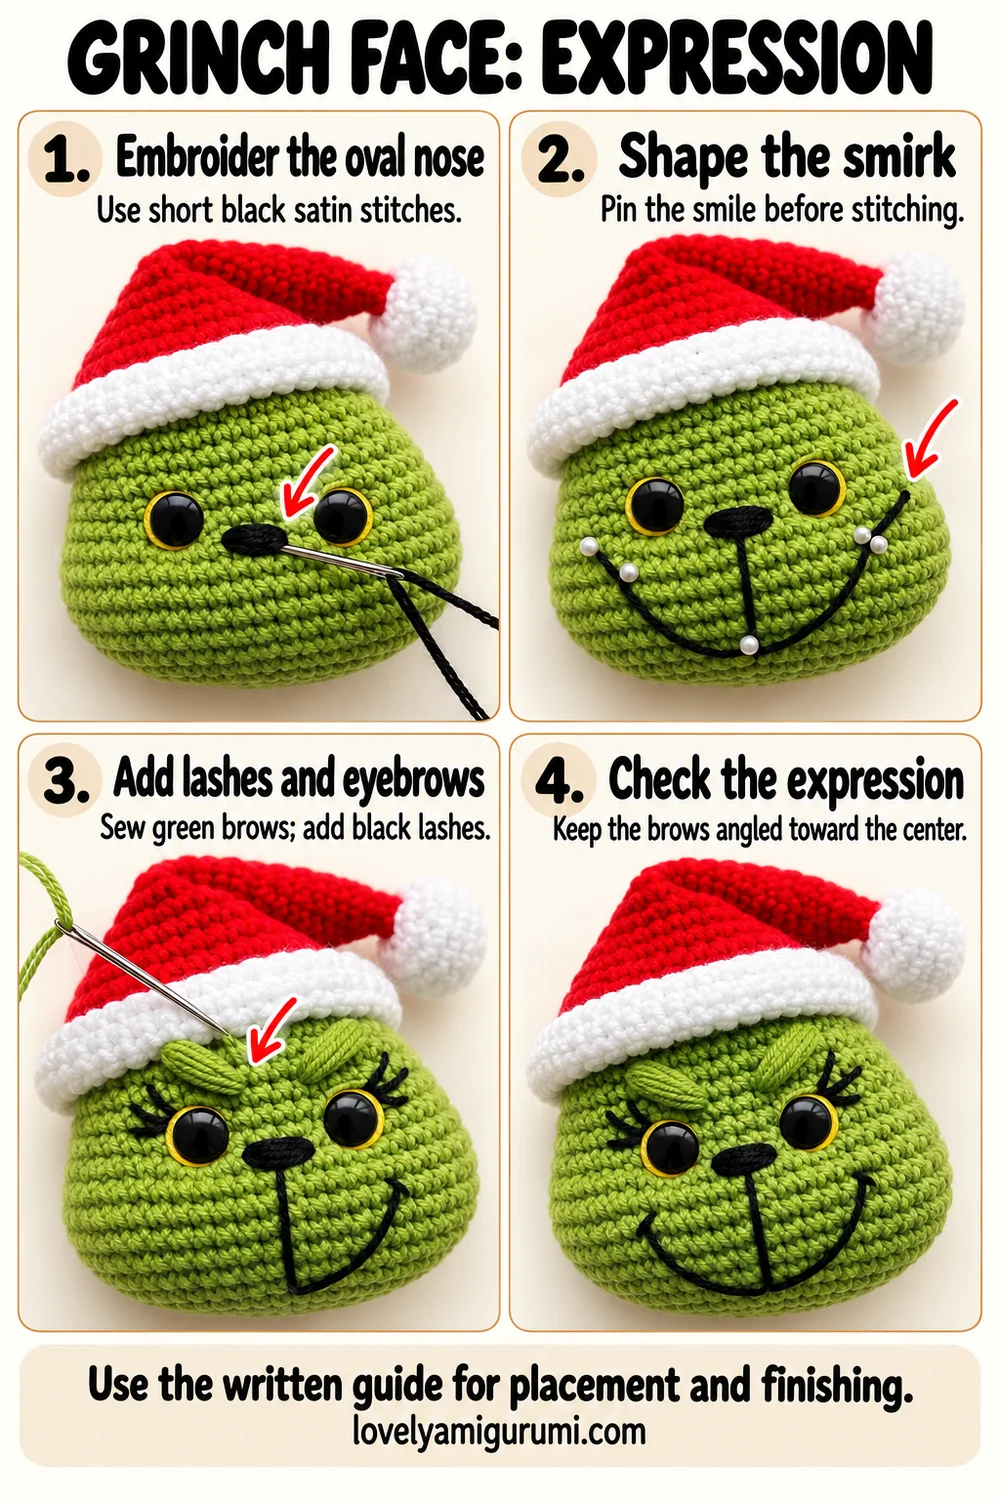
With yellow thread, make a thin stitched crescent closely around the lower and outer edge of each eye. Keep the edging narrow so the black eye remains dominant. Avoid pulling the fabric or loosening the installed eyes.
With black thread, add two or three short lashes at the upper outer corner of each eye. Keep them slightly angled outward. Secure the ends inside the head by passing through several fabric stitches and burying the knots.
2. Black Oval Nose
Place the nose between the eyes and one or two rounds below them, around Rounds 17–18. Use several short black satin stitches to form a small horizontal oval, approximately 3–4 stitches wide. Keep it flatter and smaller than the eyes.
3. Long Curved Smirk
Mark the smile with pins or a loose temporary thread. Start below the left cheek, curve down toward the lower center, and rise higher at the right corner. The bottom of the curve should sit around Rounds 23–25, depending on the shaped head.
Embroider the curve with short black backstitches rather than one long loose strand. Add a short crease at each corner. Stitch a central line down from just below the nose to meet the lower smile curve. Check the reference and keep the right corner slightly higher for the mischievous expression.
4. Raised Green Eyebrows
Use green yarn matching the head. Lay four to six parallel strands diagonally above each eye, spanning approximately 5–6 stitches. Angle the inner ends toward the center, with the outer ends higher. Sew the strand ends securely into the head.
Add a few tiny couching stitches across each bundle so the strands remain together and form a raised brow. Do not pull tightly enough to indent the whole face. Adjust both brows before securing the final ends.
Long Red Santa Hat
Start at the narrow tip with red yarn:
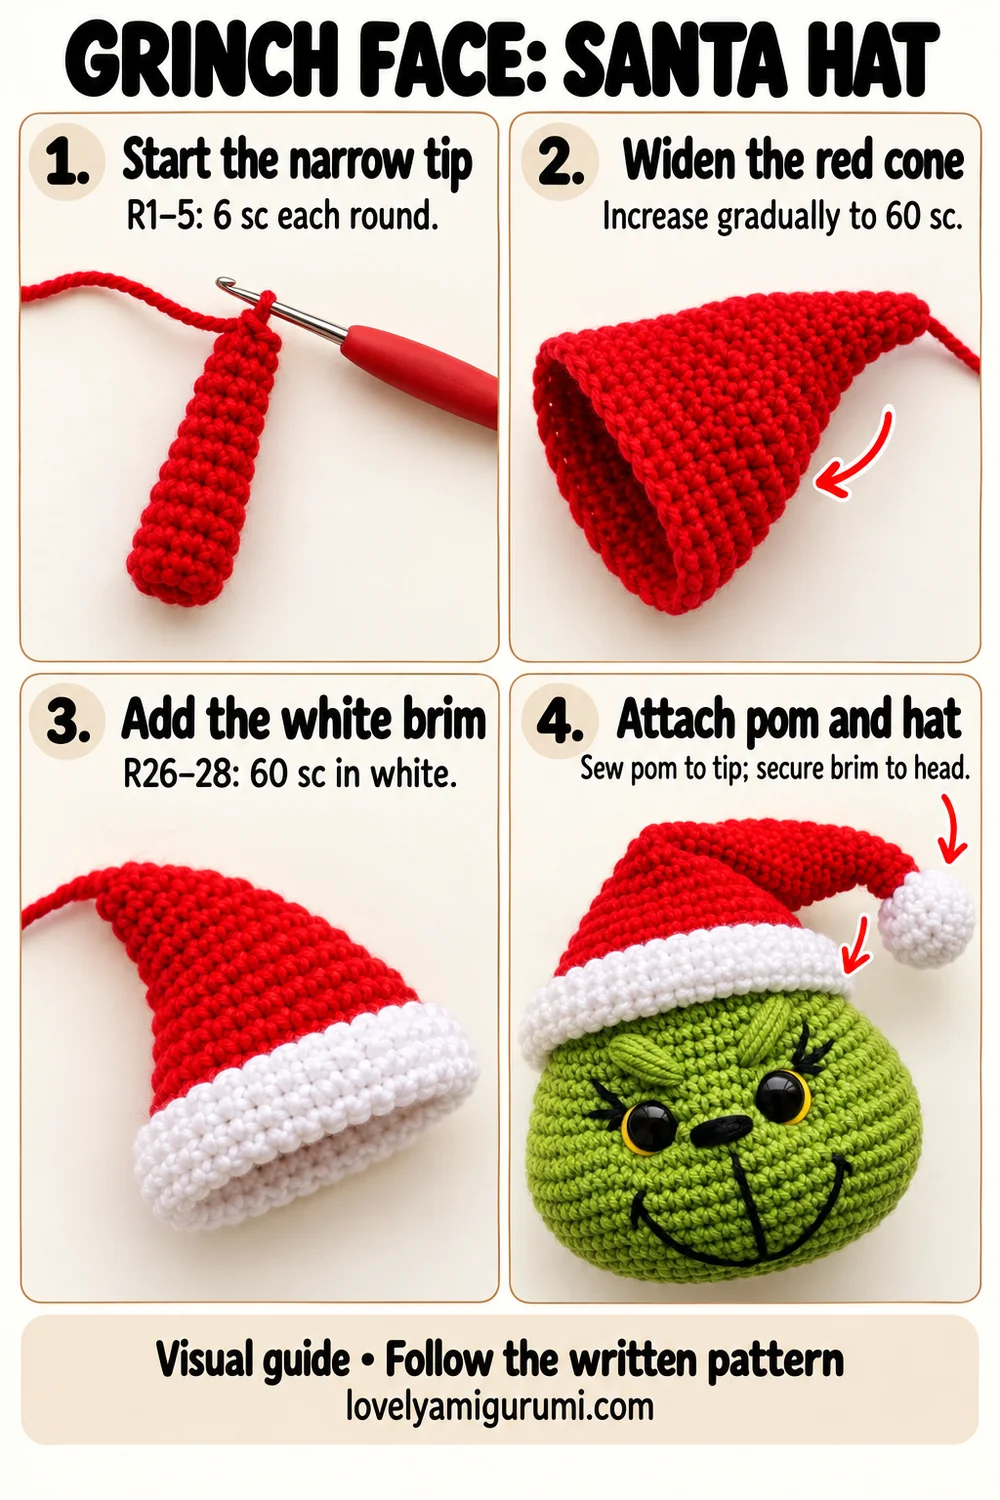
- Round 1: 6 sc in MR. [6]
- Rounds 2–5: Sc around. [6 per round]
- Round 6: Inc in each stitch. [12]
- Rounds 7–8: Sc around. [12 per round]
- Round 9: (Sc, inc) × 6. [18]
- Round 10: Sc around. [18]
- Round 11: (2 sc, inc) × 6. [24]
- Round 12: Sc around. [24]
- Round 13: (3 sc, inc) × 6. [30]
- Round 14: Sc around. [30]
- Round 15: (4 sc, inc) × 6. [36]
- Round 16: Sc around. [36]
- Round 17: (5 sc, inc) × 6. [42]
- Round 18: Sc around. [42]
- Round 19: (6 sc, inc) × 6. [48]
- Round 20: Sc around. [48]
- Round 21: (7 sc, inc) × 6. [54]
- Round 22: Sc around. [54]
- Round 23: (8 sc, inc) × 6. [60]
- Rounds 24–25: Sc around. [60 per round]
Change to white on the final yarn-over of the last red stitch.
- Rounds 26–28, white: Sc around. [60 per round]
Sl st in the next stitch to smooth the end. Fasten off with a long white sewing tail. Keep the cone unstuffed. Roll the white edge outward slightly to make a thicker band.
Try the hat on the head before sewing. The brim should sit above the eyebrows without hiding them. If it is too tight with your tension, add one evenly spaced six-increase round before the white brim and use that new count for all three white rounds.
White Crocheted Pom-Pom
With white:
- Round 1: 6 sc in MR. [6]
- Round 2: Inc in each stitch. [12]
- Round 3: (Sc, inc) × 6. [18]
- Rounds 4–6: Sc around. [18 per round]
- Round 7: (Sc, dec) × 6. [12]
- Round 8: Dec × 6. [6]
Lightly stuff before the final rounds. Fasten off with a long tail, draw the remaining stitches closed, and sew the ball securely to the narrow red hat tip. Shape it into a soft round pom-pom.
Fit and Sew the Hat
Set the hat over the crown with the white band sloping gently across the upper head. Fold the long red tip to the right, with the pom-pom resting beyond that side, as in the reference.
Sew the white brim to several green crown stitches using small white stitches hidden under the rolled edge. Work around the head, checking that the brows stay visible. Add one discreet red tack at the fold if the hat will not hold its droop naturally. Do not stuff the cone.
Hide every tail and check the brim, pom-pom, and embroidery with a gentle pull. Massage the filling again so the face stays broad and the mouth remains smooth.
Three Visual Tutorials
The final gallery shows the green head, facial embroidery, and Santa hat. Follow the numbered panels for an overview and the written instructions for complete shaping counts and placement. The images are illustrative.
Practical Tips and Troubleshooting
The head looks too round
Reduce the filling and gently flatten the front and back. Spread small wisps toward both sides to support the broad oval outline.
The smirk looks uneven
Mark the entire curve before embroidering. Use small backstitches and avoid tightening the thread until the fabric puckers.
The brows look flat
Add a few more green strands, then secure the bundle with tiny couching stitches. Keep the bulk above the eyes rather than across their edges.
The hat stands upright
Leave the red cone empty. Fold it to the right and add a discreet tack at the fold if needed.
FAQ
Does this pattern include a body?
No. It makes the green head and Santa hat shown in the reference.
Can I embroider the eyes?
Yes. Make two black satin-stitch ovals and add thin yellow edging and short black lashes.
Can I use thicker yarn?
Yes. Choose a matching hook and expect a larger decoration. Test the hat fit before attaching the brim.
More Free Christmas Crochet Patterns
- Christmas Star Keychain Crochet Pattern
- Christmas Hot Cocoa Mug Crochet Pattern
- Mini Christmas Mitten Crochet Pattern
Save This Pattern
Save this Grinch Face Crochet Pattern to your Pinterest crochet board for your next festive project. Happy crocheting from Lovely Amigurumi!
Grinch Face Visual Tutorials and Pinterest Gallery
Keep these three visual tutorial guides and three Pinterest images together for your next crochet session.