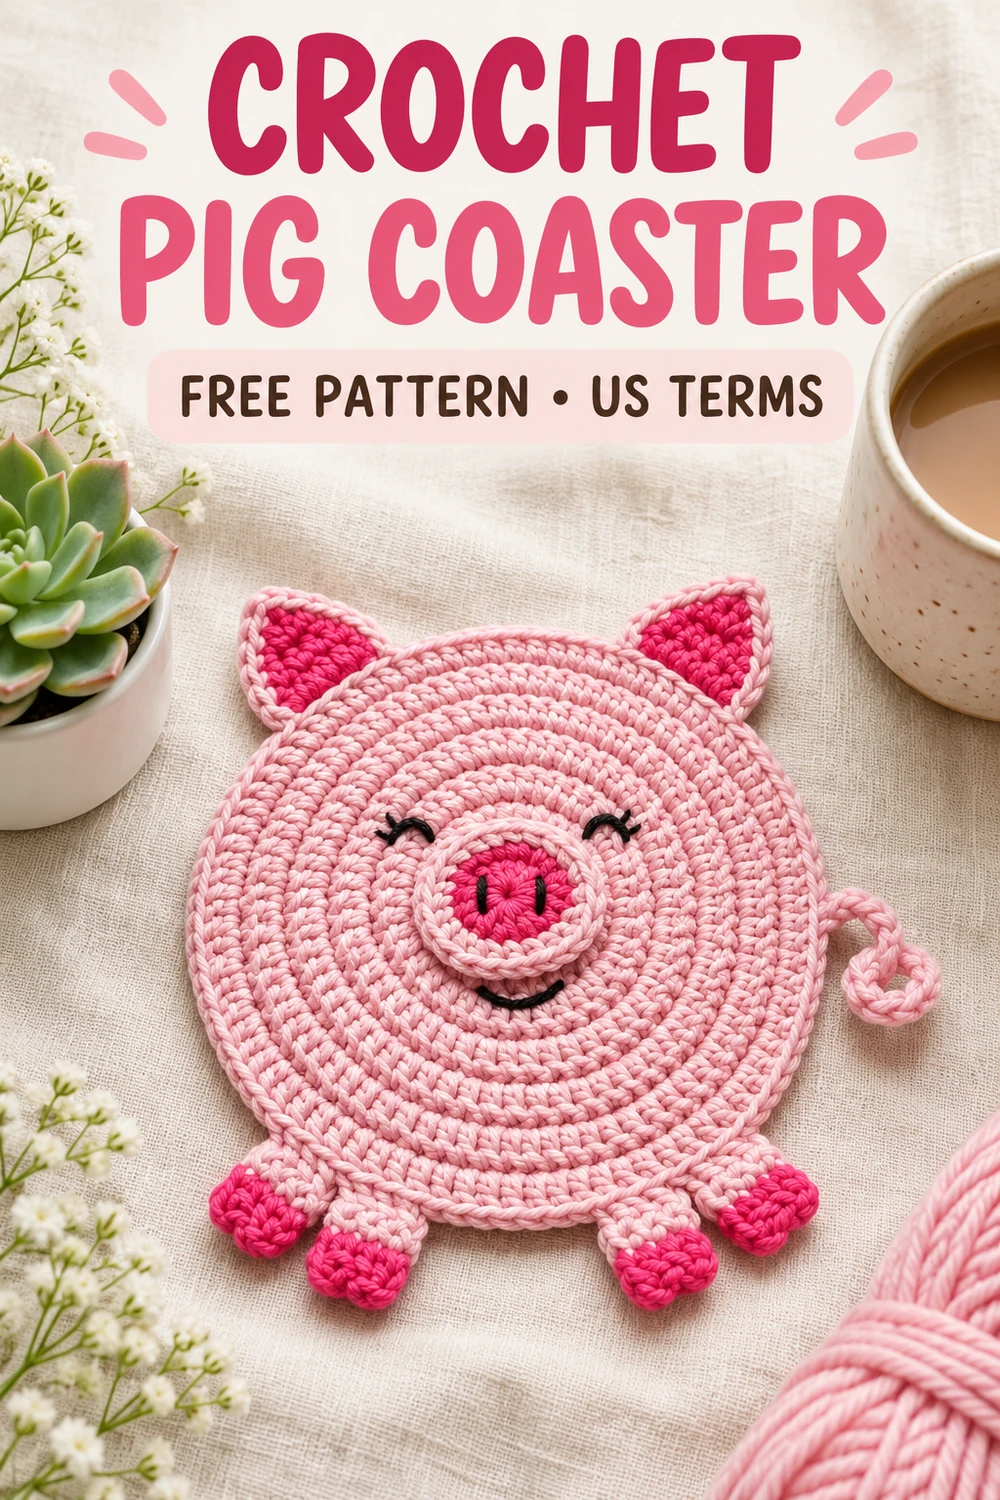
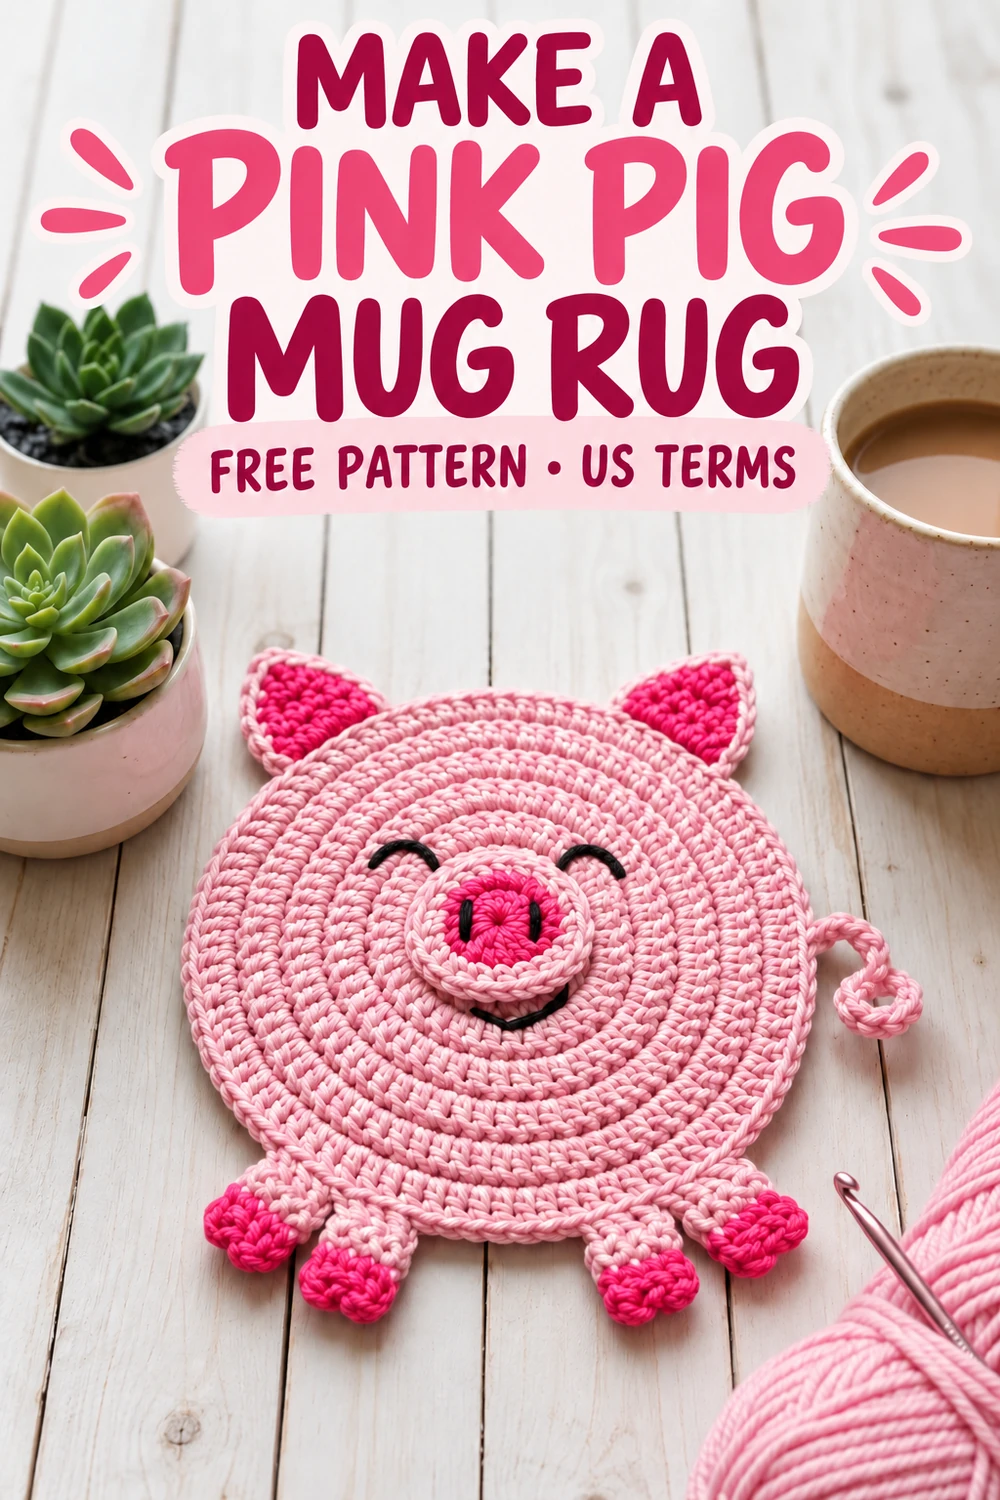
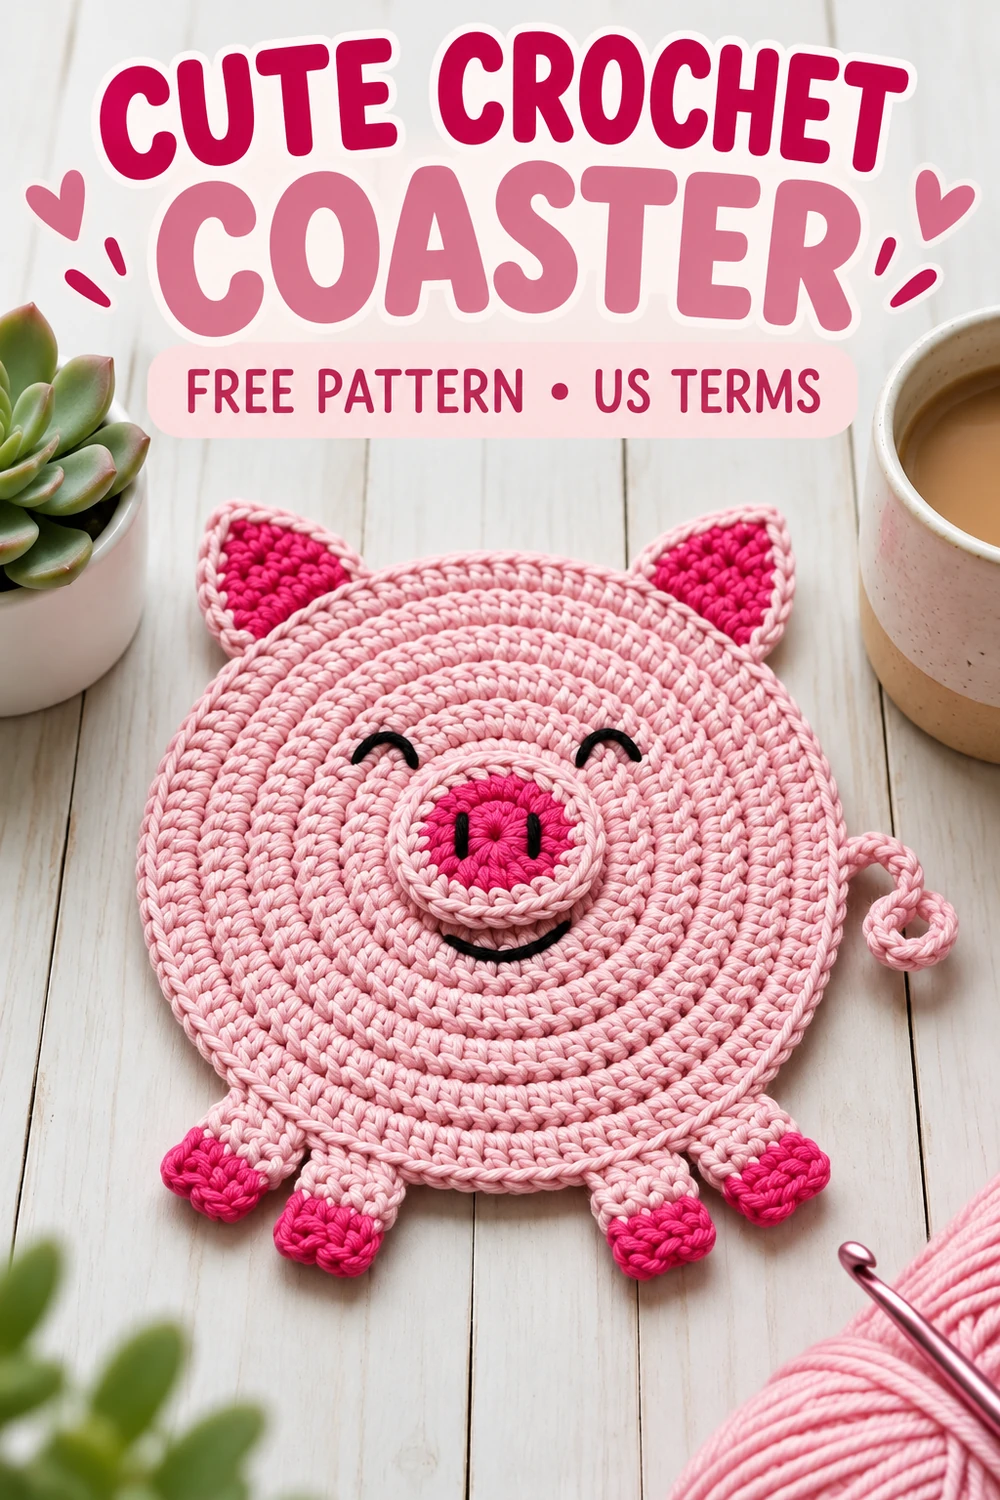
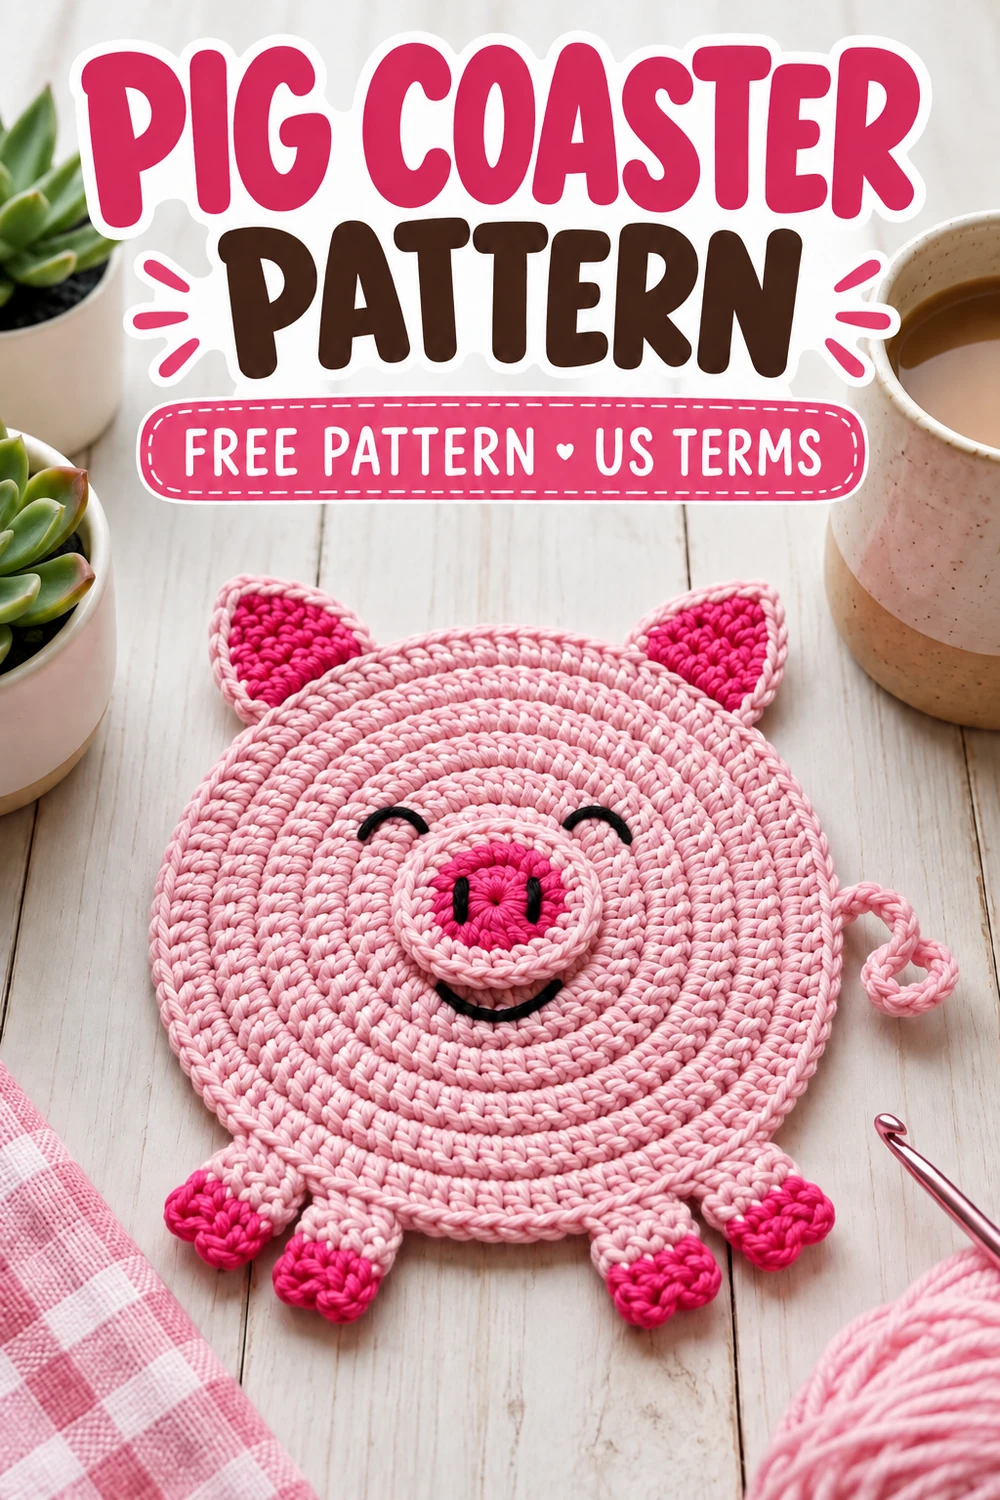
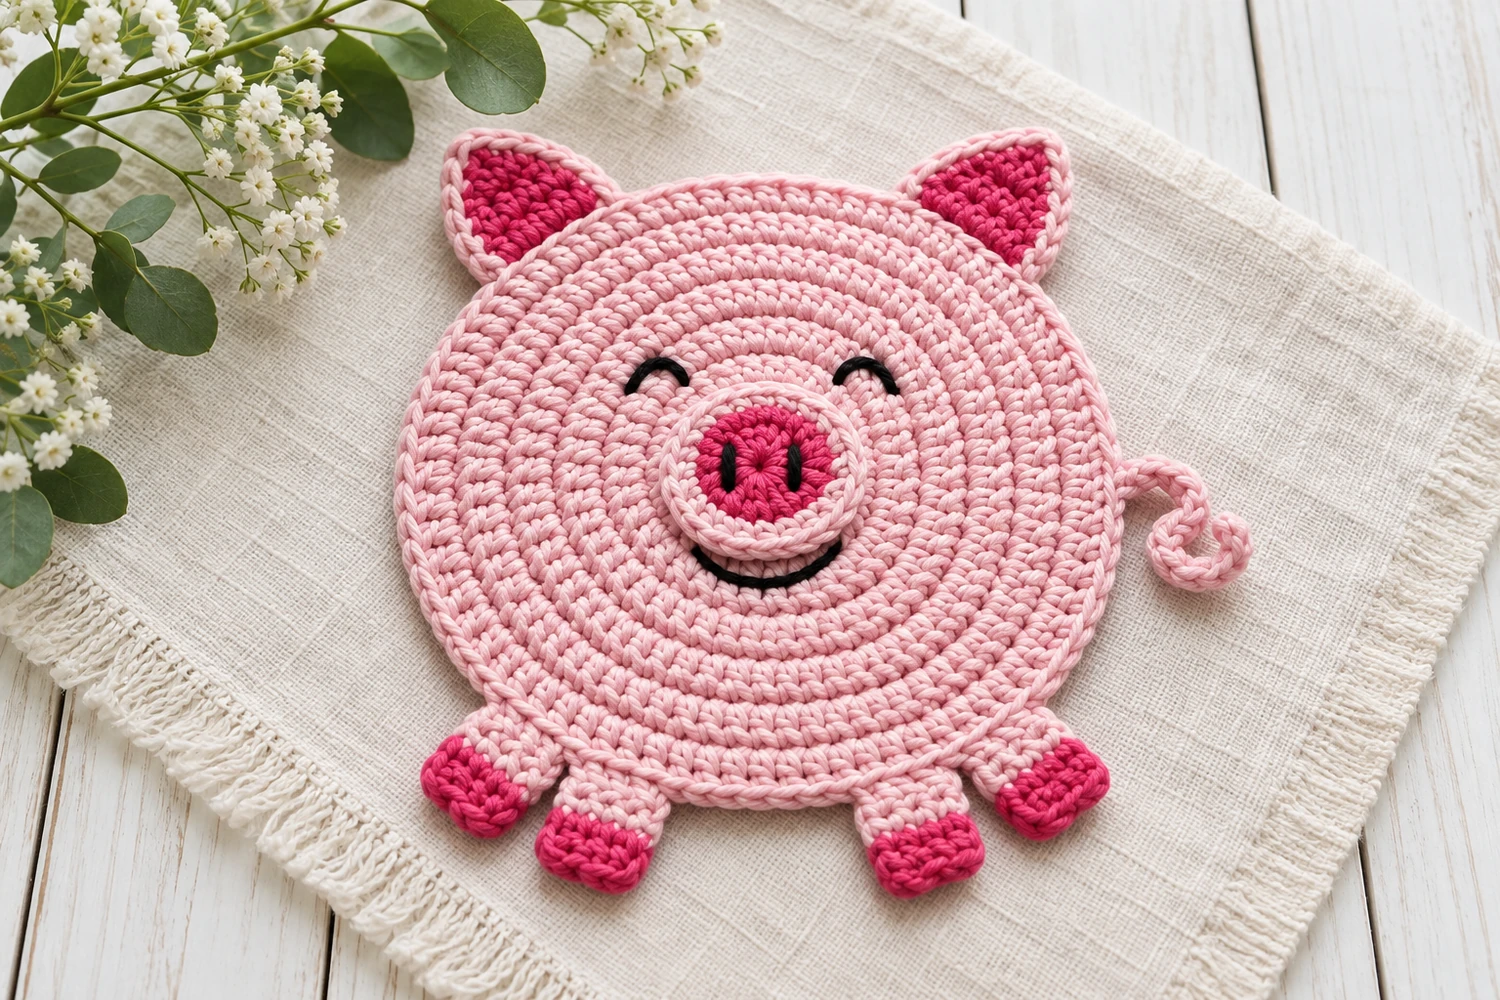
What I like about this crochet pig coaster pattern is how the two-tone snout gives a simple circle its character. Pointed ears and a curly tail finish the little pig face.
For a project intended to sit beneath a cup, I pay particular attention to the surface. A cute finish matters, but the mug also needs a level place to rest. This pattern uses embroidered eyes and an unstuffed snout to reduce bulk. You can also leave the center completely flat by embroidering the facial details instead.
The instructions below use US crochet terminology. You’ll crochet the circular base first, then make and attach the ears, snout, feet, and tail.
Pattern at a Glance
- Skill level: Confident beginner
- Crochet terms: US
- Construction: A flat circle worked in joined rounds, with separately attached details
- Yarn: Worsted-weight cotton in light pink and dark pink, plus black embroidery thread
- Hook: 4.0 mm, or the size needed for a flat, flexible fabric
- Finished size: Depends on yarn and tension; measure the completed base before attaching the details
This is a decorative mug rug with attached features. Before using it beneath a drink, check that the cup rests securely without rocking.
Materials for the Crochet Pig Coaster Pattern
- Light pink worsted-weight cotton yarn
- Dark pink worsted-weight cotton yarn
- Black embroidery thread or a small amount of fine black yarn
- 4.0 mm crochet hook
- Stitch marker
- Yarn needle
- Scissors
- Pins for positioning the pieces
- Measuring tape
Use cotton yarn suitable for the care routine you intend to follow. Check the yarn label before washing or blocking.
No stuffing is needed.
Abbreviations
- MR: Magic ring
- ch: Chain
- sc: Single crochet
- sl st: Slip stitch
- inc: Work 2 single crochets in the same stitch
- sc2tog: Single crochet 2 stitches together
- st / sts: Stitch / stitches
- RS: Right side
Numbers in parentheses give the stitch count at the end of a round or row.
Before You Begin
The base and snout are worked in joined rounds. At the end of each round, join with a slip stitch to the first single crochet.
The starting chain 1 and joining slip stitch do not count as stitches. Work the first stitch of each new round into the same stitch as the join, and avoid crocheting into the joining slip stitch.
The ears and feet are worked in rows. Chain 1 and turn between rows unless instructed otherwise.
Keep your tension comfortable. Very tight stitches can make a coaster stiff or cause the fabric to cup.
Check the Base as You Work
Lay the circle on a table every few rounds.
- If it cups upward, check your stitch count and try a slightly larger hook.
- If it develops waves, check for accidental extra stitches and consider a slightly smaller hook.
- If the outline looks slightly angular, gentle wet blocking may help soften it.
Blocking can improve the finish, but it will not reliably correct a major stitch-count or tension problem.
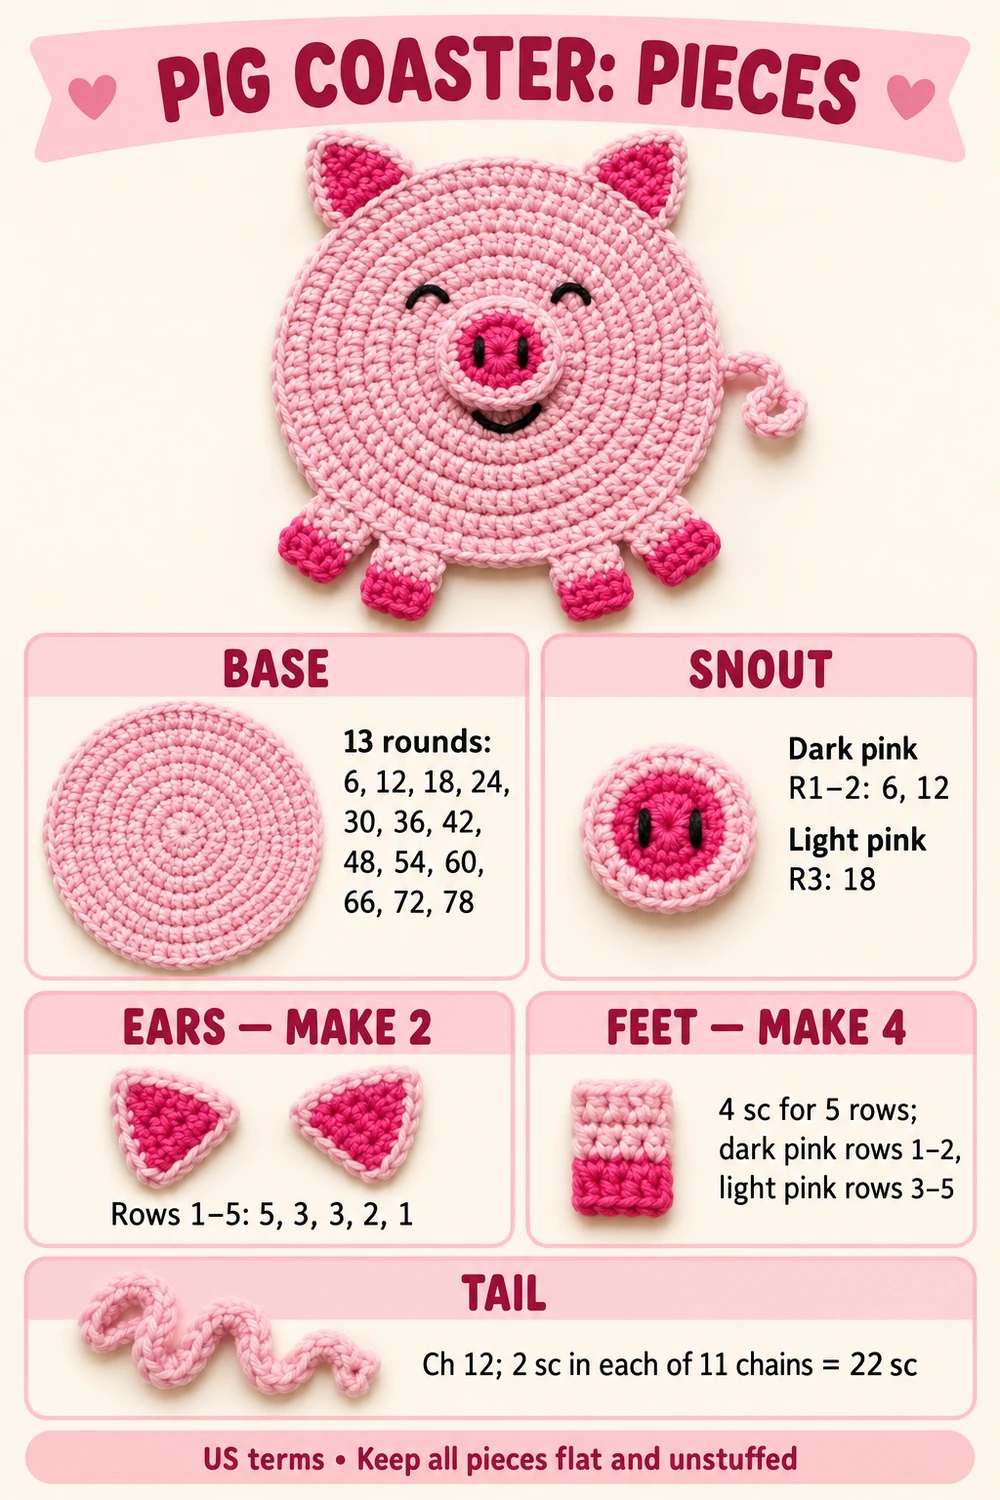
Crochet Pig Coaster Pattern: Circular Base
Using light pink yarn:
Round 1: Make a magic ring, ch 1, and work 6 sc into the ring. Tighten the ring and join. (6)
Round 2: Ch 1, inc in each st around. Join. (12)
Round 3: Ch 1, [sc in next st, inc in next st] 6 times. Join. (18)
Round 4: Ch 1, sc in next st, inc in next st, [sc in next 2 sts, inc in next st] 5 times, sc in last st. Join. (24)
Round 5: Ch 1, [sc in next 3 sts, inc in next st] 6 times. Join. (30)
Round 6: Ch 1, sc in next 2 sts, inc in next st, [sc in next 4 sts, inc in next st] 5 times, sc in last 2 sts. Join. (36)
Round 7: Ch 1, [sc in next 5 sts, inc in next st] 6 times. Join. (42)
Round 8: Ch 1, sc in next 3 sts, inc in next st, [sc in next 6 sts, inc in next st] 5 times, sc in last 3 sts. Join. (48)
Round 9: Ch 1, [sc in next 7 sts, inc in next st] 6 times. Join. (54)
Round 10: Ch 1, sc in next 4 sts, inc in next st, [sc in next 8 sts, inc in next st] 5 times, sc in last 4 sts. Join. (60)
Round 11: Ch 1, [sc in next 9 sts, inc in next st] 6 times. Join. (66)
Round 12: Ch 1, sc in next 5 sts, inc in next st, [sc in next 10 sts, inc in next st] 5 times, sc in last 5 sts. Join. (72)
Round 13: Ch 1, [sc in next 11 sts, inc in next st] 6 times. Join. (78)
Fasten off and weave in the ends.
The increases are staggered in alternate rounds to help soften the circle’s outline.
Measure the base and record its diameter. It should provide enough space for your chosen mug to rest securely.
Two-Tone Snout
Begin with dark pink yarn.
Round 1: Make a magic ring, ch 1, and work 6 sc into the ring. Tighten and join. (6)
Round 2: Ch 1, inc in each st around. Join. (12)
Change to light pink yarn.
Round 3: Ch 1, [sc in next st, inc in next st] 6 times. Join. (18)
Fasten off, leaving a long light pink tail for sewing.
Keep the snout flat and unstuffed. Embroider two short vertical nostrils in the dark pink center using black thread.
The snout is a separate flat appliqué. Sew it down without stuffing to keep the center as even as possible.
Pointed Ears — Make 2
Using dark pink yarn:
Row 1: Ch 6. Starting in the second chain from the hook, sc in each chain across. (5)
Row 2: Ch 1, turn. Sc2tog, sc in next st, sc2tog. (3)
Row 3: Ch 1, turn. Sc across. (3)
Row 4: Ch 1, turn. Sc2tog, sc in next st. (2)
Row 5: Ch 1, turn. Sc2tog. (1)
Fasten off.
Light Pink Border
With the RS facing you, join light pink yarn at a bottom corner.
Work sc evenly up the first side, placing approximately 1 sc in each row end. Work 3 sc at the tip, then sc evenly down the other side. Work 1 sc in each foundation stitch along the bottom edge.
Join to the first border stitch and fasten off, leaving a long sewing tail.
The border should lie flat. If it pulls inward, add a stitch where needed. If it ripples, reduce the number of stitches along the sides.
Flat Feet — Make 4
Begin with dark pink yarn.
Row 1: Ch 5. Starting in the second chain from the hook, sc across. (4)
Row 2: Ch 1, turn. Sc across. (4)
Change to light pink yarn.
Rows 3–5: Ch 1, turn. Sc across. (4)
Fasten off, leaving a long light pink tail for sewing.
Weave in the remaining ends. Keep each foot flat; do not stuff or fold it into a tube.
The dark pink end forms the hoof. The light pink end attaches to the base.
Curly Tail
Using light pink yarn:
Ch 12.
Starting in the second chain from the hook, work 2 sc in each chain across. (22)
Fasten off, leaving a long tail for sewing.
Gently guide the strip into a curl with your fingers. Keep it outside the area where the cup will rest.
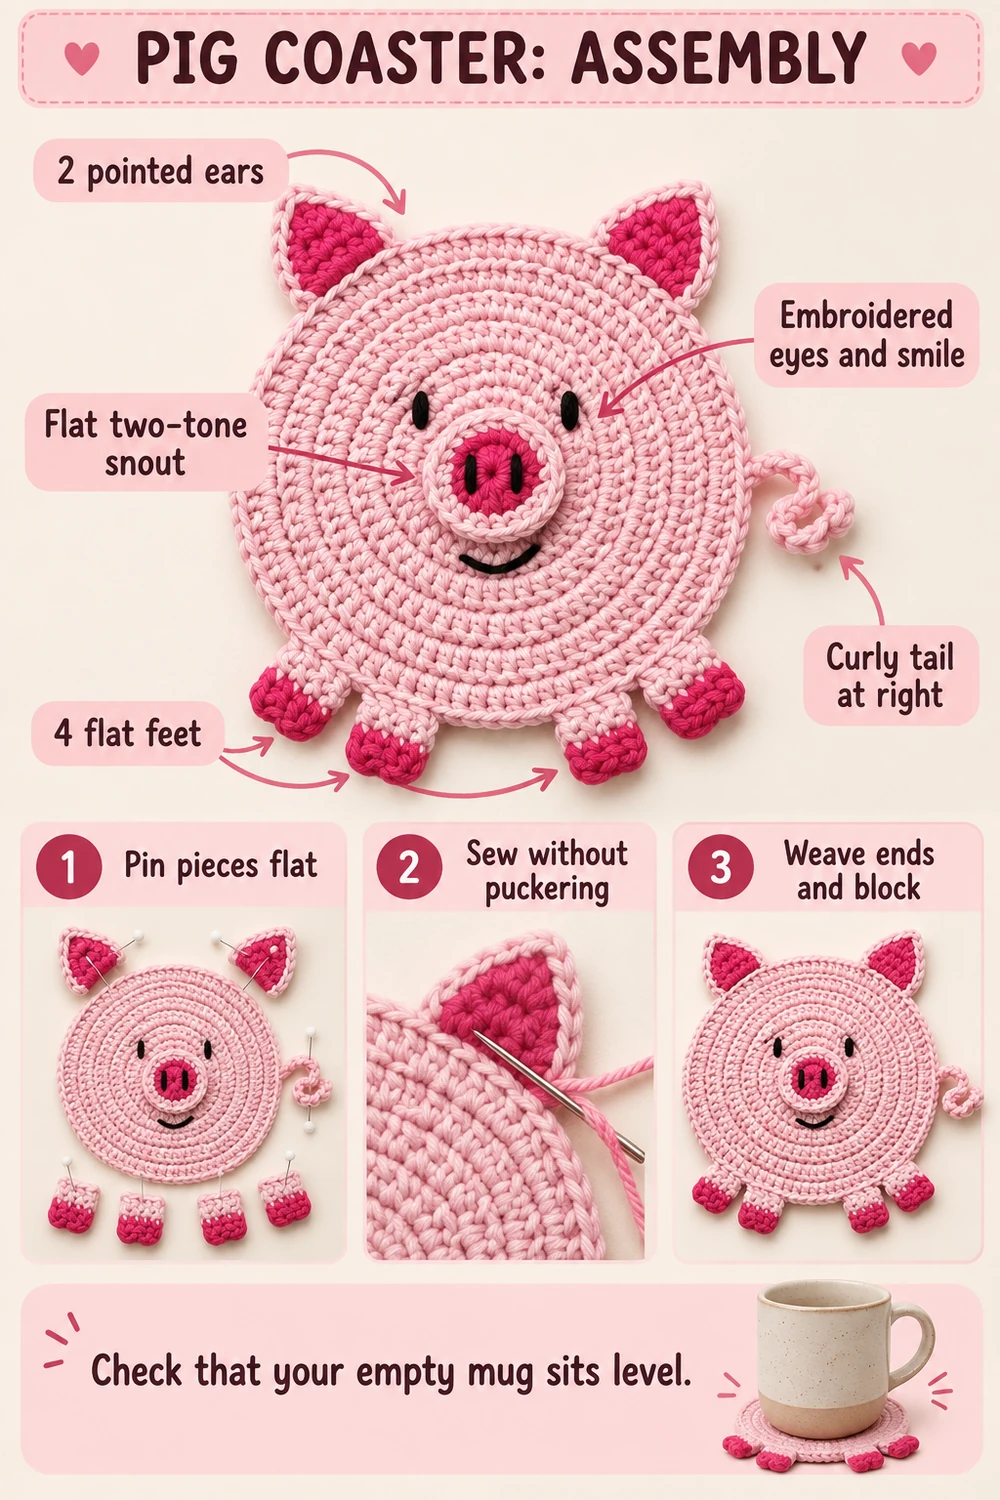
Crochet Pig Coaster Pattern Assembly
Place the base on a flat surface with the RS facing upward. Pin the pieces in position before sewing.
1. Position the Snout
Place the snout near the center of the base, adjusting its position to leave room for the eyes above and the smile below.
Sew around the light pink edge using small stitches. Catch the surface of the base where possible, and avoid pulling the sewing yarn tightly enough to pucker the circle.
2. Embroider the Eyes
Using black embroidery thread, make two small eyes above the snout, one on each side.
For an even placement, count the same number of stitches outward from the center on both sides. Add a short eyelash above each eye if desired.
Embroidered eyes keep the surface flatter than plastic safety eyes.
3. Add the Smile
Embroider a small curved smile beneath the snout. Use several short stitches to form the curve without leaving a long loose strand.
4. Attach the Ears
Position the ears along the upper edge, approximately at the 10 o’clock and 2 o’clock positions.
Overlap the bottom edge of each ear slightly onto the base. Sew securely across the bottom and at both corners.
5. Attach the Feet
Arrange the four feet along the lower edge, with two on each side of the center.
Let the dark pink hooves extend beyond the circle. Overlap the light pink ends onto the base and sew them flat in place.
Check that the feet do not fold underneath the mug rug.
6. Attach the Tail
Sew the tail to the right-hand outer edge, approximately at the 3 o’clock position.
Secure the attachment with several small stitches. Let the curl extend outward instead of underneath the base.
7. Finish the Back
Weave in all remaining ends securely. Trim only after the ends have been worked through several stitches.
Check the back for bulky knots or loose yarn loops.
Blocking and Final Check
If the yarn label permits wet blocking:
- Dampen the finished piece.
- Gently press out excess water without wringing.
- Lay it flat on a towel.
- Shape the circle and straighten the attached pieces.
- Allow it to dry completely.
Place an empty mug on the dry mug rug and check its stability. If the mug rocks on the snout or other details, use the piece as a decorative mat or make the flat-face variation below.
Flat-Face Variation
For a more even resting surface, omit the separate snout.
Instead, embroider a small dark pink oval directly onto the base using short stitches. Add two black nostrils, embroidered eyes, and a smile.
Keep the embroidery thin and avoid building up thick layers of thread.
You can keep the ears, feet, and tail because they extend beyond the circular base.
Color Ideas for the Crochet Pig Coaster Pattern
- Light pink with raspberry details for a look similar to the reference image
- Cream with dusty rose details for a softer palette
- Pale peach with coral details for a warmer version
Choose contrasting colors for the snout and hooves so the small features remain easy to see.
Care Instructions
Follow the yarn manufacturer’s washing instructions.
If hand washing is appropriate, use cool water and a small amount of mild detergent. Gently press out excess water, reshape the piece, and dry flat.
Avoid scrubbing the embroidered face or pulling the tail. Let the mug rug dry fully before using it again.
Crochet Pig Coaster Pattern FAQ
Is this crochet pig coaster pattern suitable for beginners?
It is suitable for confident beginners who can work single crochet, increases, decreases, and slip stitches. The facial embroidery and assembly require a little patience.
Why does my circular base curl?
First, check the stitch count and make sure you have not skipped an increase. If the count is correct, your tension may be too tight for the hook size. Try a slightly larger hook and check the fabric again.
Can I use acrylic yarn?
You can use acrylic for a decorative version. For everyday use with drinks, cotton is a practical starting point. Always follow the yarn’s care instructions and check that the finished piece suits your intended use.
Can I use safety eyes?
This pattern uses embroidery for a flatter surface. Plastic eyes can create hard bumps beneath a cup.
How big will the finished mug rug be?
The size depends on your yarn, hook, and tension. Measure the finished base rather than relying on a fixed diameter.
Can I make the base larger?
Yes. Continue adding 6 stitches per round, increasing the number of single crochets between increases by 1 each round. Keep checking that the fabric lies flat.
A larger base will change the proportions of the face and attached pieces.
Can I make it without the attached snout?
Yes. Use the flat-face variation to embroider the snout directly onto the circle.
More Small Crochet Projects
If you enjoy making animal details, try the Cute Flat Bee Appliqué Crochet Pattern.
For another small accessory, browse the Crochet Amigurumi Bag Keychain.
Save This Crochet Pig Coaster Pattern
If you make this pink pig mug rug, share your finished piece and mention the yarn and hook you used. Those details are helpful for other crocheters comparing colors, proportions, and finished sizes.
Save this crochet pig coaster pattern to Pinterest so you can find it when you’re ready to make another.
Pinterest Pins and Assembly Diagrams