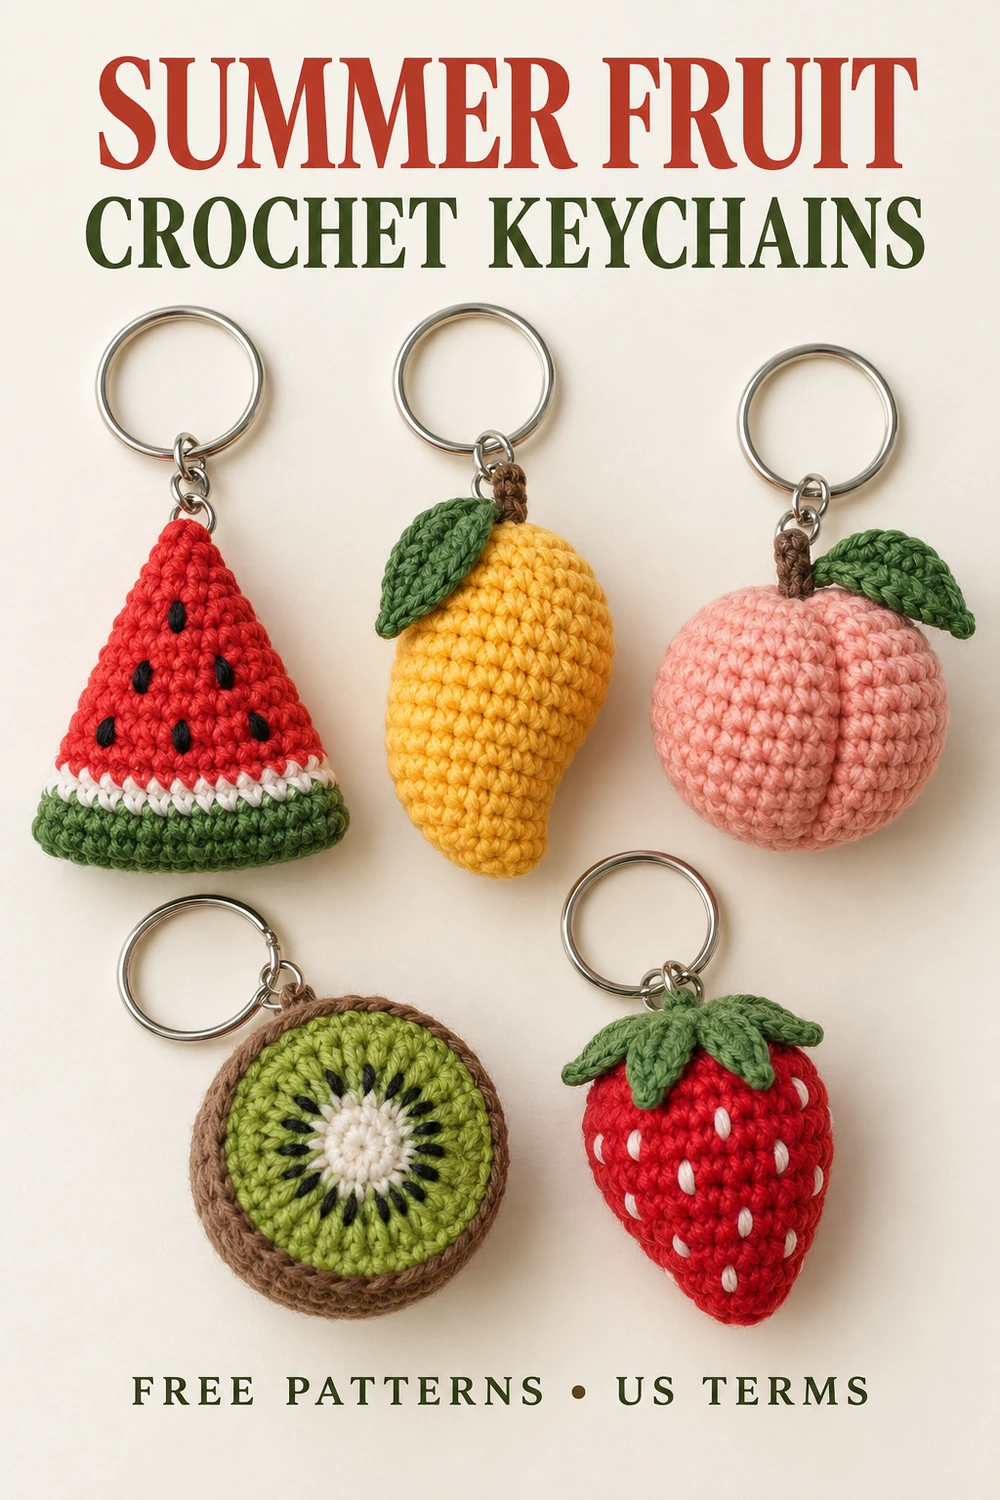
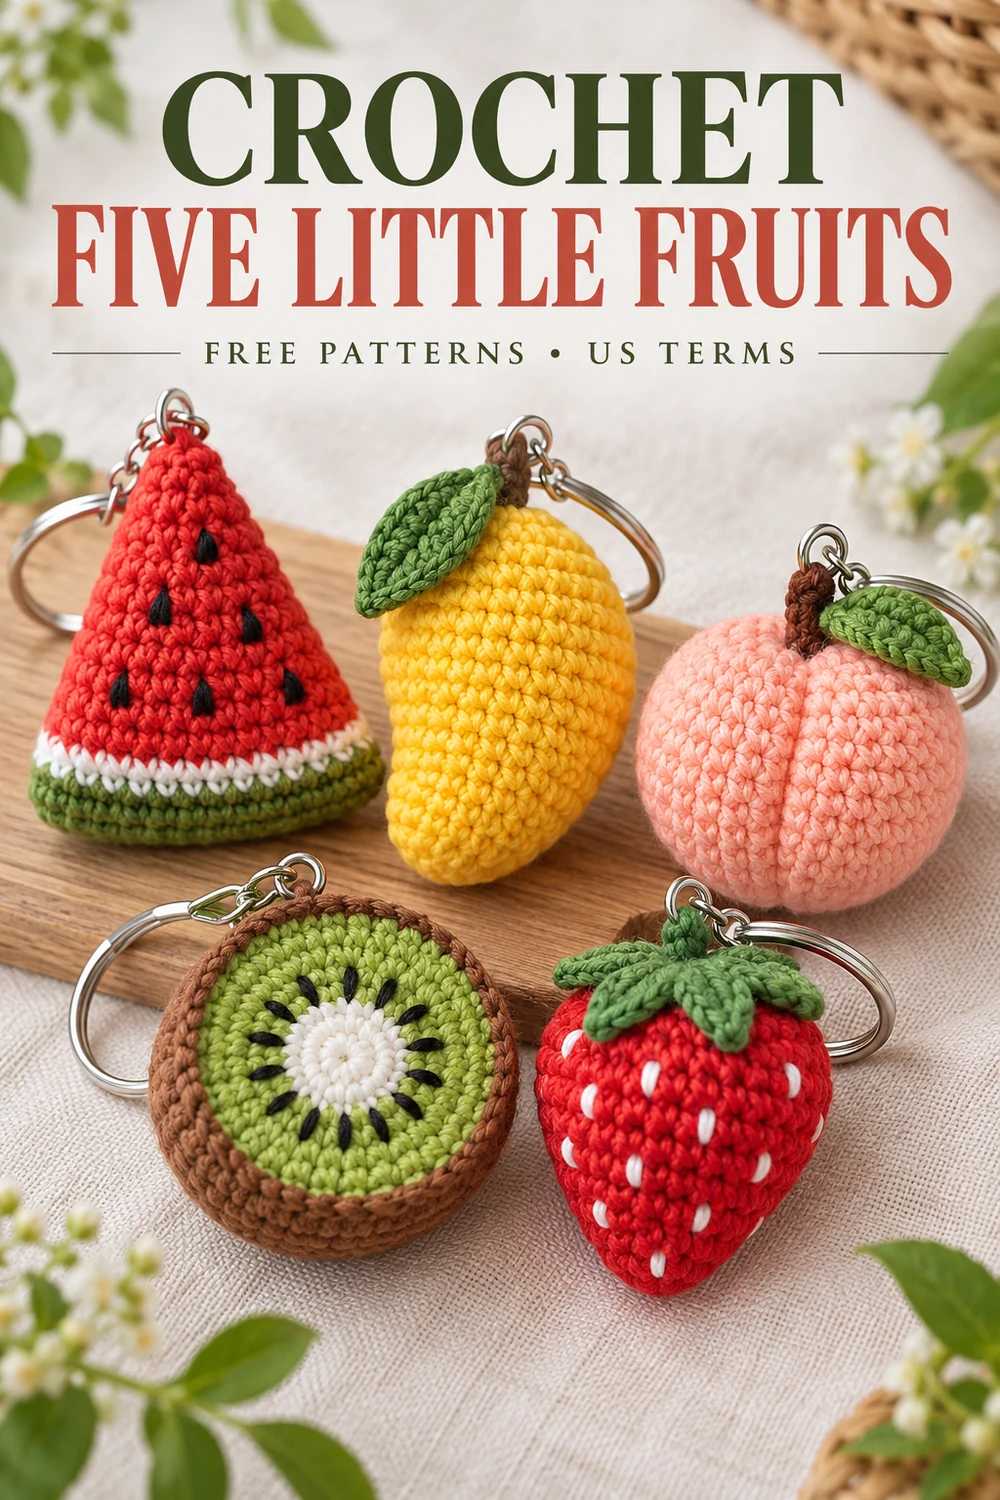
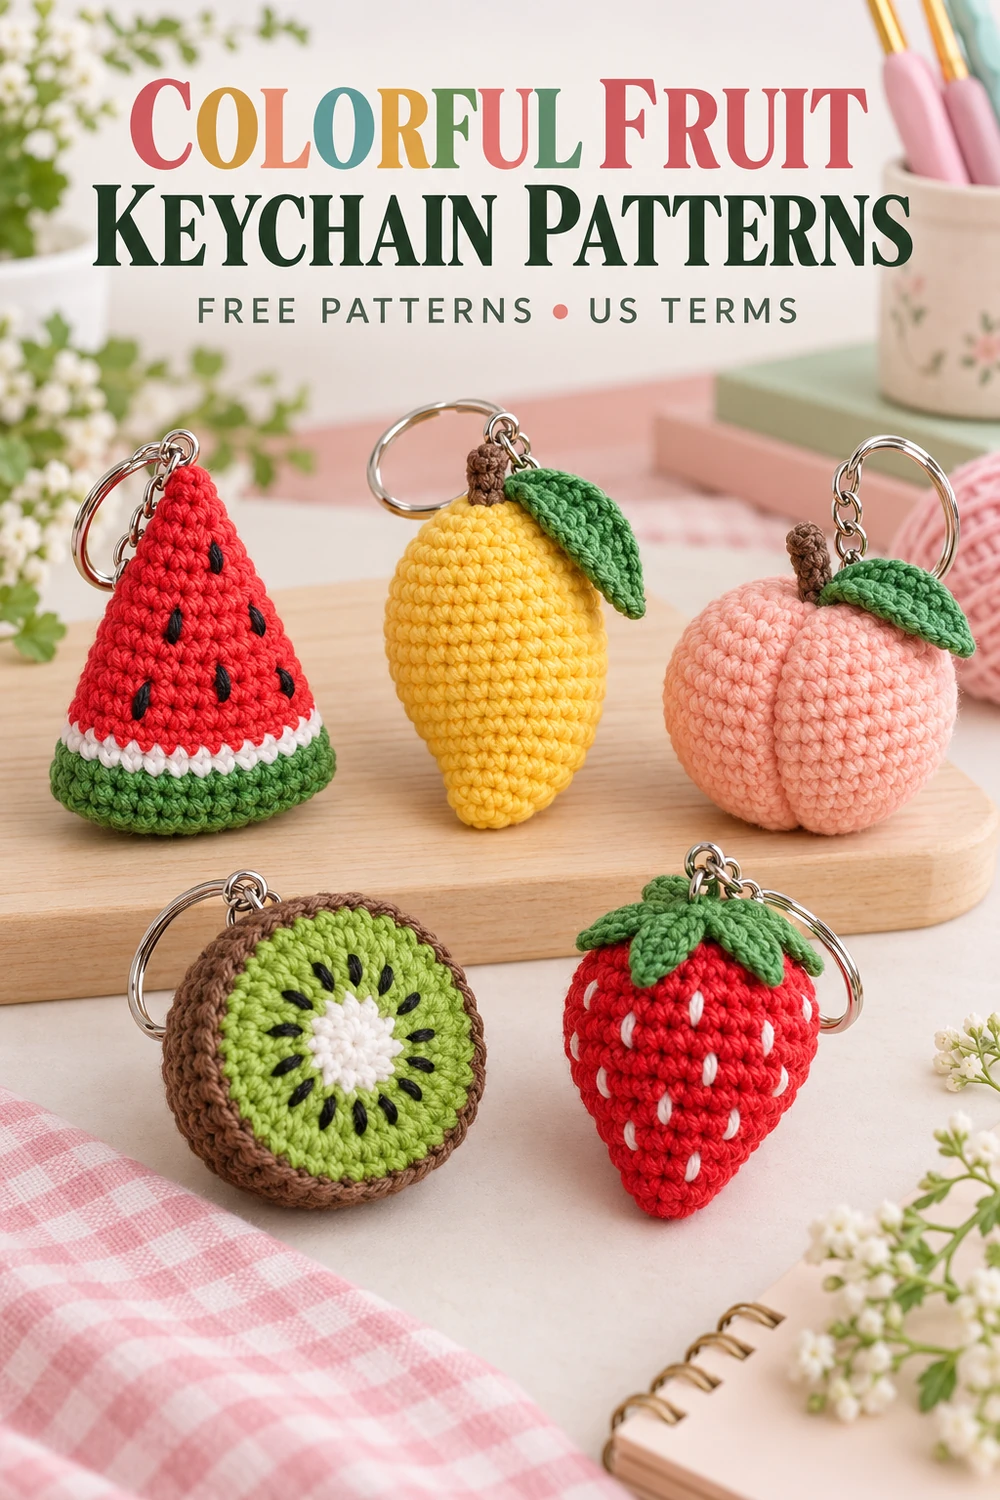
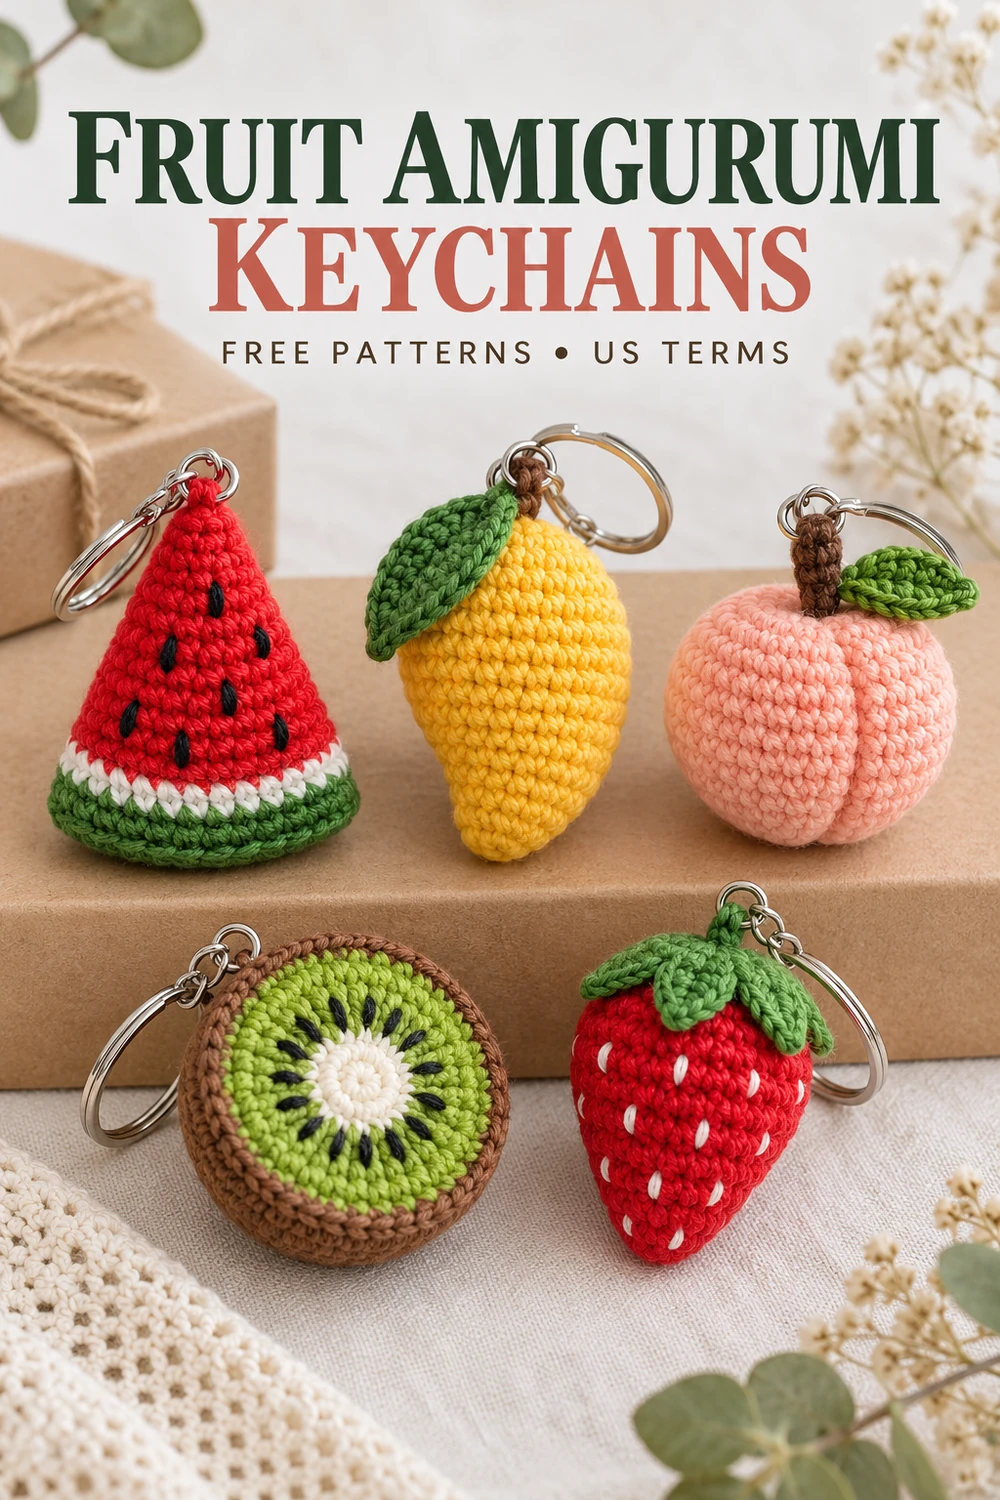
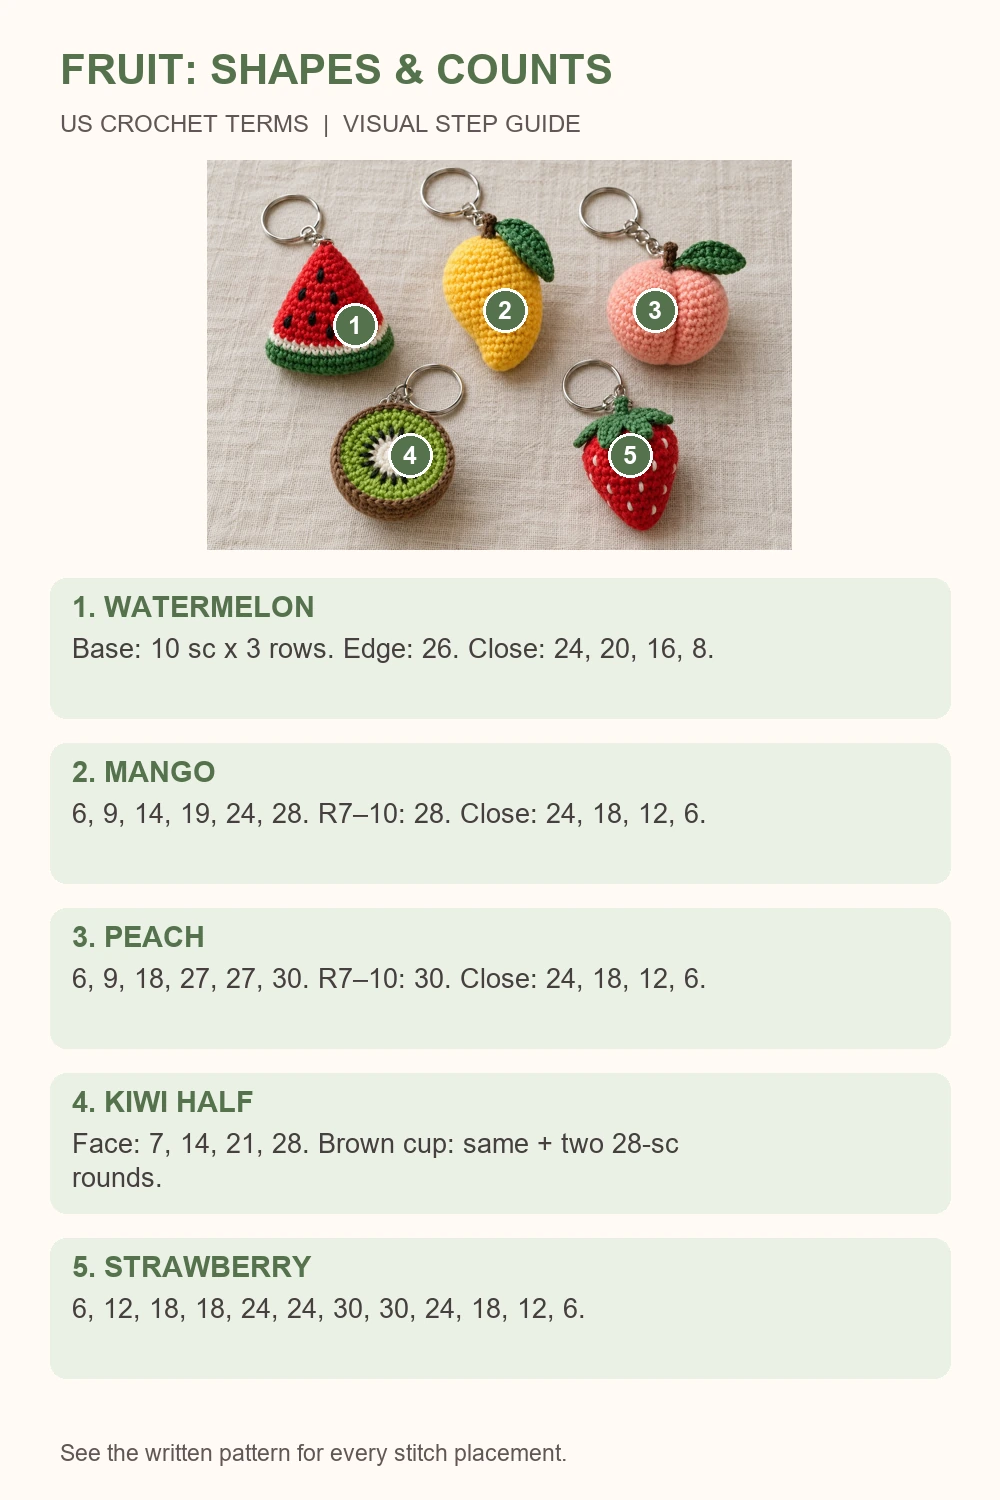
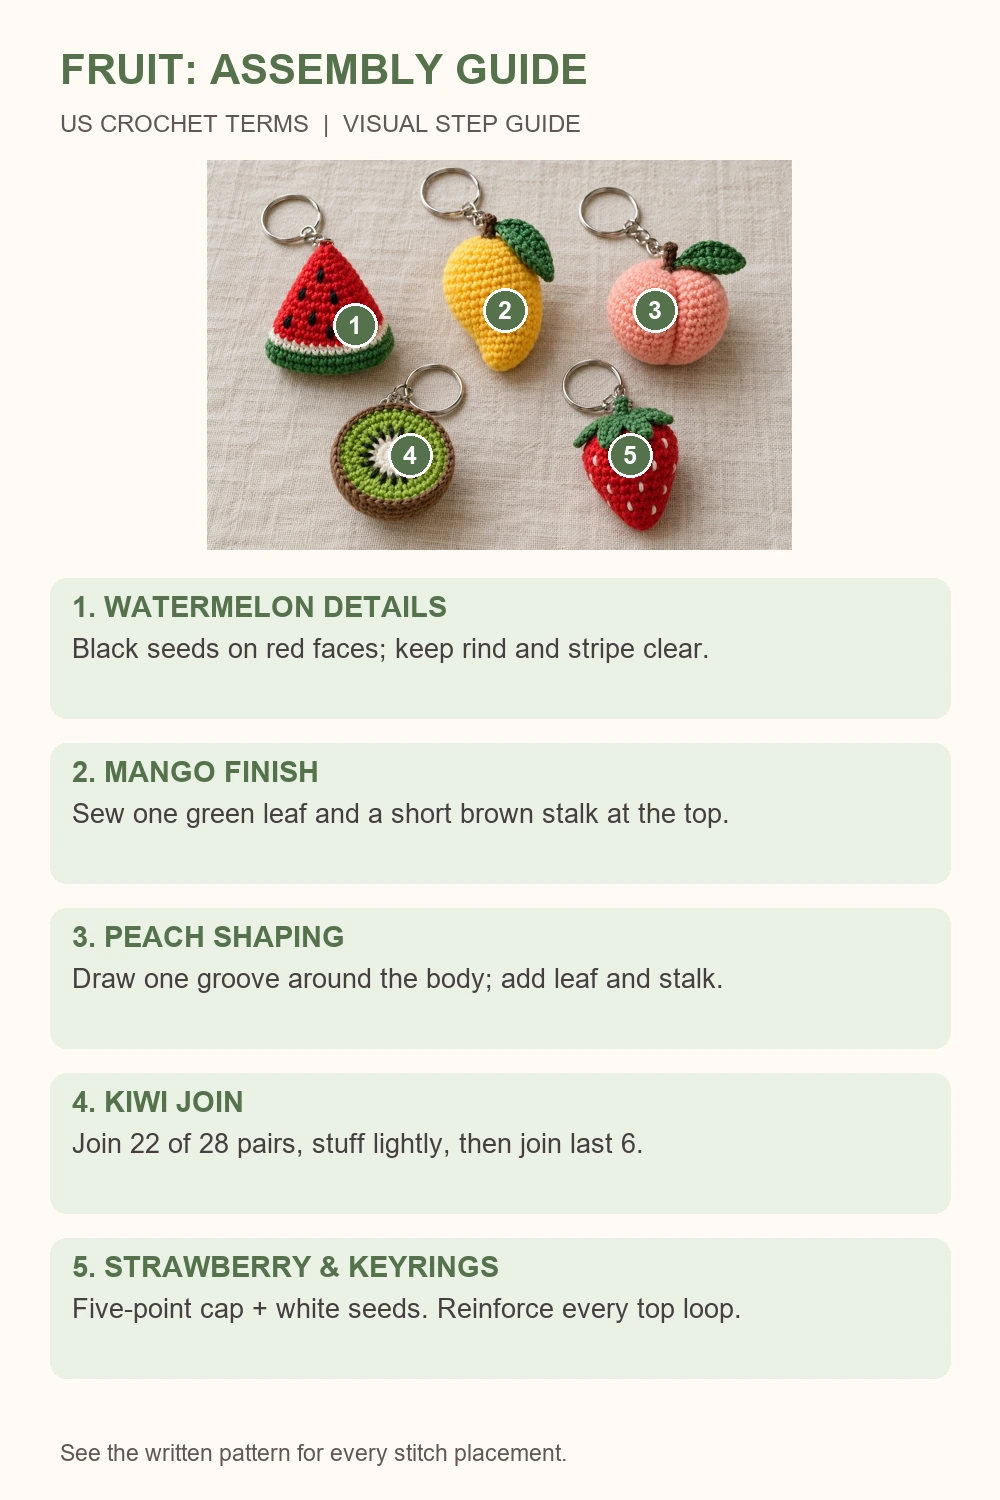
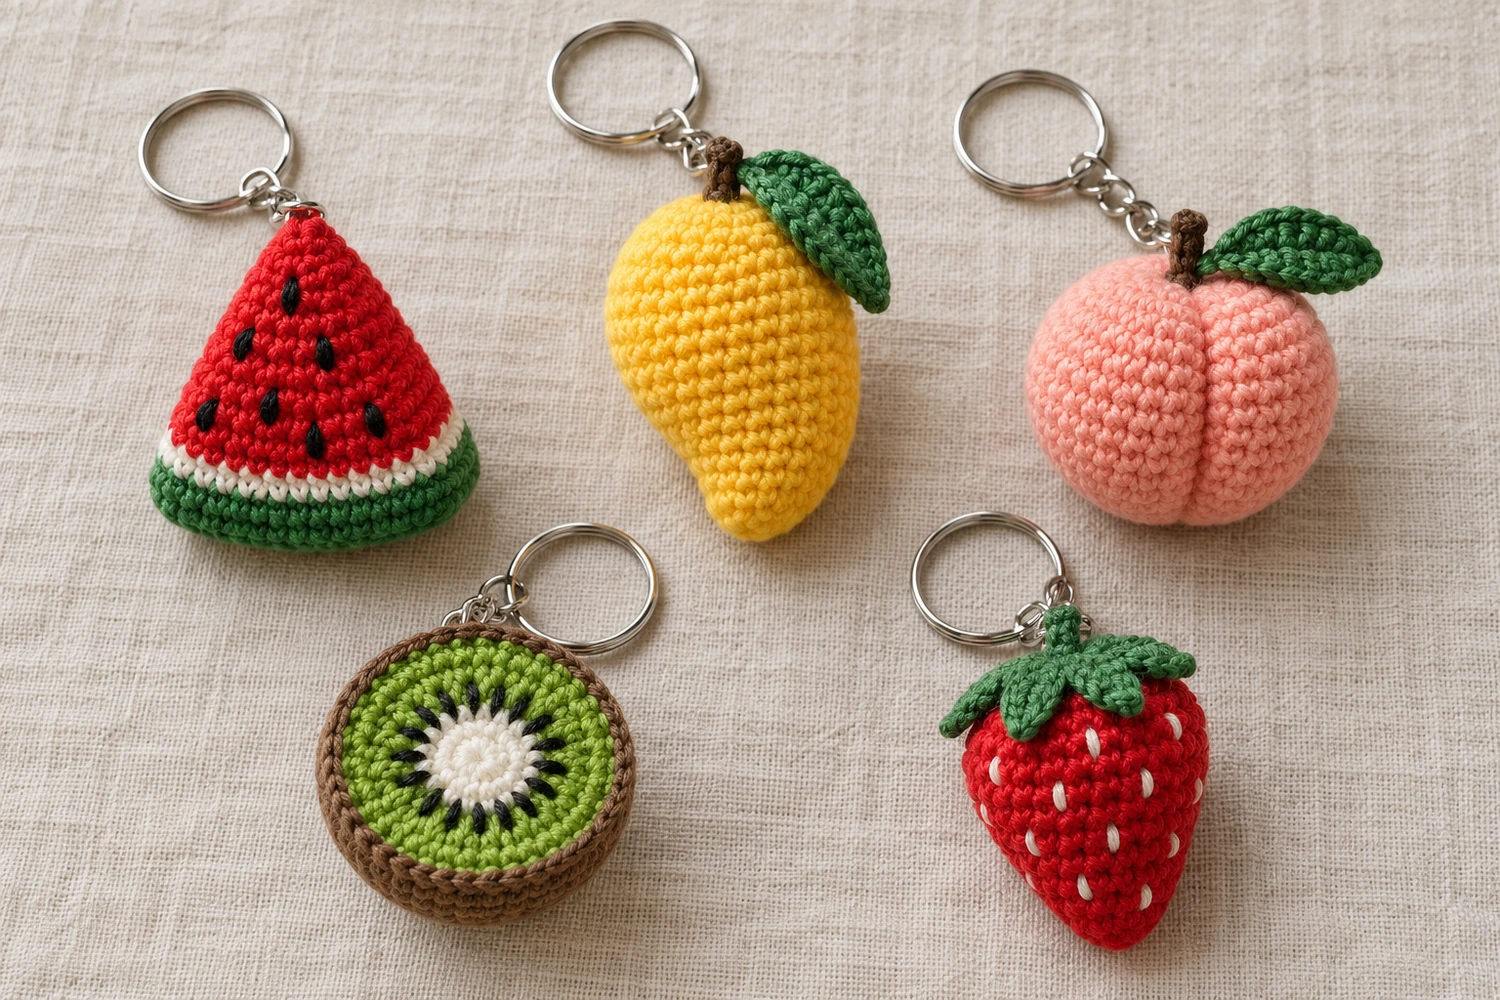
These summer fruit crochet keychains turn five familiar fruits into colorful bag charms: a watermelon slice, a yellow mango, a pink peach, a kiwi half and a red strawberry. I like this combination because each fruit has its own shape, yet the matching cotton texture ties the set together.
The finishing details make a real difference at this scale. Leave the watermelon rind visible, space the kiwi seeds around its white center and shape the peach groove before attaching the leaf. Small embroidered details keep the pieces recognizable without adding bulky parts.
Choose one fruit or follow all five free patterns below. These summer fruit crochet keychains use US crochet terminology, with stitch counts for every round and two diagrams at the end.
Project Details
- Level: Confident beginner to intermediate.
- Terms: US crochet terms.
- Size: Small bag charms; dimensions depend on your yarn and hook.
- Construction: Continuous rounds, except the watermelon’s flat base and the kiwi’s joined inner face.
Materials for Summer Fruit Crochet Keychains
- Fine cotton yarn in green, white, red, yellow, peach or pink, and brown.
- Black embroidery thread for watermelon and kiwi seeds; white thread for strawberry seeds.
- Approximately 2–2.5 mm hook as a starting point; adjust for dense fabric.
- Fiberfill, stitch marker, tapestry needle, scissors, and keyrings with short chains or clasps.
Abbreviations — US Terms
MR = magic ring; ch = chain; sc = single crochet; hdc = half double crochet; dc = double crochet; sl st = slip stitch; inc = 2 sc in one stitch; dec = invisible decrease across the front loops of the next 2 stitches; st(s) = stitch(es). Bracketed numbers show completed stitch totals.
Summer Fruit Crochet Keychains: Pattern Notes
Use a marker for the start of every continuous round. Do not join or turn unless directed. Beginning ch 1 and joining slip stitches do not count as stitches. Change color on the final yarn-over of the preceding stitch. Secure color tails inside the piece. Stuff gradually before the opening becomes too small; leave enough flexibility to shape the fruit.
Standard closure: Fasten off with a tail, pass it through the front loops of all remaining stitches, pull closed, secure, and bury the end.
Watermelon Slice
Green Rectangular Base
Ch 11. Row 1: Starting in the second chain from the hook, sc in each chain. [10] Rows 2–3: Ch 1, turn, sc in each stitch. [10 per row]
Build the Slice
Round 4: Ch 1 without turning. Work 3 sc along the short row-end edge (one per row), 10 sc along the unused loops of the foundation chain, 3 sc along the opposite row-end edge, then 10 sc across the top row. [26] Do not add separate corner stitches. Mark the first stitch and continue in a spiral.
- Round 5: 26 sc in green. [26]
- Round 6: Change to white; 26 sc. [26]
- Rounds 7–10: Change to red for Round 7, then sc around in red. [26 per round]
- Round 11: dec, 11 sc, dec, 11 sc. [24]
- Round 12: (4 sc, dec) × 4. [20]
- Round 13: (3 sc, dec) × 4. [16] Add stuffing and flatten the broad sides gently.
- Round 14: dec × 8. [8] Close using the standard closure.
Embroider 6–7 small black seed stitches on each visible red face. Keep the white stripe and green base clear. Shape the closed red end into a soft point with your fingers.
Mango — Yellow
- Round 1: 6 sc in MR. [6]
- Round 2: (sc, inc) × 3. [9]
- Round 3: 2 sc, inc × 5, 2 sc. [14]
- Round 4: 2 sc, (sc, inc) × 5, 2 sc. [19]
- Round 5: 2 sc, (2 sc, inc) × 5, 2 sc. [24]
- Round 6: (5 sc, inc) × 4. [28]
- Round 7: 28 sc. [28]
- Round 8: 28 sc. [28]
- Round 9: 28 sc. [28]
- Round 10: 28 sc. [28]
- Round 11: (5 sc, dec) × 4. [24]
- Round 12: (2 sc, dec) × 6. [18] Add stuffing.
- Round 13: (sc, dec) × 6. [12]
- Round 14: dec × 6. [6] Close.
The concentrated increases in Rounds 3–5 make one side fuller. Keep the right side of the fabric facing outward and shape the mango into a slightly curved oval. Add a green leaf at the closed end. For the short brown stalk, ch 4; starting in the second chain from the hook, work sl st, sc, sc. Fasten off with a tail and sew beside the leaf.
Green Leaf — For Mango and Peach
Ch 6. Starting in the second chain from the hook, work sc, hdc, dc, hdc, then (sc, ch 2, sc) in the final chain. Rotate to work along the unused side of the foundation chain: hdc, dc, hdc, sc in the next four chains. Sl st to the first sc. [10 stitches plus the ch-2 tip] Fasten off with a sewing tail.
Peach — Peach or Pink
- Round 1: 6 sc in MR. [6]
- Round 2: (sc, inc) × 3. [9]
- Round 3: inc × 9. [18]
- Round 4: (sc, inc) × 9. [27]
- Round 5: 27 sc. [27]
- Round 6: (8 sc, inc) × 3. [30]
- Round 7: 30 sc. [30]
- Round 8: 30 sc. [30]
- Round 9: 30 sc. [30]
- Round 10: 30 sc. [30]
- Round 11: (3 sc, dec) × 6. [24]
- Round 12: (2 sc, dec) × 6. [18] Add stuffing.
- Round 13: (sc, dec) × 6. [12]
- Round 14: dec × 6. [6] Close, leaving a long shaping tail.
Shape and Add the Stalk
Pass the long tail through the body from the closed top to the initial MR at the bottom. Bring the yarn up around one outside side and insert it through the top again. Pull gently to form a single groove, then secure and bury the tail. With brown, ch 4; starting in the second chain from the hook work sl st, sc, sc. Fasten off and sew the stalk and one green leaf to the top beside the groove.
Kiwi Half
Inner Face — Joined Rounds
Join every round with a sl st to its first sc. Begin subsequent rounds with ch 1; neither the chain nor join counts as a stitch.
- Round 1: With white, 7 sc in MR; join. [7]
- Round 2: With white, inc × 7; join, changing to green. [14]
- Round 3: With green, (sc, inc) × 7; join. [21]
- Round 4: With green, (sc, inc, sc) × 7; join. [28]
Fasten off. Embroider short black radial seed stitches around the white center, keeping them inside the green ring.
Brown Outer Cup — Continuous Rounds
- Round 1: 7 sc in MR. [7]
- Round 2: inc × 7. [14]
- Round 3: (sc, inc) × 7. [21]
- Round 4: (sc, inc, sc) × 7. [28]
- Round 5: 28 sc. [28]
- Round 6: 28 sc. [28]
Join the Kiwi
Keep the brown cup right side out. Place the green face over its opening with the seed embroidery facing up. With brown, work 1 sc through each matching pair of edge stitches. Join 22 pairs, add a small amount of stuffing, then join the last 6 pairs. [28 joining sc] Do not crochet into the inner face’s slip-stitch join or starting chain. Sl st to the first joining sc, fasten off, and hide the ends.
Strawberry — Red
Start at the pointed bottom and work toward the leafy top.
- Round 1: 6 sc in MR. [6]
- Round 2: inc × 6. [12]
- Round 3: (sc, inc) × 6. [18]
- Round 4: 18 sc. [18]
- Round 5: (2 sc, inc) × 6. [24]
- Round 6: 24 sc. [24]
- Round 7: (3 sc, inc) × 6. [30]
- Round 8: 30 sc. [30]
- Round 9: (3 sc, dec) × 6. [24]
- Round 10: (2 sc, dec) × 6. [18] Add stuffing.
- Round 11: (sc, dec) × 6. [12]
- Round 12: dec × 6. [6] Close.
Five-Point Green Top
Make an MR. Repeat 5 times: ch 4; starting in the second chain from the hook, work sl st, sc, sc along the chain; sl st into the MR. Pull the ring closed and leave a sewing tail. [5 pointed leaves] Sew the center over the strawberry’s final closure and tack each leaf down near its base. Embroider small white seed stitches spaced over the red body.
Finish Your Summer Fruit Crochet Keychains
Make a small loop with yarn held double: ch 6, fasten off with two long tails, then sew both ends securely through several firm body stitches at the top of each fruit: the red point of the watermelon, the leafy top of the mango or peach, the brown rim of the kiwi, and the green top of the strawberry. Reinforce through the body stitches beneath any sewn leaf rather than attaching only to its loose tip. Connect the clasp or short chain to the loop, secure the ends, and check with a gentle pull. These summer fruit crochet keychains have small metal parts and are decorative accessories, not baby toys.
Summer Fruit Crochet Keychains: Troubleshooting
- Watermelon count does not match: Round 4 has 26 stitches. Round 11 uses all 26 and produces 24; check both groups of 11 sc.
- Fruit is lumpy: Add smaller amounts of stuffing and massage the shape before closing.
- Kiwi face will not fit: Both joining edges must have 28 sc; exclude chains and joining slip stitches.
- Color stripe puckers: Relax the color-change tension and secure tails without pulling the fabric.
Summer Fruit Crochet Keychains FAQ
Can I use leftover yarn?
Yes. Use matching weights within each fruit so color changes and sewn parts stay proportional.
Can I use thicker yarn?
Yes, with an appropriate hook. The finished fruit will be larger and may work better as a bag charm.
Can these be decorations?
Omit the metal hardware and use the finished fruits as small display pieces. Avoid loose hardware on items intended for small children.
How do I keep the set looking consistent?
Use the same yarn weight and hook throughout your summer fruit crochet keychains. Fill each body gradually so the stitches remain compact, and check the hardware loops before securing the ends.
How should I clean the keychains?
Follow the yarn label and consider the metal hardware. Spot cleaning can be convenient for a bag charm; let the stuffing dry completely before using it again.
More Free Crochet Patterns
Save This Pattern
Save these Summer Fruit Crochet Keychains to your Pinterest crochet board for your next colorful handmade set. Happy crocheting from Lovely Amigurumi!
Pinterest Pins and Crochet Diagrams