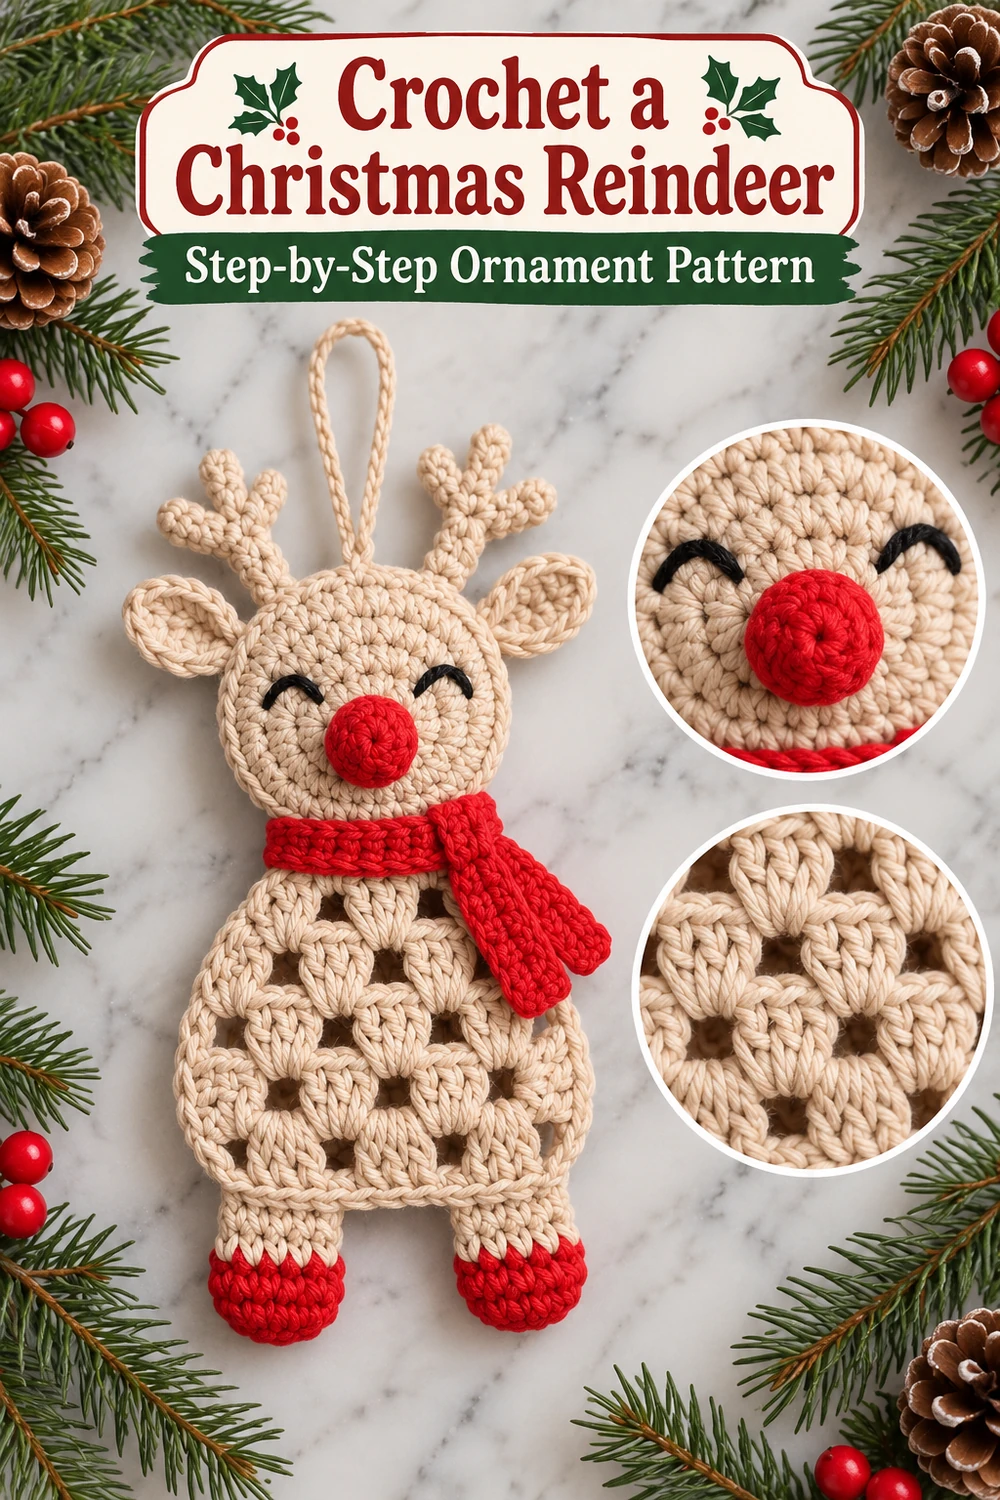
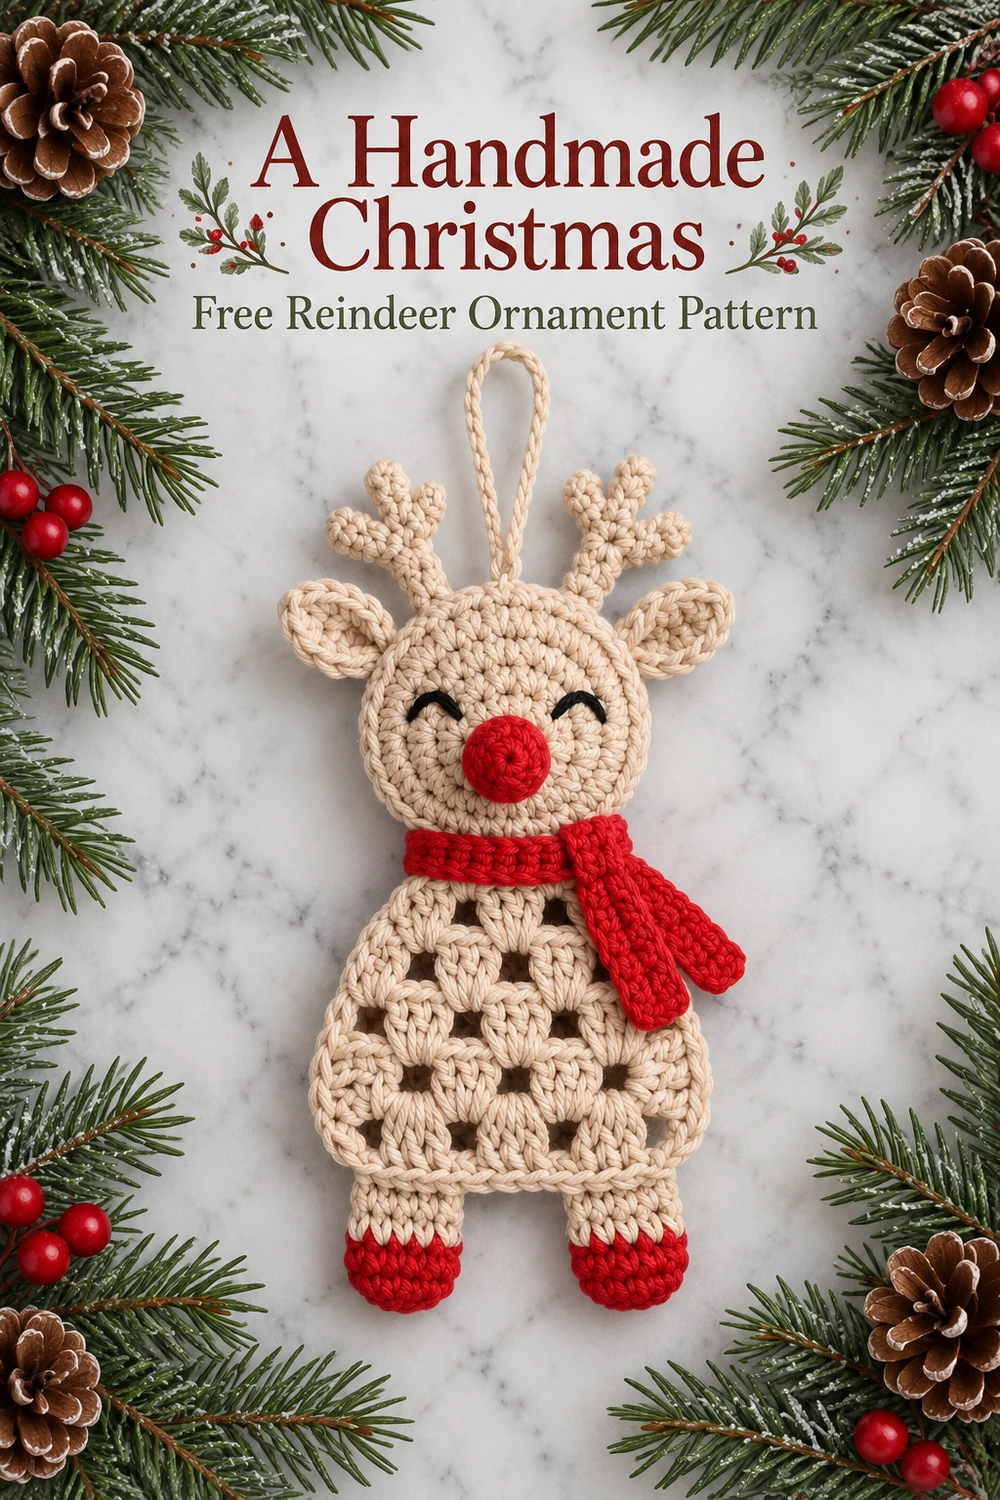
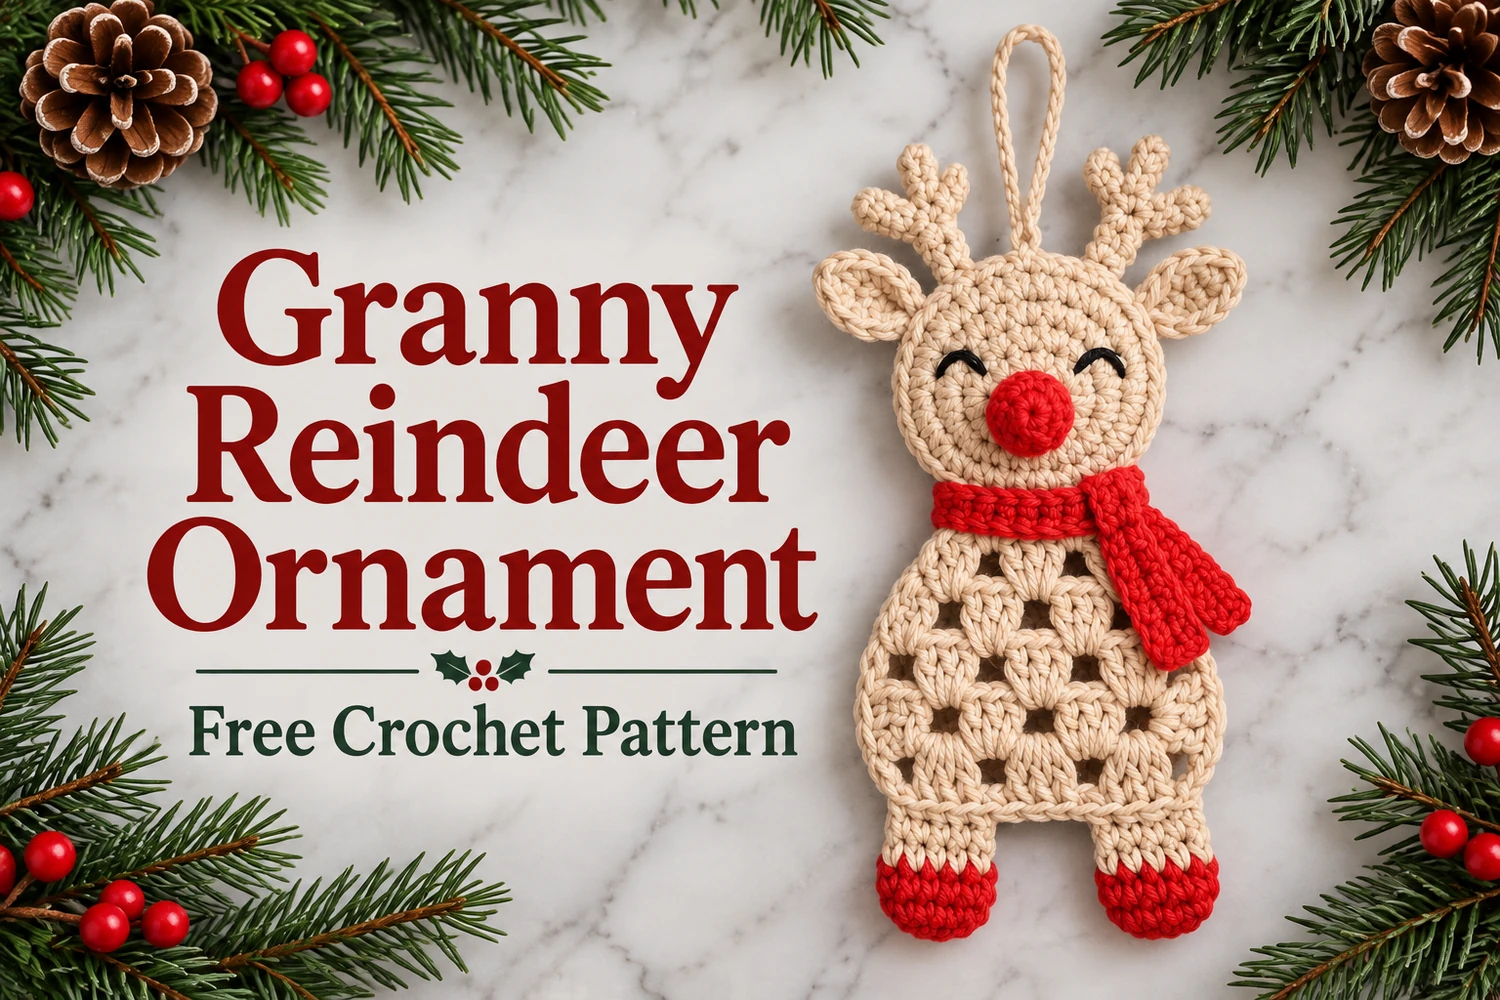
This Granny Reindeer Ornament Crochet Pattern combines an openwork beige body, a round sleepy face, a bright red nose, and a matching scarf and hooves. Small branching antlers, oval ears, and a simple hanging loop complete the flat Christmas decoration shown in the reference.
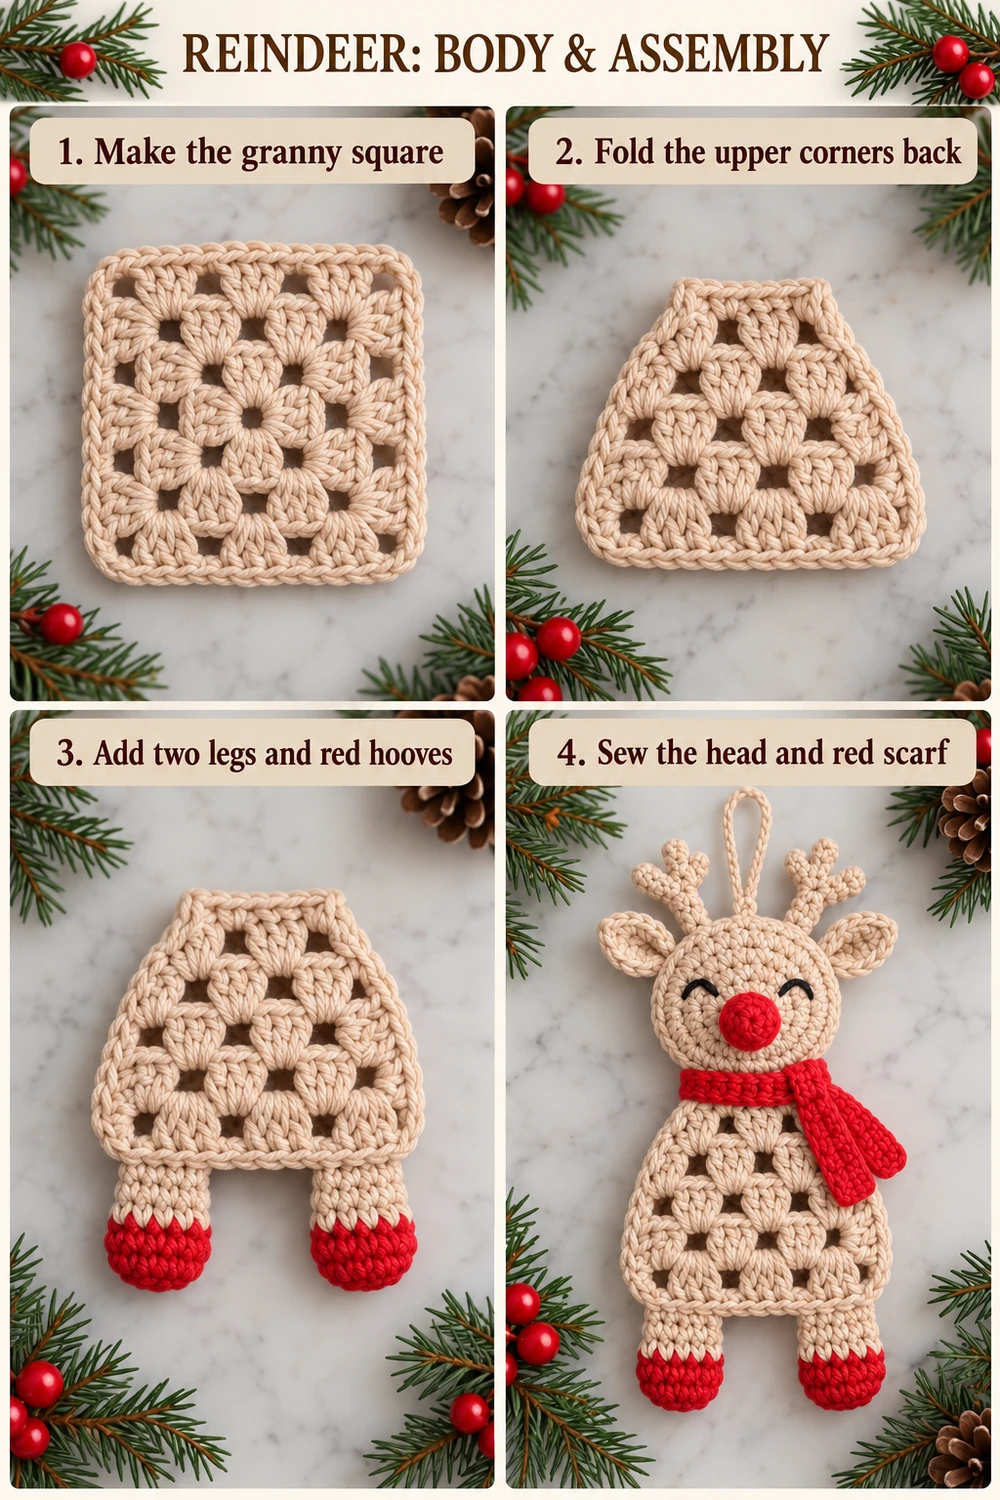
Make the body from a small granny square, fold its upper corners behind the neck, then add the separate head and two legs. The folds give the body a gently flared outline while preserving the airy three-double-crochet groups.
Pattern Information
- Skill level: confident beginner to intermediate, including joining and small-piece sewing.
- Terminology: US crochet terms.
- Estimated height: 22–26 cm excluding the hanging loop with DK cotton and a 2.5–3 mm hook. Actual size depends on tension.
- Construction: flat granny body and head, separate ears and antlers, two flat legs, and an unstuffed raised nose.
- Colors: natural beige, bright red, and black embroidery thread.
This is an image-inspired adaptation. Stitch totals have been reviewed, but the design has not been physically crocheted or independently tested. Follow the written instructions for the exact construction; the photos illustrate the intended appearance.
Materials
- DK cotton yarn: approximately 35–45 g beige and 10–15 g red.
- 2.5–3 mm crochet hook.
- Black embroidery thread or fine black yarn for the closed eyes.
- Tapestry needle, embroidery needle, scissors, stitch marker, and pins.
- Optional blocking mat and rustproof pins.
- Strong matching sewing thread if you prefer extra reinforcement for the loop.
No stuffing, wire, safety eyes, or hard beads are required. Use the same beige yarn for the head, granny body, ears, antlers, and leg tops so the pieces look coordinated.
Stitches and Abbreviations
- MR: magic ring.
- ch: chain; sl st: slip stitch.
- sc: single crochet; hdc: half double crochet; dc: double crochet.
- inc: 2 sc in one stitch; dec: sc2tog over the next two stitches.
- 3-dc group: 3 separate double crochets worked into one space, not joined together at the top.
- R: round or row, as specified. Numbers in brackets give stitch totals.
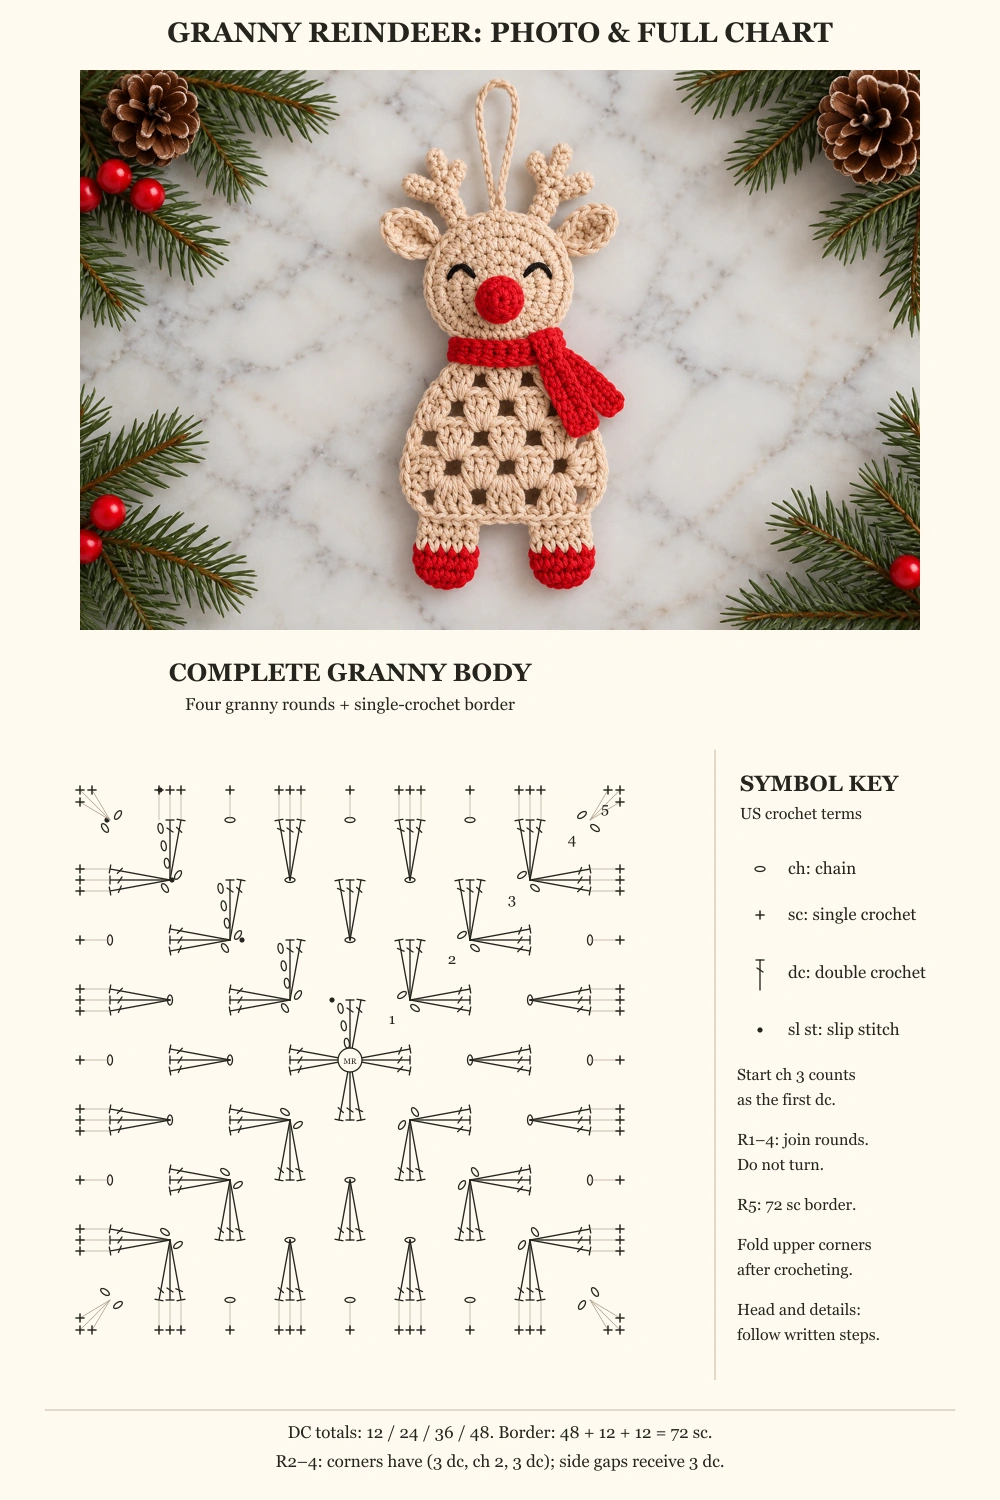
The granny body uses joined rounds with no turning. Its starting ch 3 counts as one dc. The ch-2 spaces are the four corners; ch-1 spaces separate groups along the sides. Slip-stitch joins do not count. The head, nose, and antler stem are described separately, so do not apply granny starting-chain rules to those pieces.
Granny Reindeer Ornament Crochet Pattern
1. Beige Granny Body — Rounds 1–4
Begin with a magic ring in beige. Keep the ring loose until all four first-round groups are in place.
- R1: ch 3 (counts as first dc), 2 dc in MR, ch 2; work (3 dc in MR, ch 2) three more times. Close MR and sl st to the top of the starting ch 3. [12 dc; four ch-2 corners]
- R2: sl st across the next two dc and into the corner space. In that same corner work (ch 3, 2 dc, ch 2, 3 dc). Ch 1; in each of the next three corners work (3 dc, ch 2, 3 dc), with ch 1 after each corner. Join to the starting ch 3. [24 dc; four ch-2 corners; four ch-1 side spaces]
- R3: sl st across the next two dc and into the corner space. Start that corner with (ch 3, 2 dc, ch 2, 3 dc), then ch 1. Work 3 dc into the next ch-1 space, ch 1. At each remaining corner work (3 dc, ch 2, 3 dc), ch 1, then 3 dc in the next ch-1 side space, ch 1. Join. [36 dc; four ch-2 corners; eight ch-1 side spaces]
- R4: move to the corner with slip stitches as before. Start that corner with (ch 3, 2 dc, ch 2, 3 dc), ch 1. Work (3 dc into next ch-1 side space, ch 1) twice. Repeat around the other three sides, working (3 dc, ch 2, 3 dc) at each corner and one 3-dc group in each of the two side spaces. Ch 1 between adjacent groups and join. [48 dc; four ch-2 corners; twelve ch-1 side spaces]
2. Single-Crochet Border — Round 5
Ch 1 (does not count). Work 1 sc into each of the 48 dc, 1 sc into each of the twelve ch-1 side spaces, and 3 sc into each of the four ch-2 corners. Join to the first sc. [72 sc] Fasten off with a long tail. This border supports the edge when the upper corners are folded. Lightly damp-block the square flat before shaping; do not stretch the holes excessively.
3. Shape the Body
Lay the square with a straight edge at the top. Fold the upper-left and upper-right corners diagonally to the back, reducing the visible top width to approximately the width of the lower head. Leave the lower half open and full width. Pin both folds symmetrically; they should taper the upper sides without pulling the lower edge upward.
Sew each folded corner to the back using a few small stitches through the dense dc groups. Keep the front granny openings clear. The fold depth is adjustable, usually around 1.5–2 cm at each upper corner for the suggested size. These folds and the scarf will be hidden behind the head. Gently round the lower corners with your fingers when shaping, rather than adding any decreases to the granny rounds.
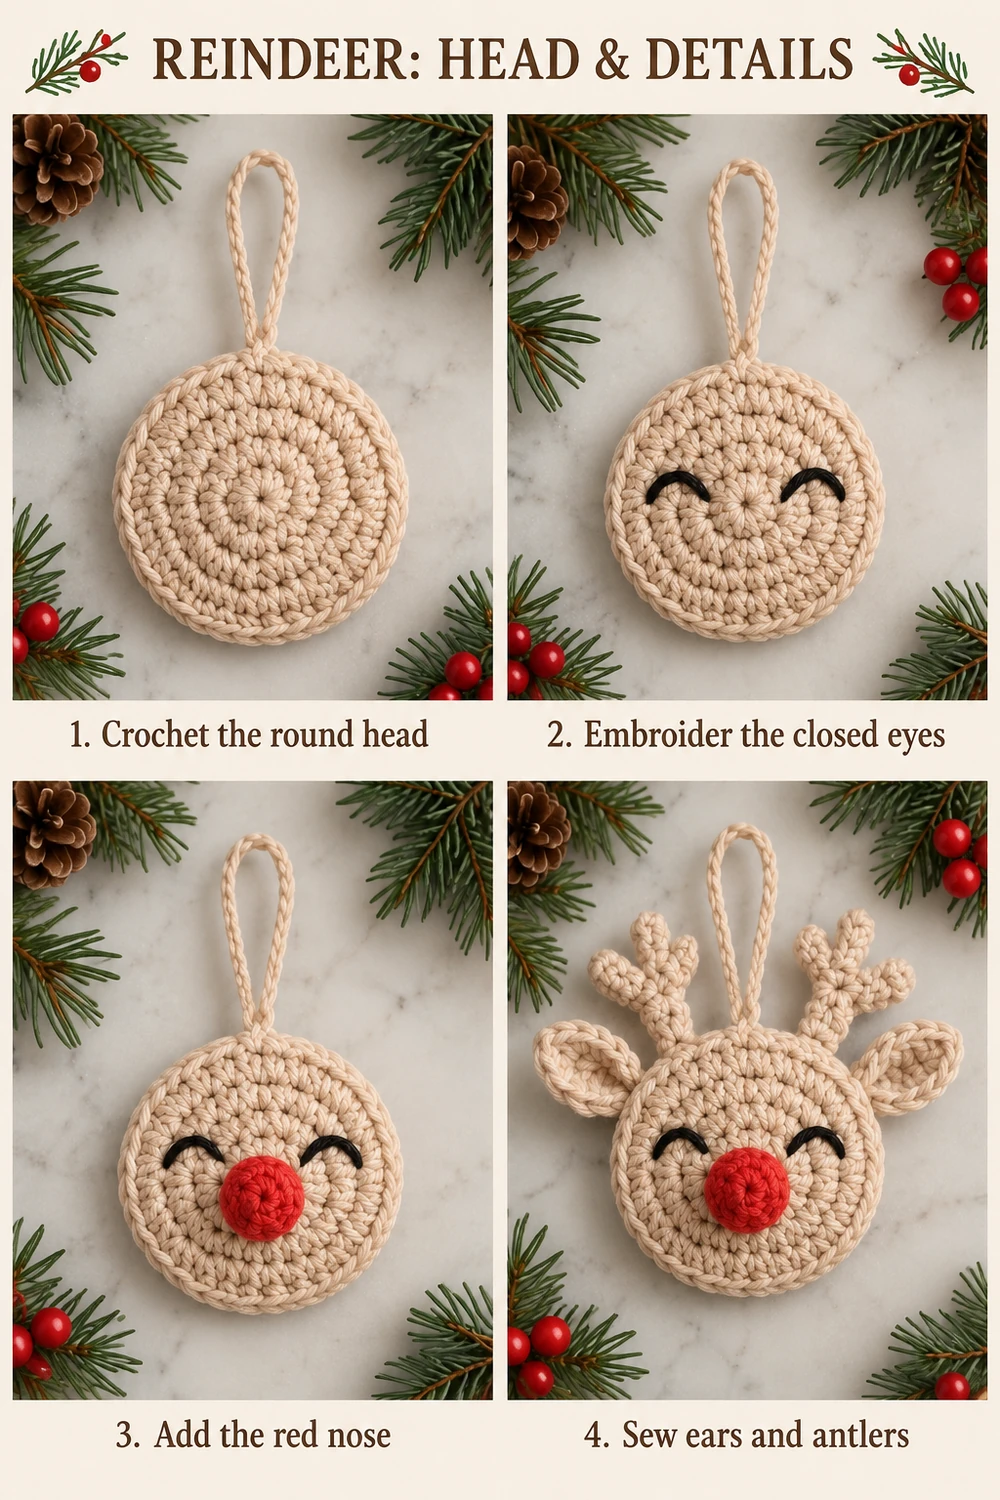
4. Flat Round Head
Work in continuous rounds with beige, without joining or turning. Mark the first stitch.
- R1: 6 sc in MR. [6]
- R2: inc × 6. [12]
- R3: (sc, inc) × 6. [18]
- R4: (2 sc, inc) × 6. [24]
- R5: (3 sc, inc) × 6. [30]
- R6: (4 sc, inc) × 6. [36]
- R7: (5 sc, inc) × 6. [42]
- R8: (6 sc, inc) × 6. [48]
Sl st into the next stitch to smooth the ending; it does not add to the count. Fasten off with a 35 cm sewing tail. Close the MR and weave in the center tail. Keep the head flat and unstuffed.
Closed Embroidered Eyes
Mark two shallow inverted-U eye curves across the upper-middle face, one on each side of the center. Each eye can span approximately three stitches, with 4–5 stitches between the inner ends. Use black thread and small backstitches or couching stitches to form smooth arcs. Keep the expression sleepy and cheerful, as in the reference. No mouth is needed.
5. Raised Red Nose
Use red and work continuous rounds: R1, 6 sc in MR [6]; R2, inc × 6 [12]; R3, 12 sc [12]. Sl st into the next stitch and fasten off with a sewing tail. Leave the twelve-stitch opening unclosed. The little cup forms the rounded nose without stuffing.
Position the opening against the head just below its center, between the eyes. Sew the entire twelve-stitch edge to the head. The MR center faces forward. Keep the nose centered and raised, with no loose yarn visible around its rim.
6. Oval Ears — Make Two
With beige, ch 7. From the second chain, work sc, hdc, dc, hdc, sc. Into the last chain work (sc, ch 2, sc) for the tip. Continue along the opposite side of the foundation chain with sc, hdc, dc, hdc, sc. Sl st at the base and fasten off with a 25 cm tail.
Pinch the base slightly and sew the two base edges together with one or two stitches. Sew the ears behind the upper sides of the head, pointing diagonally outward. Keep them below the antlers and leave most of each oval free.
7. Branching Antlers — Make Two
Each antler is a flat single-crochet cord with two short side branches. Use beige and ch 11. The end of the main cord forms the third tip.
- Work 1 sc into the second chain and each of the next two chains. [3 main-stem sc]
- Make the first branch: ch 4, work 1 sc into the second chain and each of the next two chains. [3 branch sc] Sl st into the base of this branch at the third main-stem sc.
- Resume along the original foundation chain and work sc into the next three unworked chains. [6 main-stem sc total]
- Make a second branch exactly as above: ch 4, return with 3 sc, then sl st at its base.
- Resume the original foundation and sc into each of its four remaining chains. [10 main-stem sc total, plus two branches of 3 sc each]
Fasten off with a long tail. Arrange the two branches and the end of the stem into a three-tip silhouette. Turn or flip the second antler to mirror the first. Sew the bottom 1–1.5 cm of each stem behind the top of the head, close to the center but leaving room for the hanging loop. Tack the branch bases if needed; do not add wire.
8. Two Legs with Red Hooves
Make two identical flat legs. Start in beige and ch 6.
- Row 1: sc into the second chain and each remaining chain. [5]
- Rows 2–3: ch 1, turn; 5 sc. [5]
- Change to red on the final pull-through of row 3.
- Rows 4–5: ch 1, turn; 5 sc. [5]
- Row 6: ch 1, turn; dec, sc, dec. [3]
Fasten off and weave in the color-change tails. Leave a beige starting tail for attachment. The decreased final red row rounds the lower hoof. Sew the beige tops behind the lower body edge, leaving a visible gap between the legs. Attach each leg across its full width with several stitches so it hangs straight. Keep both red ends facing forward.
9. Red Scarf
Neck Band
With red, ch 31. Row 1: sc in the second chain and each remaining chain [30]. Row 2: ch 1, turn; 30 sc. Fasten off with a long tail. Check the length around the flat neck before sewing: the band should cover the head-to-body seam, with its ends overlapping at the back. If your tension differs, adjust the foundation chain to fit without drawing the fabric together.
Two Hanging Ends
For each end, ch 5. Row 1: sc in the second chain and each remaining chain [4]. Continue in rows of 4 sc, turning with ch 1. Make one strip 10 rows long and the second 13 rows long. Fasten off with sewing tails. Place the shorter strip over the longer one and sew their upper ends to the right front of the neck band. Let them fall diagonally down the chest. Tack them near their tops so the lower ends remain free.
10. Join the Head and Body
Place the head over the narrowed top of the body with approximately 1–1.5 cm overlap. The lower face should sit in front of the folded corners. Pin, then sew through the lower head edge and dense groups of the body beneath it. Use several separated attachment points rather than tightening one seam across the whole neck.
Wrap the red neck band over this join and sew its overlapping ends at the back. Add small tacking stitches at the sides to keep the band level. The scarf covers the join; the structural head-to-body stitches carry the body weight. Check that both scarf ends lie on the right and the body holes remain visible below them.
11. Secure the Hanging Loop
With beige, ch 30, or make a chain that gives your preferred loop length. Fasten off leaving two long tails. Fold the chain and sew both ends to several dense stitches on the back of the upper head, between the antlers. Make at least four passes in different directions, anchoring through more than one crochet stitch.
The loop must be attached to the head itself, not only to an antler or the scarf. Weave the tails into the back of the head and test the loop gently over a soft surface. Adjust the ears, antlers, and scarf before trimming the final tails.
Photo and Full Crochet Symbol Chart
The third instructional image below places the finished reindeer photo above a complete connected chart of the granny body, rounds 1–4 and the single-crochet border. It shows every dc, chain space, and border sc, with the English legend alongside. The upper-corner folds are made after crocheting and are explained in the assembly steps. The head, nose, ears, antlers, legs, and scarf follow their separate written instructions.
Read from the center outward. A group of three dc shares one space at its base but has three separate tops. Each corner receives two groups separated by ch 2; side spaces receive one group. The starting ch 3 replaces the first dc of each granny round, and each round closes with a slip stitch.
Finishing Tips
- Block the granny square before folding so the two upper corners match.
- If the head cups, recount the six increases per round and loosen an overly tight tension.
- If the eyes pucker, loosen the black thread and use shorter anchoring stitches.
- If the antlers flop, tack their lower stems to the head over a slightly longer area.
- Keep the scarf ends short enough to reveal the openwork body.
- Spot-clean gently, reshape while damp, and dry flat. Check the yarn label before using heat.
Frequently Asked Questions
Is the body a special reindeer-shaped stitch pattern?
The base is a four-round granny square with a single-crochet border. Folding its upper corners behind the neck creates the flared reindeer shape. No stitch-count changes are needed for those folds.
Does the nose need stuffing?
No. The small unstuffed cup gives a raised button shape when its open edge is sewn to the face.
Can I make a smaller ornament?
Use finer yarn with a matching smaller hook to scale all pieces together. Keep the same stitch counts and adjust the hanging loop and scarf band to fit the finished neck.
Can this be a toy?
The pattern is designed as a hanging decoration, with a long loop and sewn-on details. Display it out of reach of young children and pets.
More Free Christmas Crochet Patterns
- Snowman Christmas Door Hanging Crochet Pattern
- Christmas Bell Ornament Crochet Pattern
- Rustic Christmas Star Ornament Crochet Pattern
Save This Pattern
Save this Granny Reindeer Ornament Crochet Pattern for a cozy handmade Christmas. Happy crocheting from Lovely Amigurumi!
Photo Tutorials, Full Granny Chart, and Pinterest Gallery
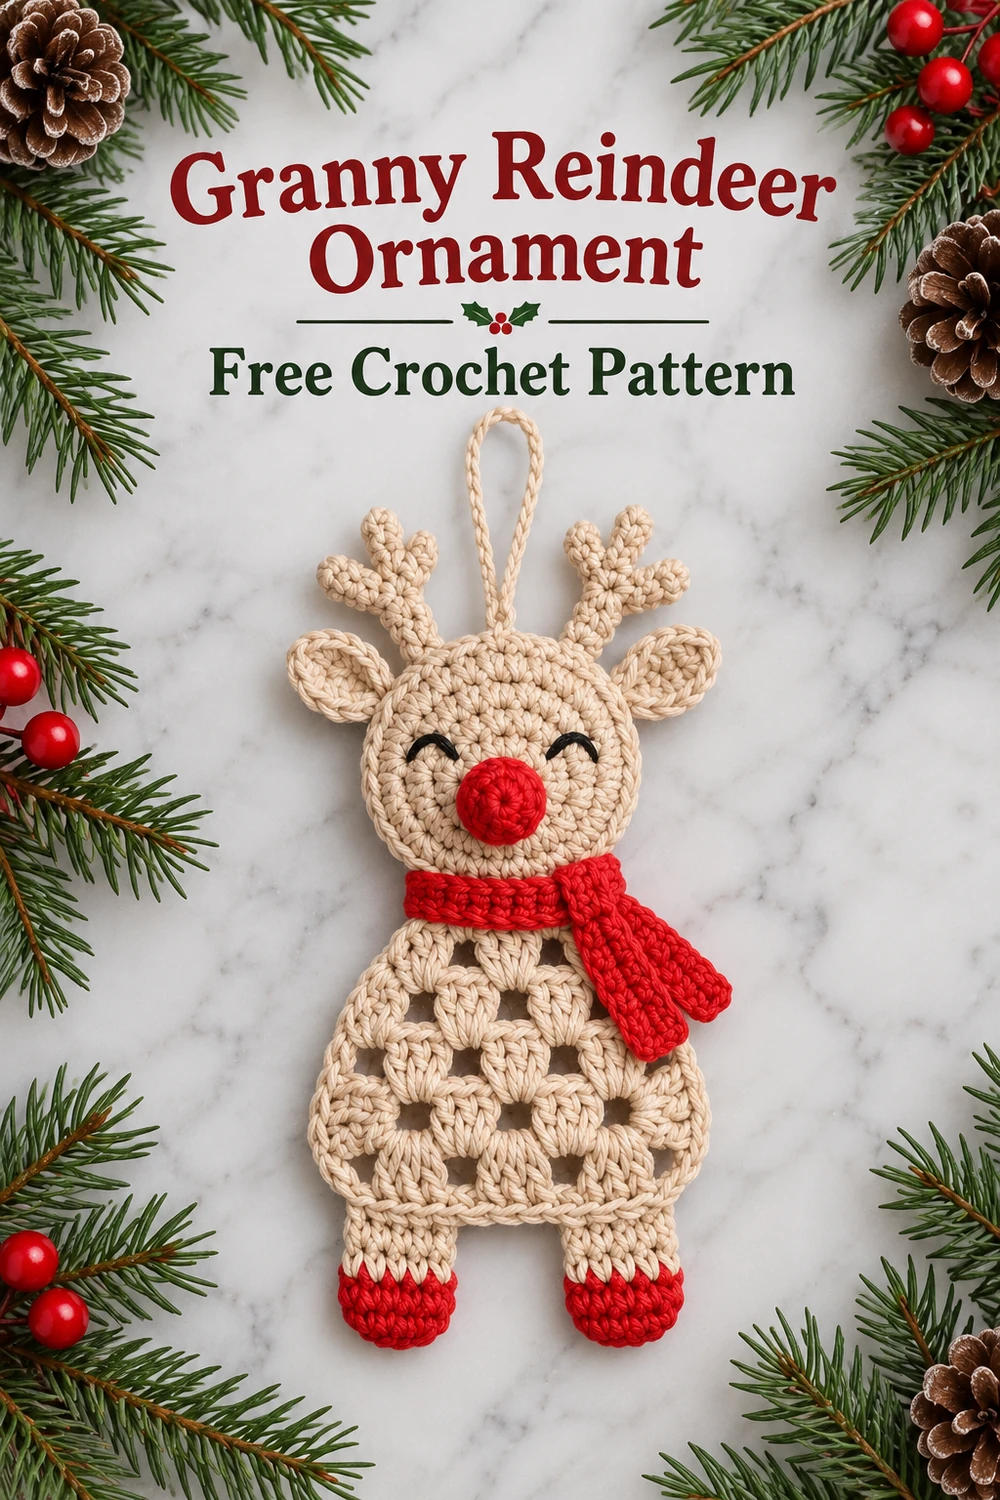
The two photo tutorials and the finished-reindeer photo with its complete body chart come first, followed by three Pinterest images. All six images are grouped here at the end.