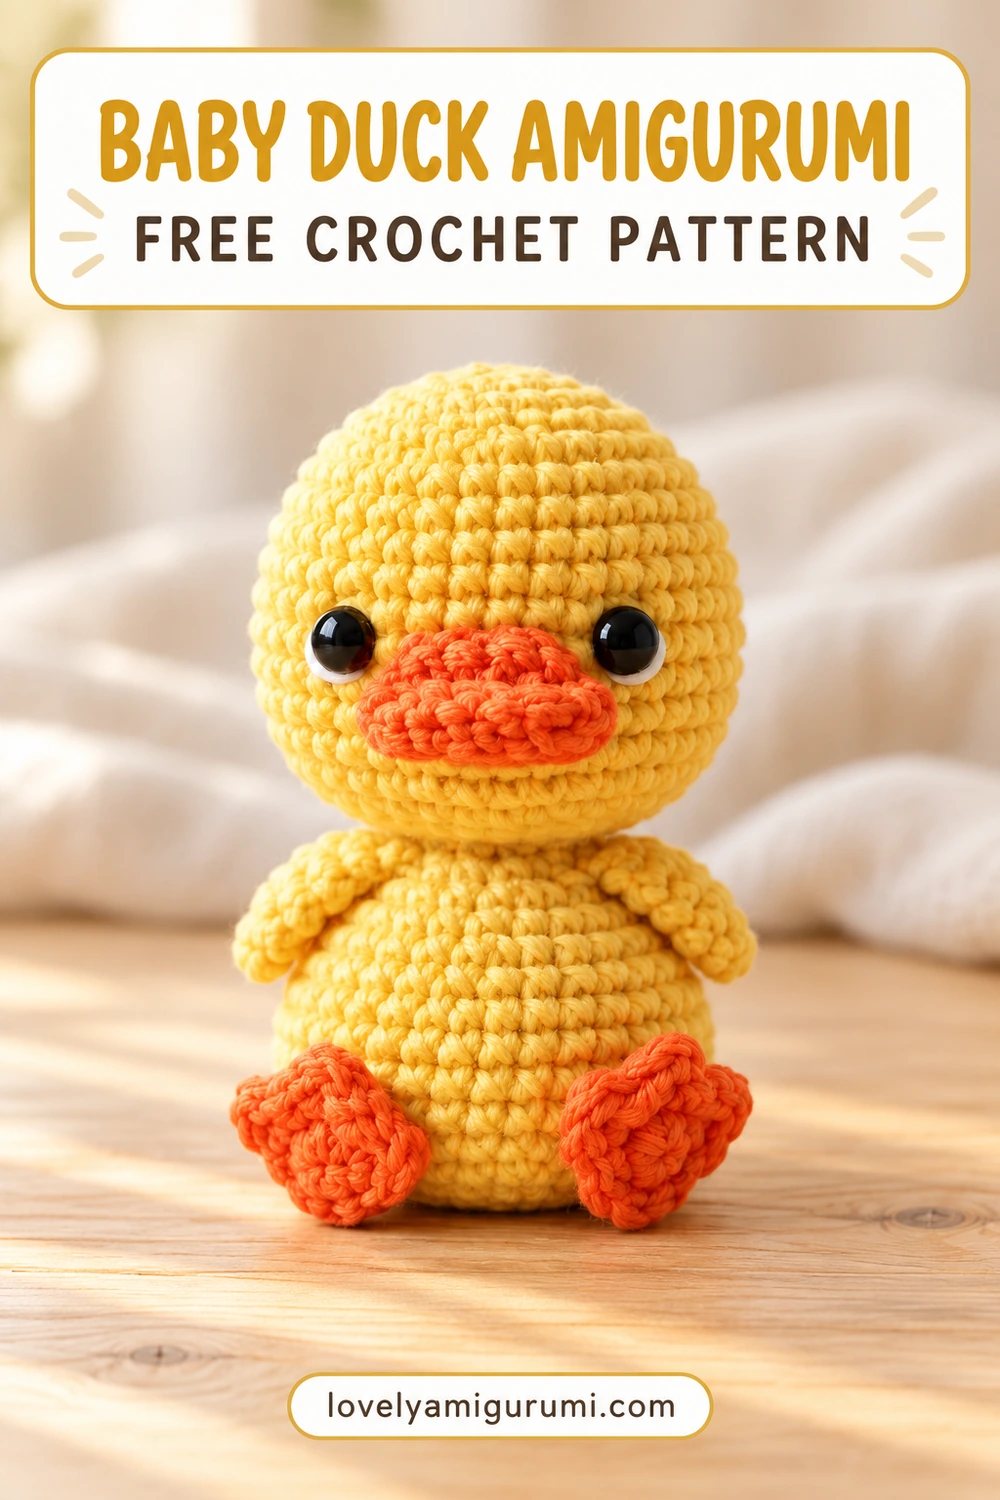
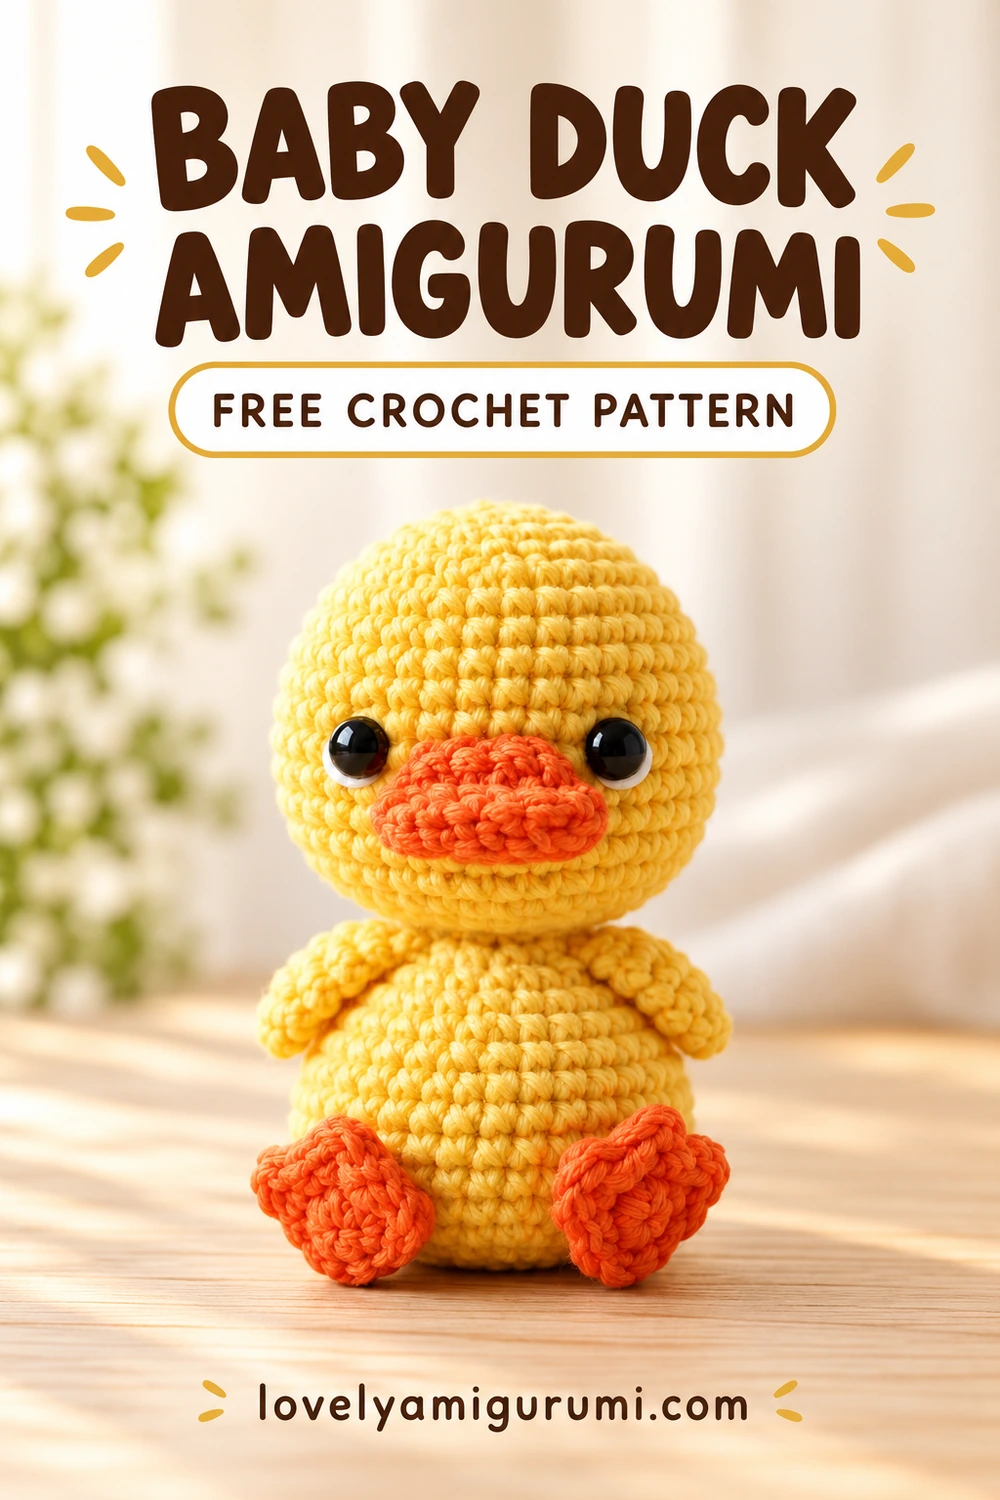
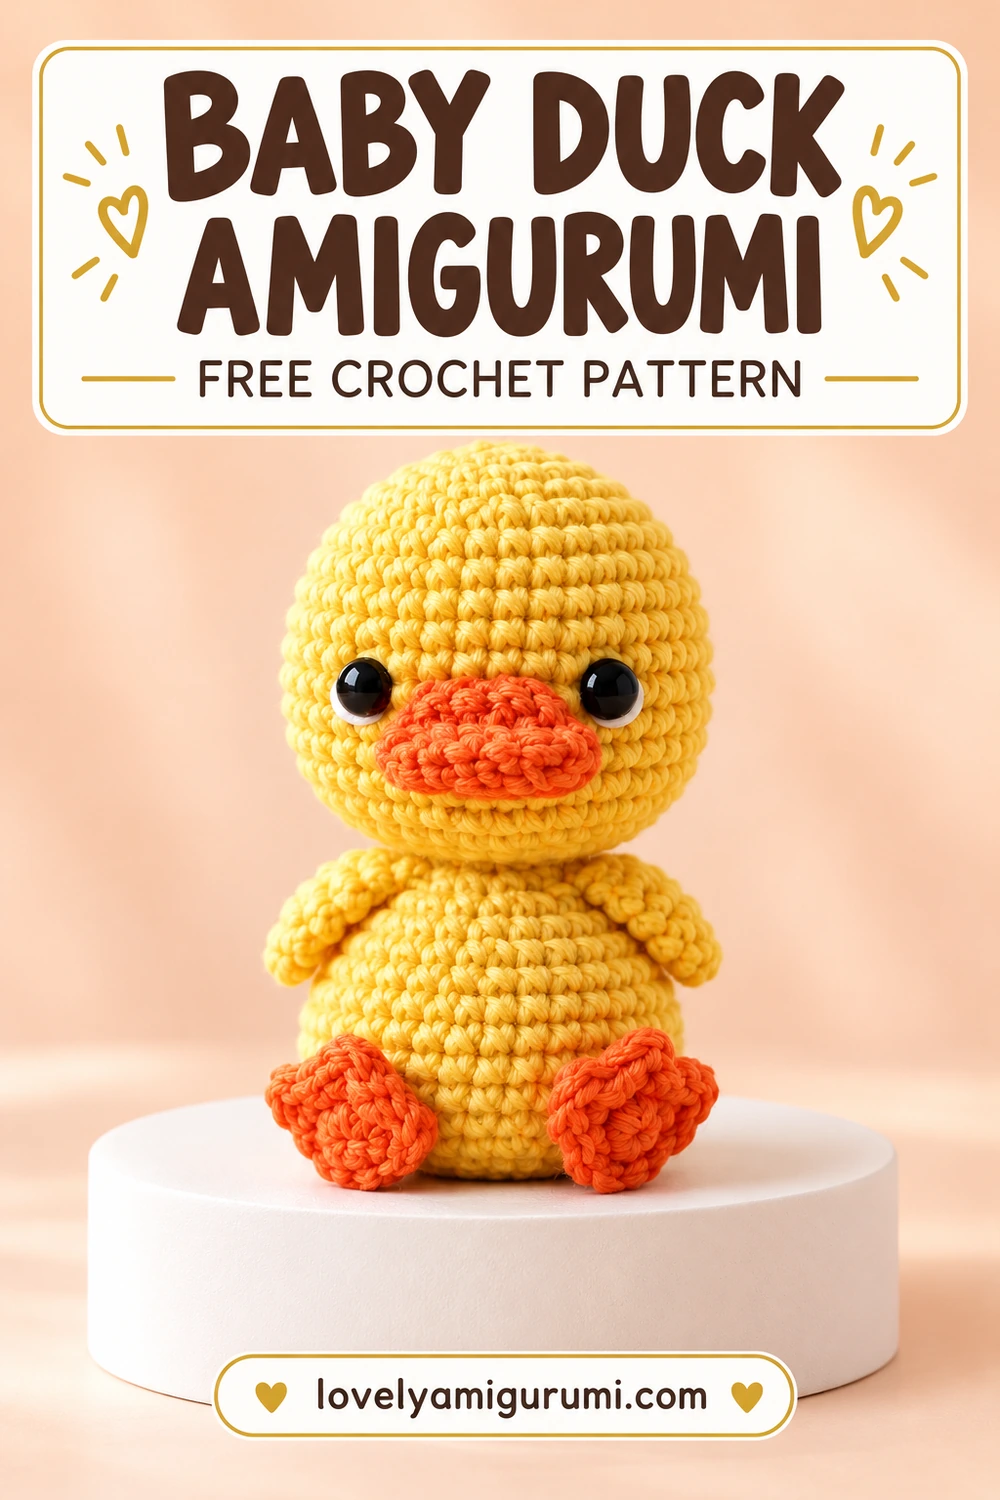
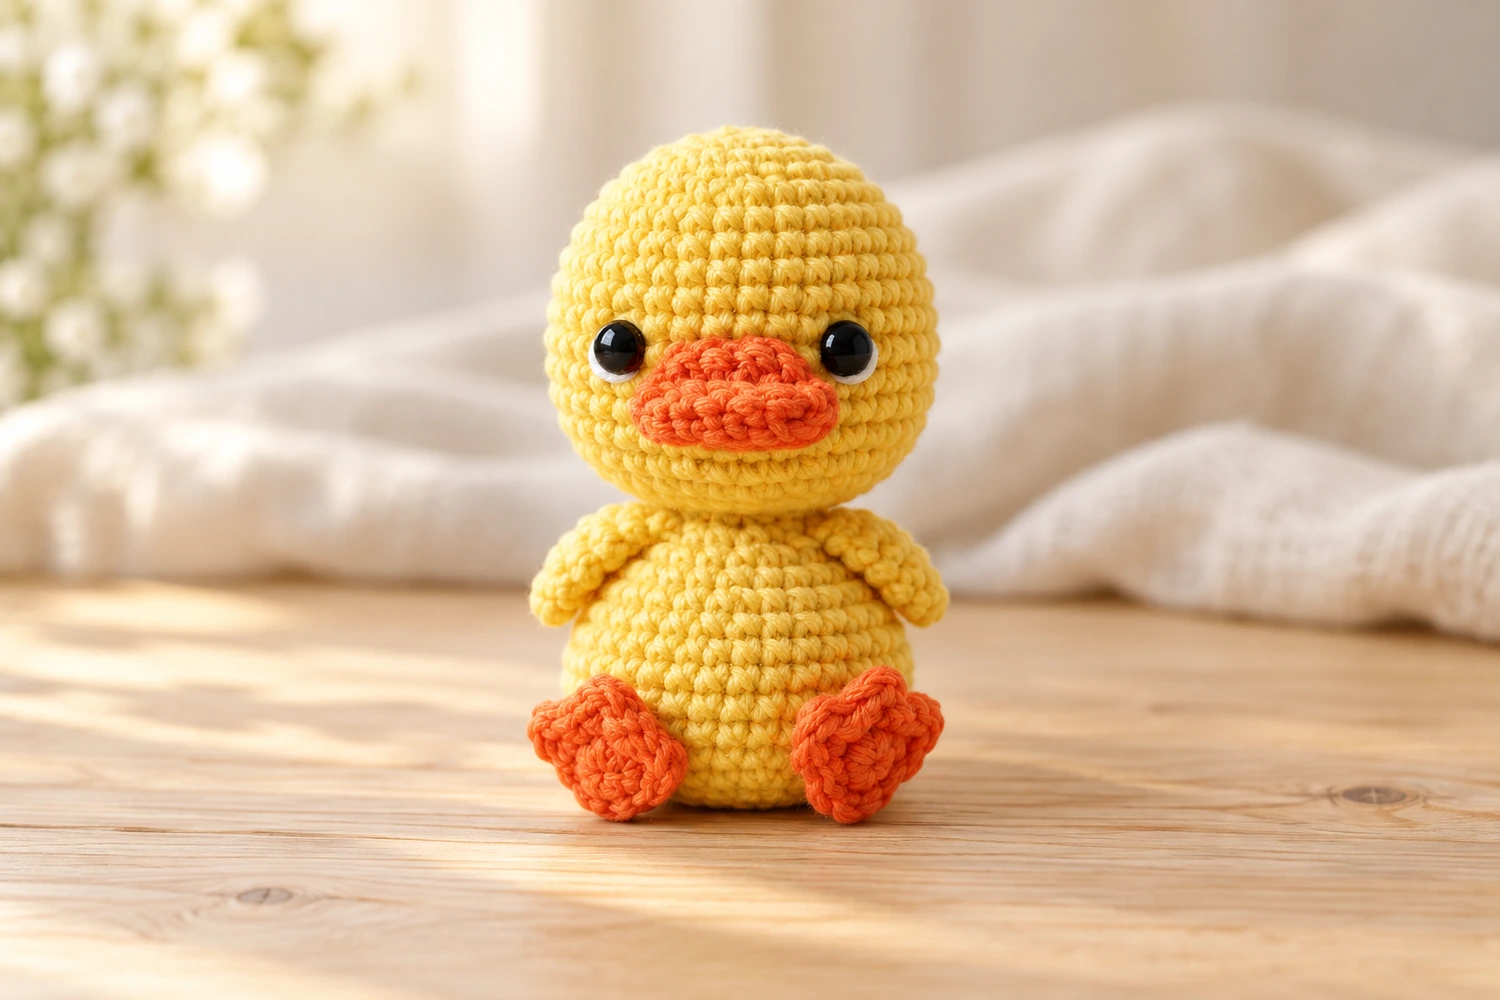
I like a duckling with a simple face and bright orange feet: the color contrast makes the little bird easy to recognize without extra accessories. This Baby Duck Amigurumi has a rounded head, two small wings and a short oval bill. My recommendation is to pin the feet before sewing so both toes point forward and the duck sits evenly.
The body and head are worked together from the bottom up. Make the wings, three-toed feet and bill separately, then sew them to the finished figure. The pattern below includes the complete closure and assembly; the cover version does not use an eggshell.
Materials for Baby Duck Amigurumi
- Yellow DK cotton yarn for body and wings; orange yarn of the same weight for feet and bill.
- A 2–2.5 mm hook adjusted for dense stitches.
- Black thread for embroidered eyes and a little white thread for highlights; optional 8 mm safety eyes for a decorative piece.
- Fiberfill, marker, yarn needle, scissors and assembly pins.
The finished size varies with yarn and tension. Keep all colors the same weight so the feet and bill stay in proportion. A smooth yarn makes the small increases easier to count and gives the stitch definition shown in the cover.
Stitches and pattern notes
MR = magic ring; ch = chain; sc = single crochet; hdc = half double crochet; dc = double crochet; sl st = slip stitch; inc = 2 sc in the same stitch; dec = single crochet two stitches together; st(s) = stitch(es). FLO and BLO mean front loops only and back loops only. For an invisible decrease, pick up the front loop of each of the next two stitches, yarn over and pull through both front loops, then complete the single crochet.
Work the round sections in a continuous spiral without joining unless a section says otherwise. Move the marker to the first stitch of each round. Numbers in parentheses are the counts after completing the round. Repeat only the bracketed sequence the stated number of times. Turning chains and joining slip stitches do not count as stitches. Leave sewing tails on separate parts and secure all ends inside the work.
Baby Duck Amigurumi: body and head
Use yellow. The first section is the body; R18 expands the narrow neck into the head. Add filling to the body before that expansion.
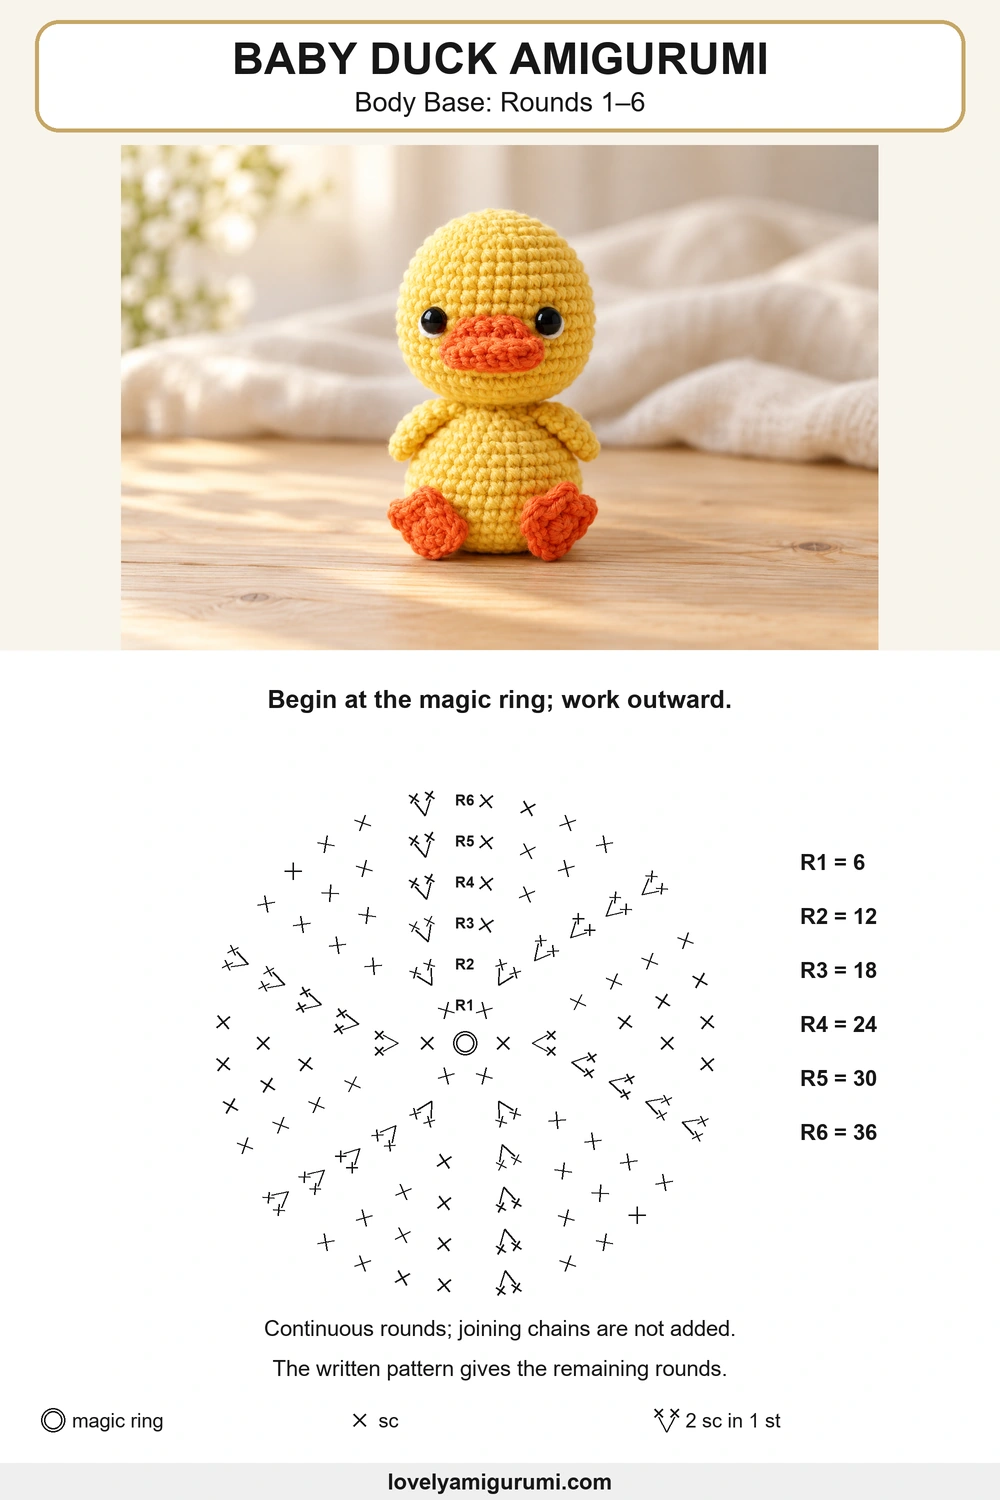
R1: 6 sc in MR. (6)
R2: inc × 6. (12)
R3: [sc, inc] × 6. (18)
R4: [2 sc, inc] × 6. (24)
R5: [3 sc, inc] × 6. (30)
R6: [4 sc, inc] × 6. (36)
R7–9: 36 sc in each round. (36; 3 rounds)
R10: [10 sc, dec] × 3. (33)
R11: [9 sc, dec] × 3. (30)
R12: [8 sc, dec] × 3. (27)
R13: [7 sc, dec] × 3. (24)
R14: 24 sc. (24)
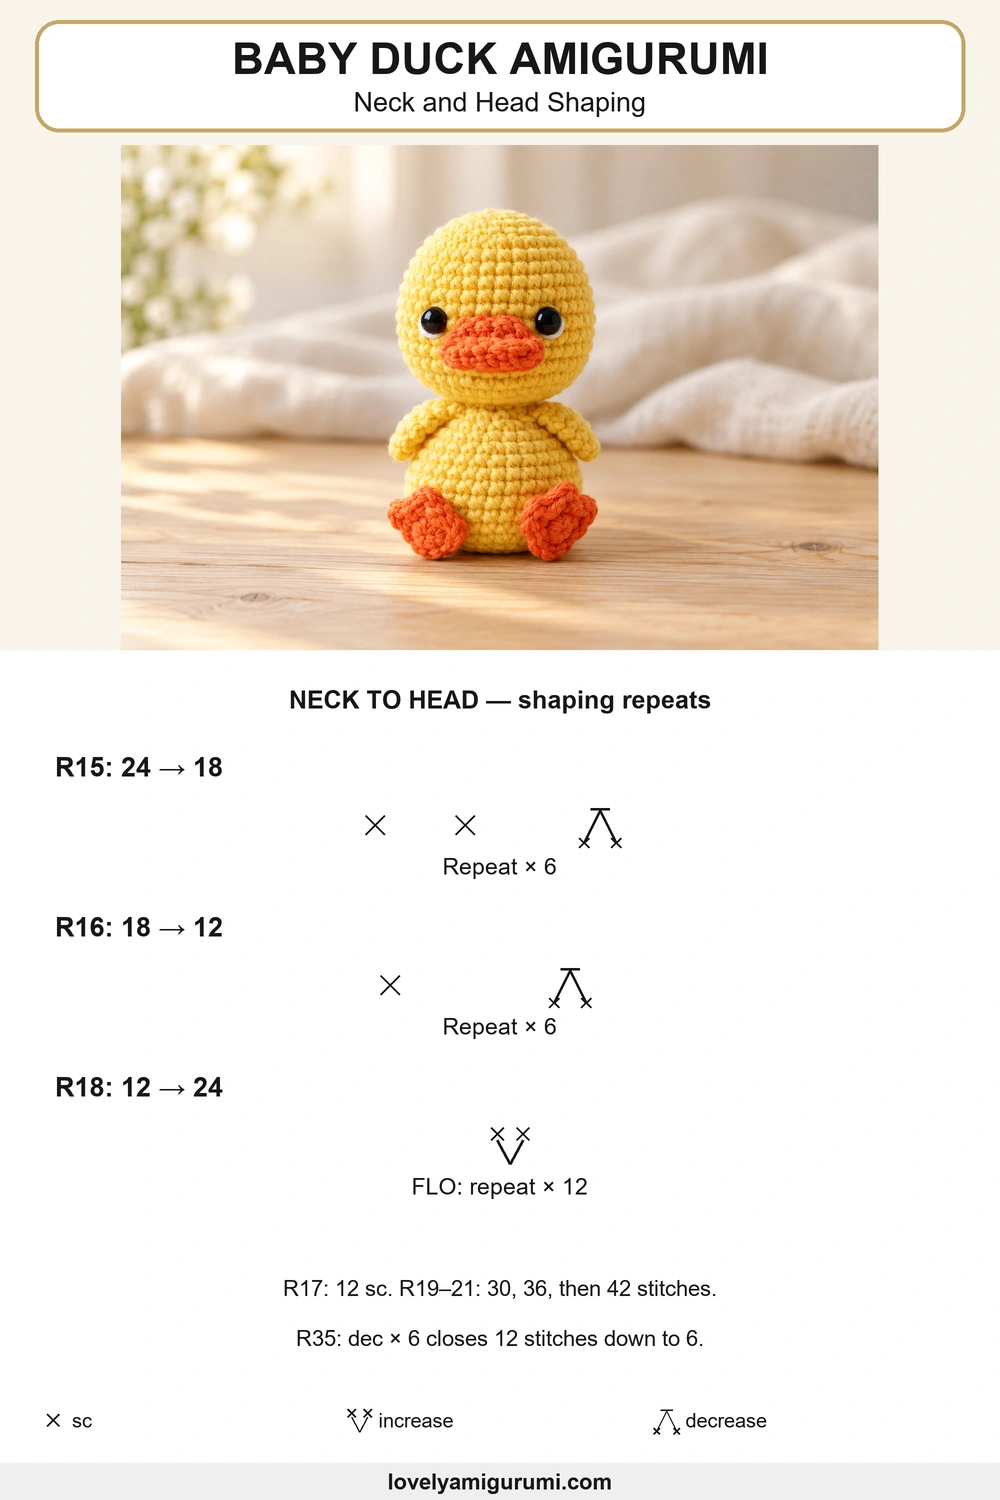
R15: [2 sc, dec] × 6. (18)
R16: [sc, dec] × 6. (12)
Fill the body, keeping the bottom rounded.
R17: 12 sc. (12)
R18: in FLO, inc × 12. (24)
R19: [3 sc, inc] × 6. (30)
R20: [4 sc, inc] × 6. (36)
R21: [5 sc, inc] × 6. (42)
R22–26: 42 sc in each round. (42; 5 rounds)
If using safety eyes, place them between R25 and R26, leaving about nine stitches between the posts. Mark the center of the face and bill before securing the washers. Embroidered eyes can be added after closing the head.
R27: [5 sc, dec] × 6. (36)
R28: [10 sc, dec] × 3. (33)
R29: [9 sc, dec] × 3. (30)
R30: 30 sc. (30)
R31: [8 sc, dec] × 3. (27)
R32: [7 sc, dec] × 3. (24)
R33: [2 sc, dec] × 6. (18)
R34: [sc, dec] × 6. (12)
Finish filling the head without opening gaps in the fabric.
R35: dec × 6. (6)
Fasten off. Thread the tail through the six remaining front loops and pull closed. The final round uses all twelve previous stitches in six decreases; do not add plain stitches after only three decreases.
Small wings: make 2
With yellow, R1: 6 sc in MR. (6)
R2: [sc, inc] × 3. (9)
R3: [2 sc, inc] × 3. (12)
R4–5: 12 sc in each round. (12; 2 rounds)
Leave unstuffed. Flatten the twelve-stitch opening into six pairs and work one sl st through both layers of each pair. (6 joining sl sts.) Leave a sewing tail. Pin each wing to a side of the upper body around R13–15, one or two rounds below the neck.
Three-toed orange feet: make 2
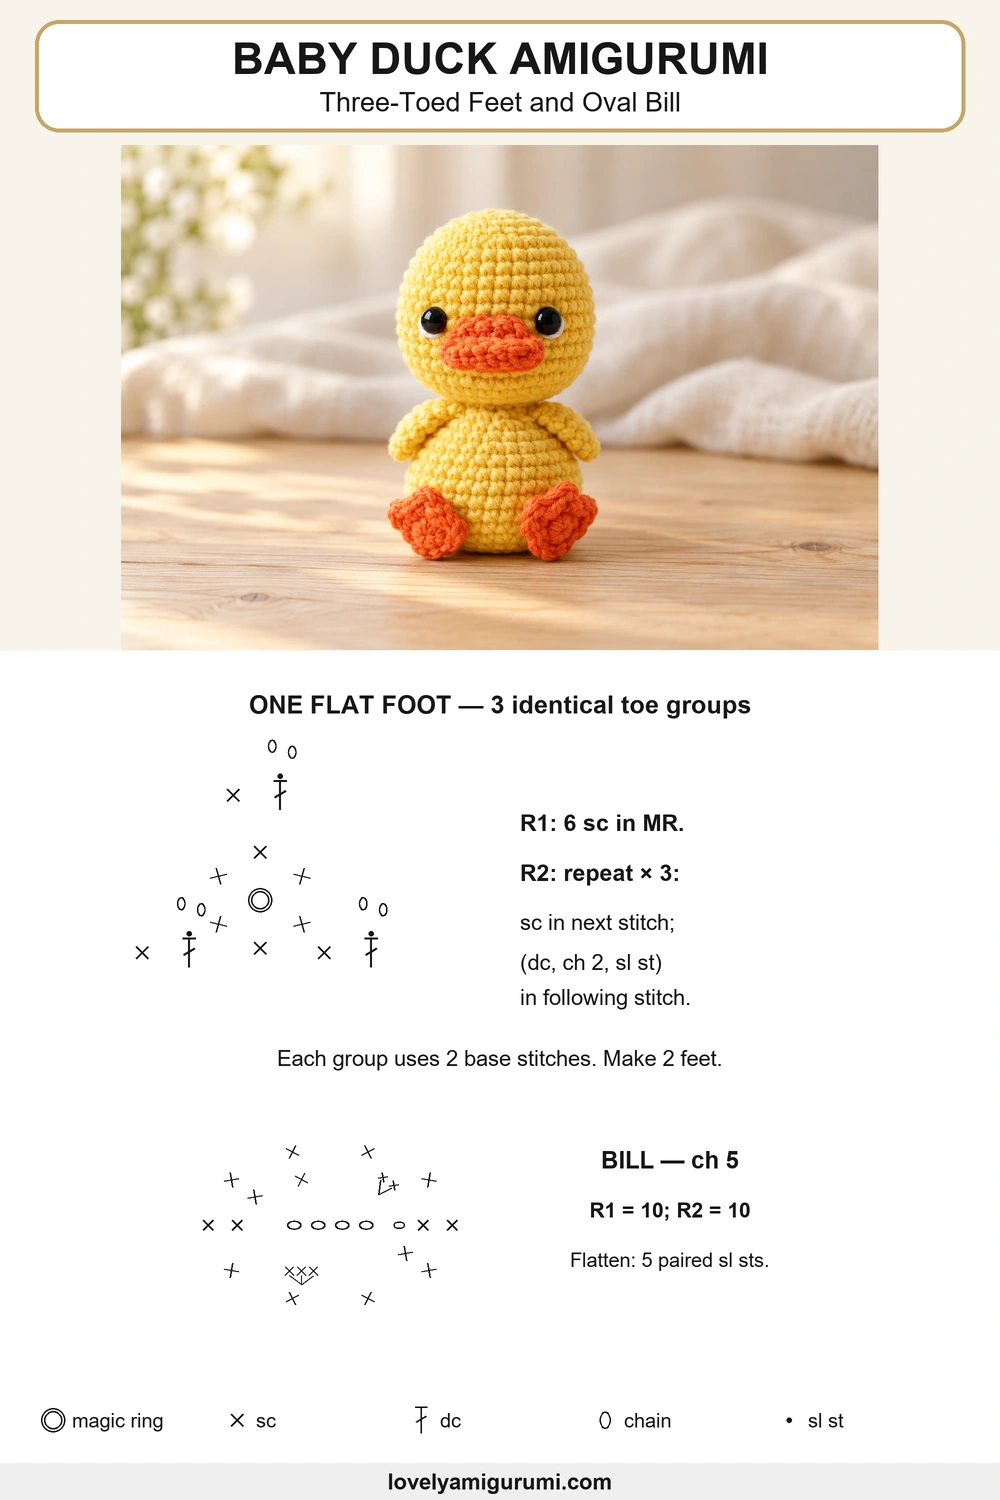
R1: work 6 sc in a magic ring. (6.) Pull the ring closed. In the next round, each toe uses two of those six base stitches.
R2: [sc in the next stitch; in the following stitch work dc, ch 2 and sl st] × 3.
Join with a sl st to the first sc and fasten off with a sewing tail.
There are three sc, three dc and three toe slip stitches, plus the three chain-2 toe edges. All six base stitches are used exactly once. Lay the feet flat and sew their central/back edges to the lower front of the body around R3–6, leaving the three toe lobes visible. Do not trim the tails before attaching them.
Orange oval bill
Ch 5. Work around both sides of the four usable chains.
R1: 2 sc in the second chain from the hook, 2 sc, 3 sc in the last chain; rotate to the unused side, 2 sc, then 1 sc in the first worked chain. (10)
R2: 10 sc. (10)
Leave the bill unstuffed. Flatten the ten-stitch opening into five matching pairs and work one sl st through both layers of each pair. (5 joining sl sts.) Fasten off with a tail. Pin the bill horizontally at the center of the face, below the eyes around R23–25, and sew the closed back edge to the head. The rounded oval end points forward.
Face and Baby Duck Amigurumi assembly
- If embroidering eyes, make two matching black ovals centered around R25–26. A tiny white stitch beside each eye is an optional highlight.
- Check the bill from the front and both sides before sewing; it should be centered and level.
- Sew the wing seams to the body, keeping the rounded ends angled slightly forward and down.
- Pin the two feet at the same height and spread the toe lobes gently before sewing.
- Secure all sewing tails inside the body. Glue is not required for the feet or bill.
Reading the three duck charts
Chart 1 shows the body base increases R1–6. Chart 2 shows the decrease repeats in R15–16 and the front-loop increases in R18, with counts for the following head rounds. Chart 3 shows the three-toe foot repeat and the ten-stitch oval bill foundation. Follow the written ranges for the plain rounds and final head decreases.
Finishing checks
For a balanced seated Baby Duck Amigurumi, keep the lower body rounded and both feet at the same height. If the feet pull the body forward, move their attachment points slightly higher before sewing. The wings should sit below the neck rather than on the head.
Why does the final round have six decreases?
R34 has twelve stitches. Six decreases use two stitches each and leave six stitches to close. Three decreases followed by plain stitches would leave nine, changing the top shape.
Can I add an eggshell?
An eggshell would be a separate accessory with its own shaping and fit. This Baby Duck Amigurumi pattern is complete as the seated duck shown on the cover, without an egg section.
Should I fill the wings and bill?
No. Their flattened seams help the wings lie against the body and keep the bill short. Fill only the body and head, adding small pieces rather than one large clump.
Can I use thicker yarn?
Yes, with a suitable hook and consistent yarn weights for yellow and orange. The duckling will be larger. Check stitch counts carefully if you choose a fluffy yarn that hides the loops.
More small animal patterns
For a farm-themed group, try the chill chicken, mini cow head and white bunny. Each uses a different set of small details to create its character.
Save the Baby Duck Amigurumi instructions and three charts to Pinterest. I would love to see the yellow shades and tiny expressions you choose for your duckling.