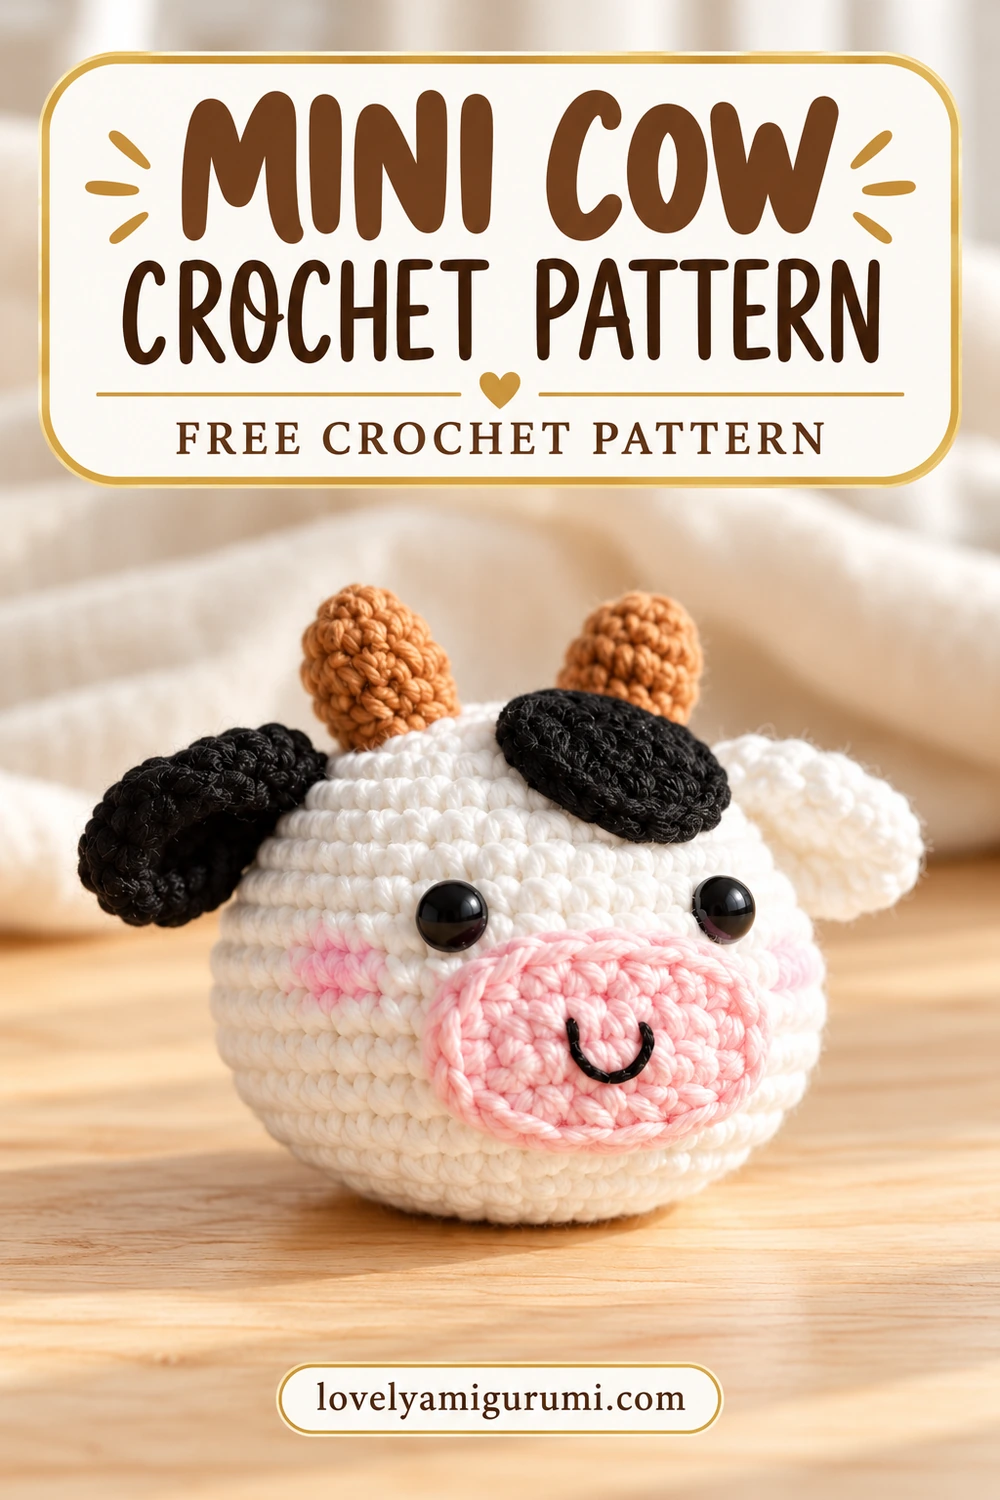
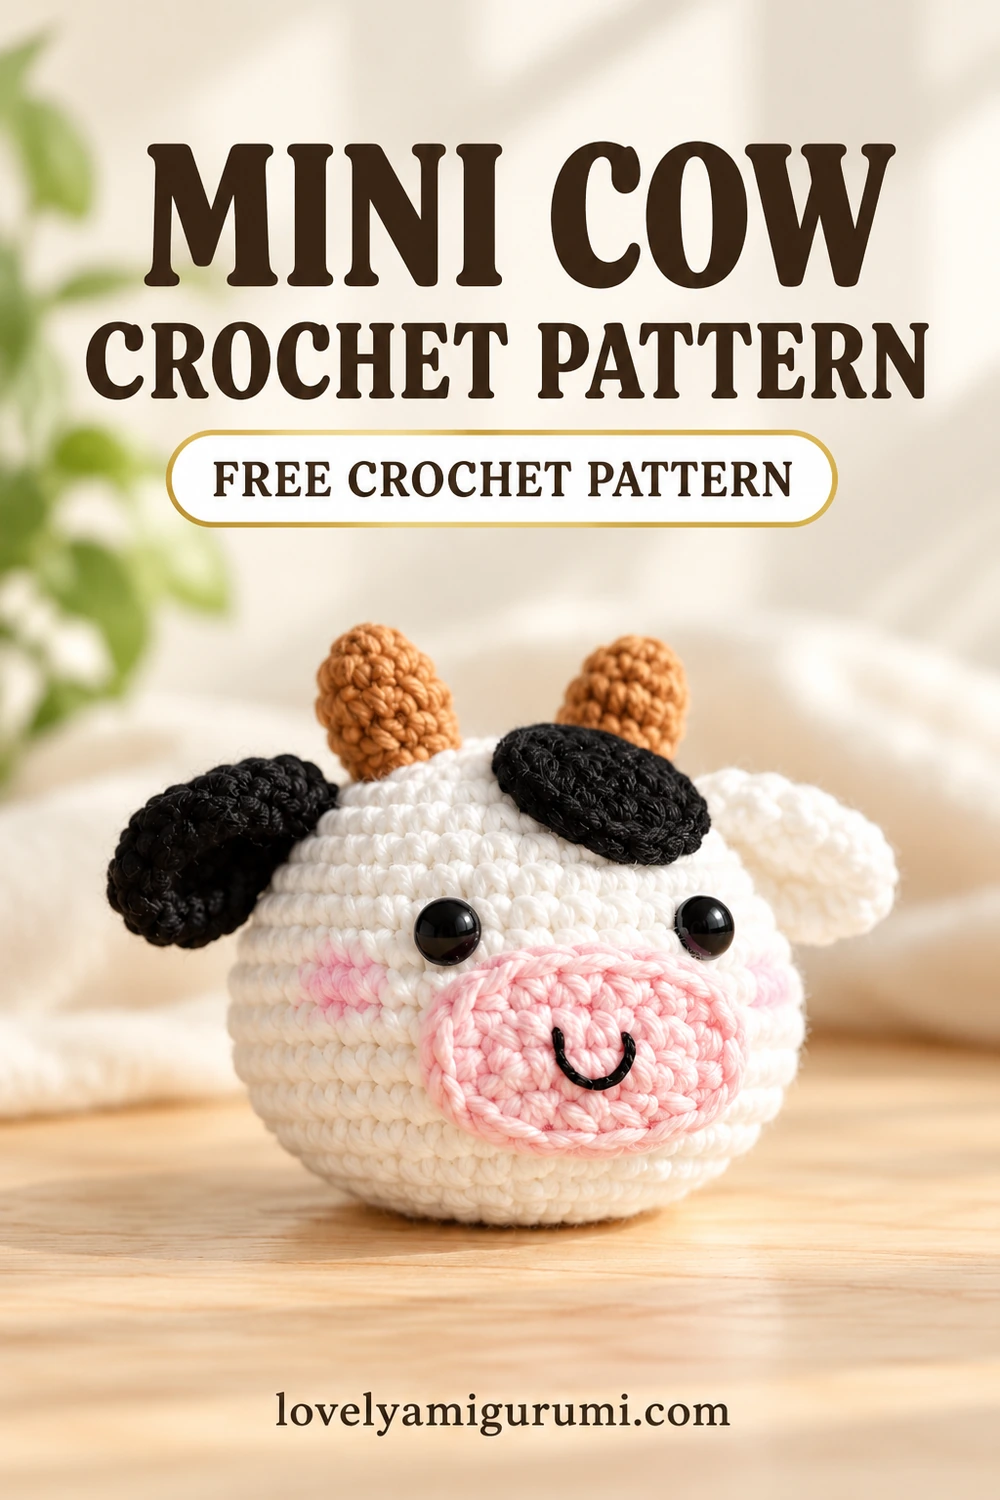
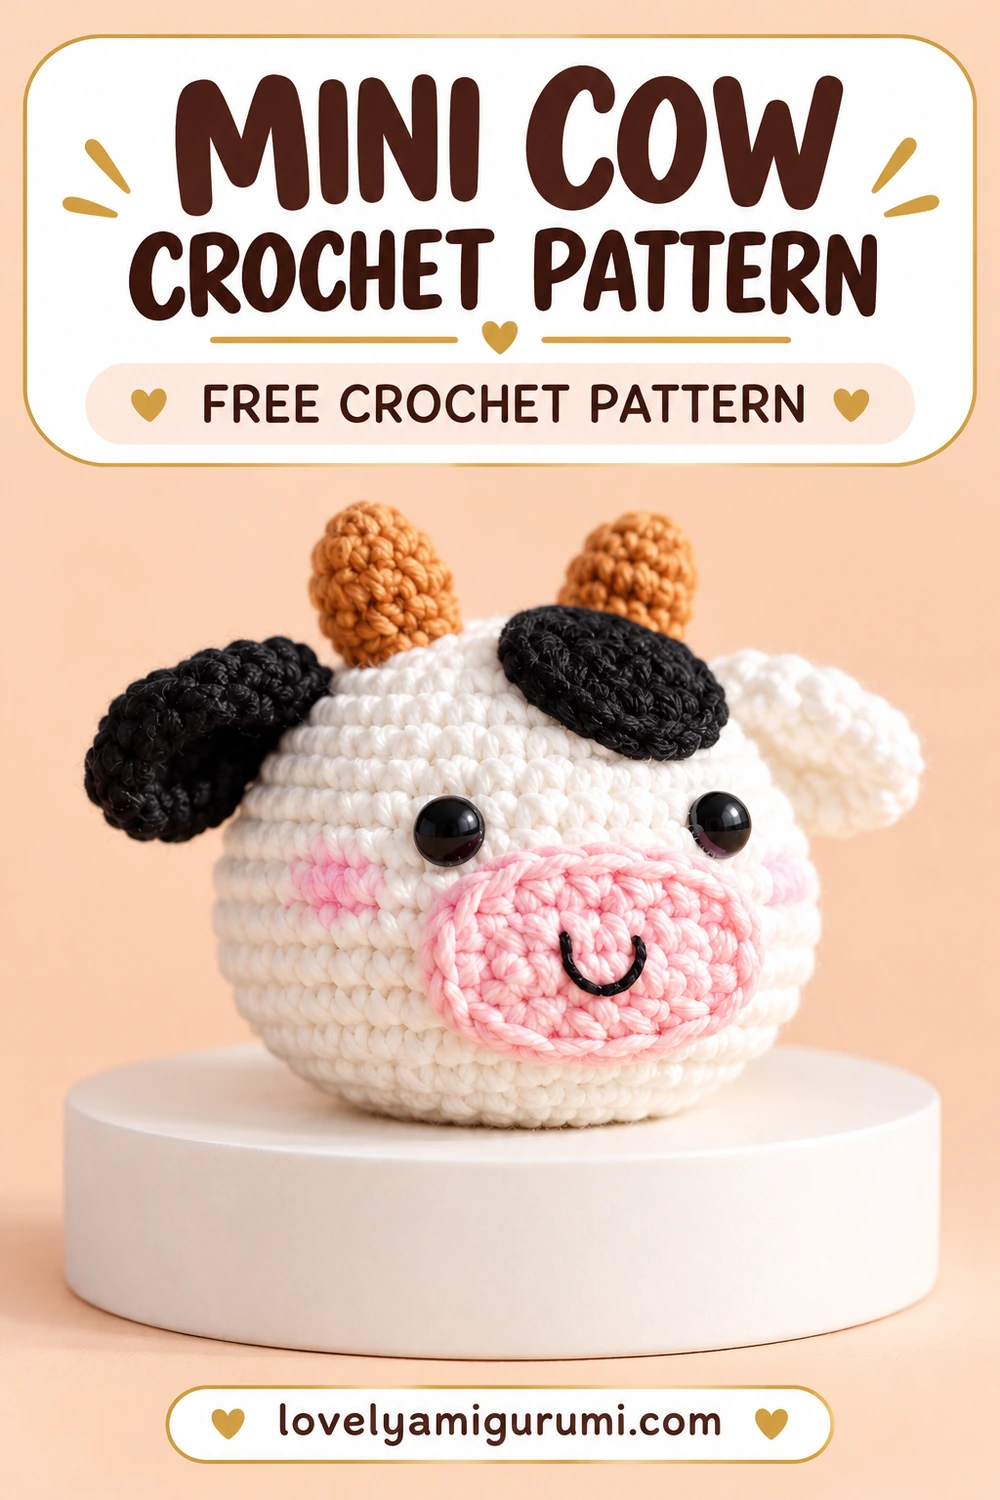
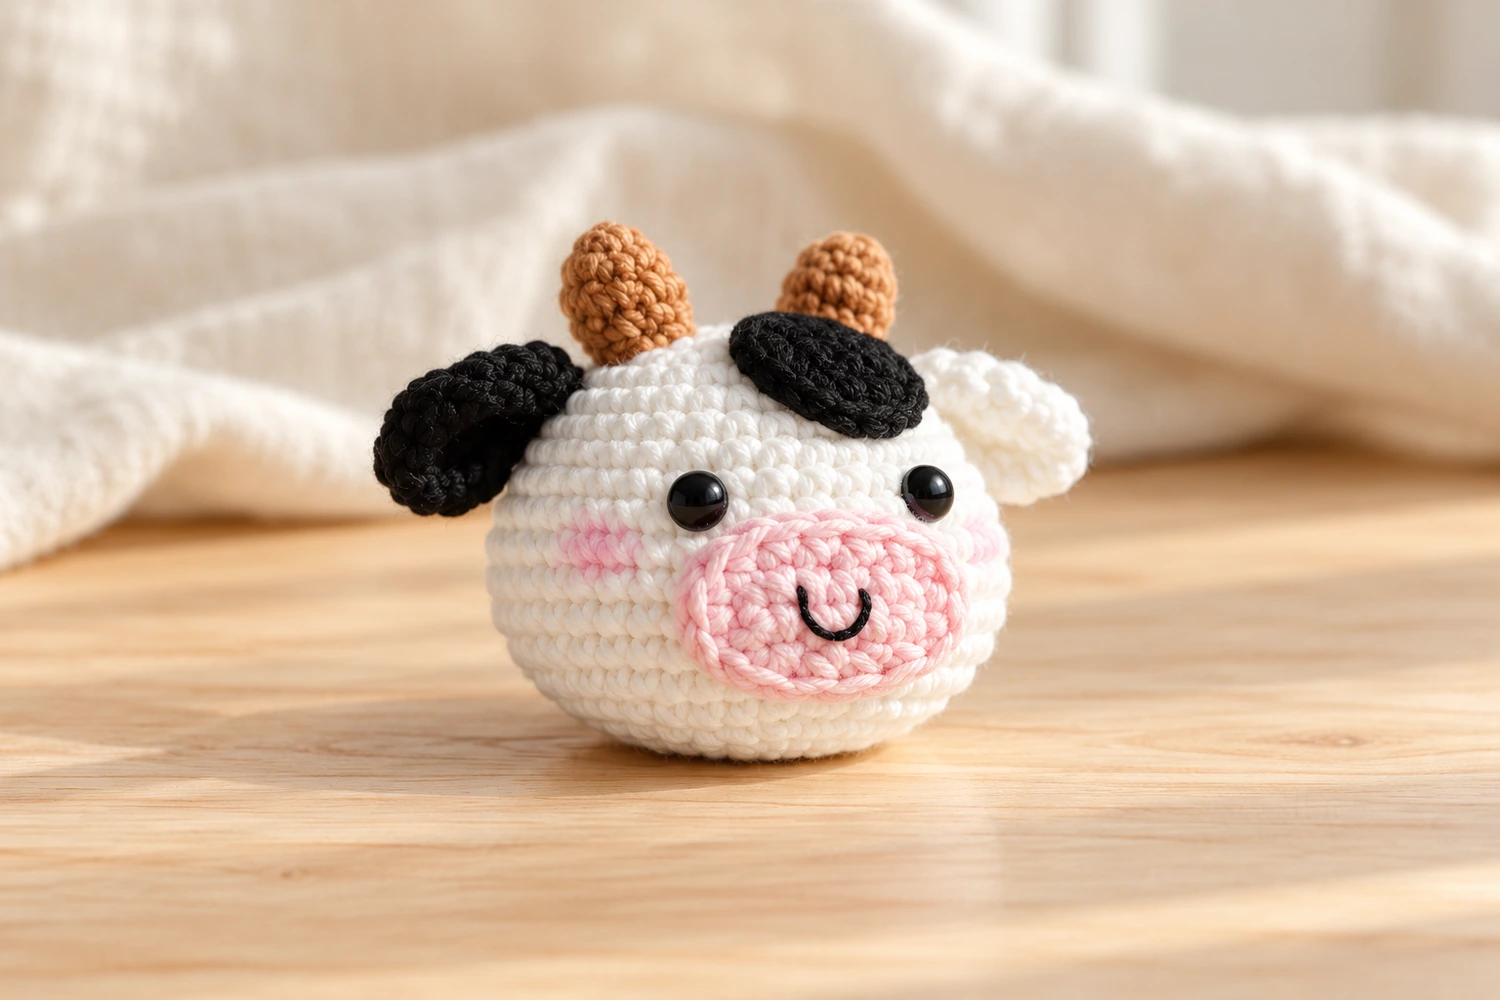
A pink oval muzzle and mismatched ears are the details I like most in this mini cow crochet pattern. The design is a little decorative cow head, with rounded cheeks, two short horns and one black forehead patch. My recommendation is to pin the muzzle and ears together before sewing either one: that helps you judge the whole face rather than a single piece.
The head is worked in continuous rounds with a few targeted cheek increases. Make the ears, horns, muzzle and patch separately, then sew them on. Three charts show the base rounds, cheek shaping and smaller facial pieces. This cover design has no body or legs.
Materials for the mini cow crochet pattern
- White DK cotton yarn, black yarn for one ear and the patch, pink yarn for the muzzle and light brown or beige yarn for horns.
- A 2–2.5 mm hook adjusted for a dense fabric.
- Black embroidery thread for eyes and the small muzzle smile; pale pink thread for optional cheeks.
- Fiberfill, marker, yarn needle, scissors and pins.
- Optional 6–8 mm safety eyes for a decorative piece, fitted before head closure.
Keep the yarn weights consistent for all pieces. Finished width depends on yarn and tension. This is a cow-head decoration; changing to a thicker yarn enlarges all parts, so make them with the same hook and yarn weight rather than mixing a bulky muzzle with a fine head.
Stitches and pattern notes
MR = magic ring; ch = chain; sc = single crochet; hdc = half double crochet; dc = double crochet; sl st = slip stitch; inc = 2 sc in the same stitch; dec = single crochet two stitches together; st(s) = stitch(es). FLO and BLO mean front loops only and back loops only. For an invisible decrease, pick up the front loop of each of the next two stitches, yarn over and pull through both front loops, then complete the single crochet.
Work the round sections in a continuous spiral without joining unless a section says otherwise. Move the marker to the first stitch of each round. Numbers in parentheses are the counts after completing the round. Repeat only the bracketed sequence the stated number of times. Turning chains and joining slip stitches do not count as stitches. Leave sewing tails on separate parts and secure all ends inside the work.
Mini cow crochet pattern: head
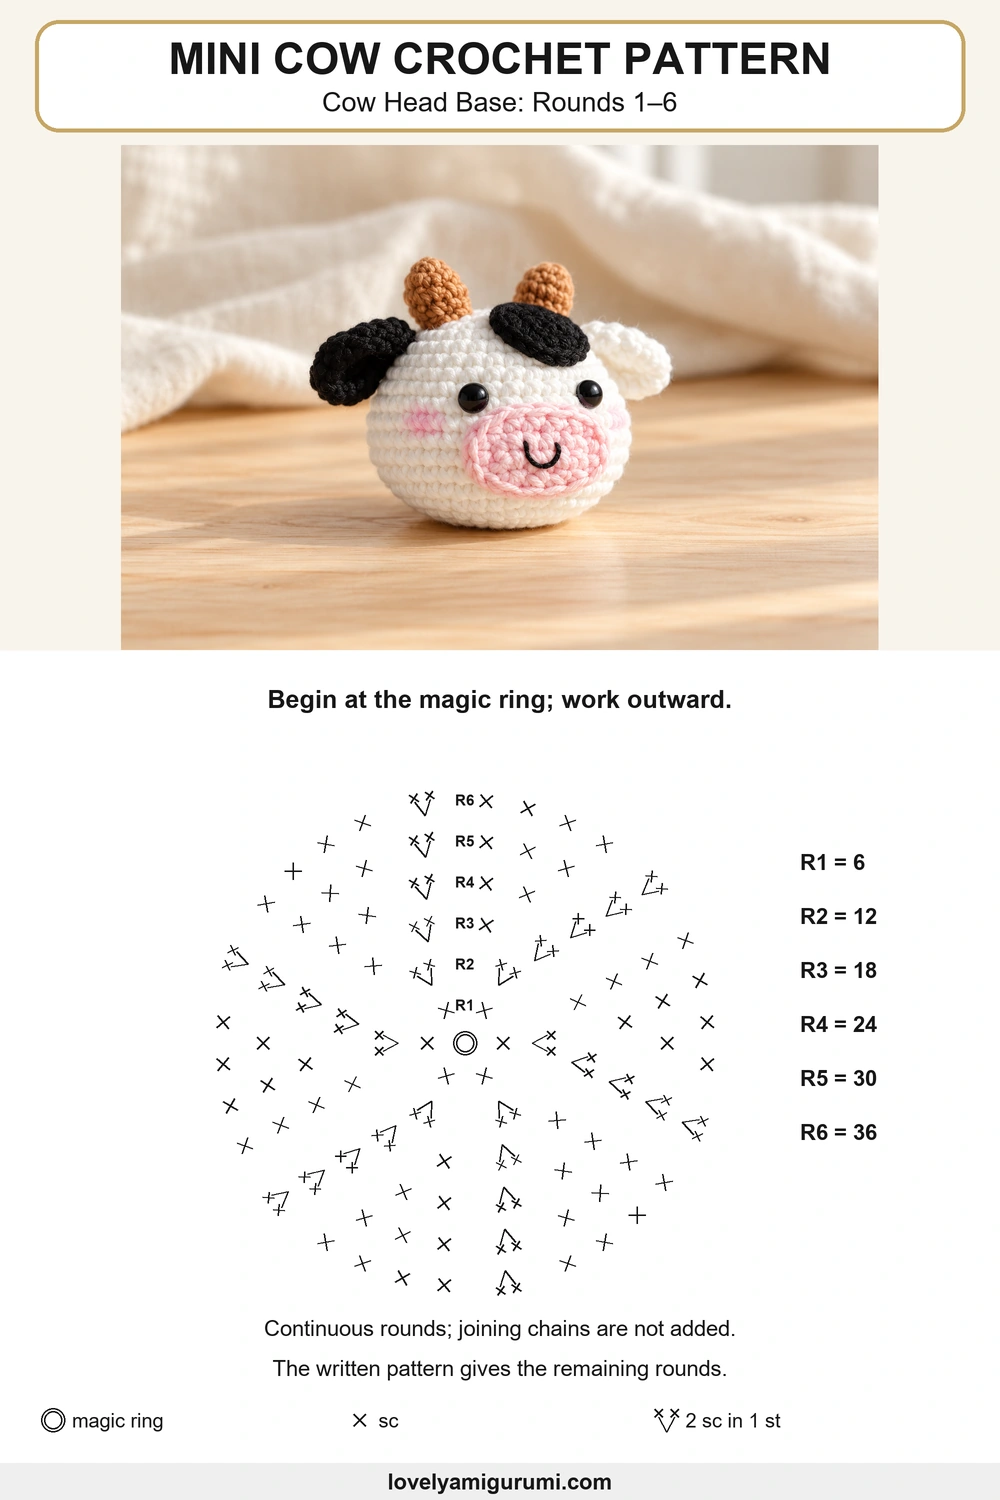
R1: 6 sc in MR. (6)
R2: inc × 6. (12)
R3: [sc, inc] × 6. (18)
R4: [2 sc, inc] × 6. (24)
R5: [3 sc, inc] × 6. (30)
R6: [4 sc, inc] × 6. (36)
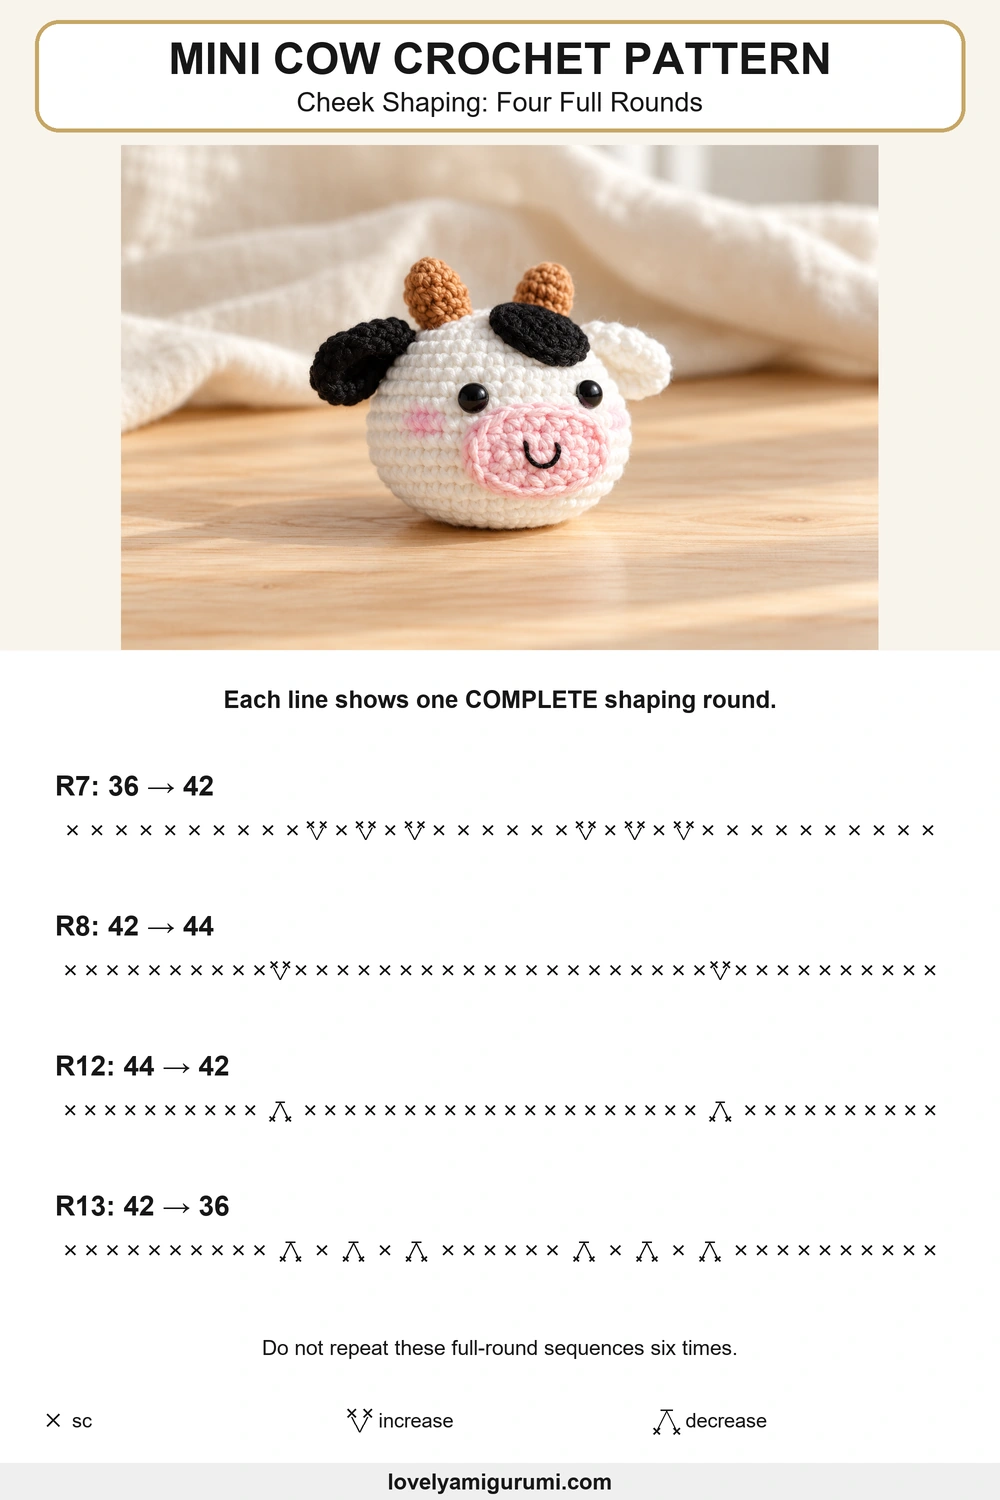
R7: 10 sc, [inc, sc] × 2, inc, 6 sc, [inc, sc] × 2, inc, 10 sc. (42)
R8: 10 sc, inc, 20 sc, inc, 10 sc. (44)
R9–11: 44 sc in each round. (44; 3 rounds)
R12: 10 sc, dec, 20 sc, dec, 10 sc. (42)
R13: 10 sc, dec, sc, dec, sc, dec, 6 sc, dec, sc, dec, sc, dec, 10 sc. (36)
R14–16: 36 sc in each round. (36; 3 rounds)
R17: [4 sc, dec] × 6. (30)
R18: [3 sc, dec] × 6. (24)
Pin the muzzle on one broad side and mark two eye positions just above it, approximately between R10 and R11. Leave about six stitches between the eye posts if using safety eyes. Fit the washers before narrowing the opening. Shape the cheek areas gently while adding filling, keeping the back slightly flatter.
R19: [2 sc, dec] × 6. (18)
Add the remaining filling in small pieces.
R20: [sc, dec] × 6. (12)
R21: dec × 6. (6)
Fasten off, pass the tail through the final six front loops and pull closed. Bury the tail. The six increases in R7 make the cheeks broader; R8 adds two more stitches, and R12–13 reverse that shaping.
Cupped ears: one white and one black
R1: 6 sc in MR. (6)
R2: inc × 6. (12)
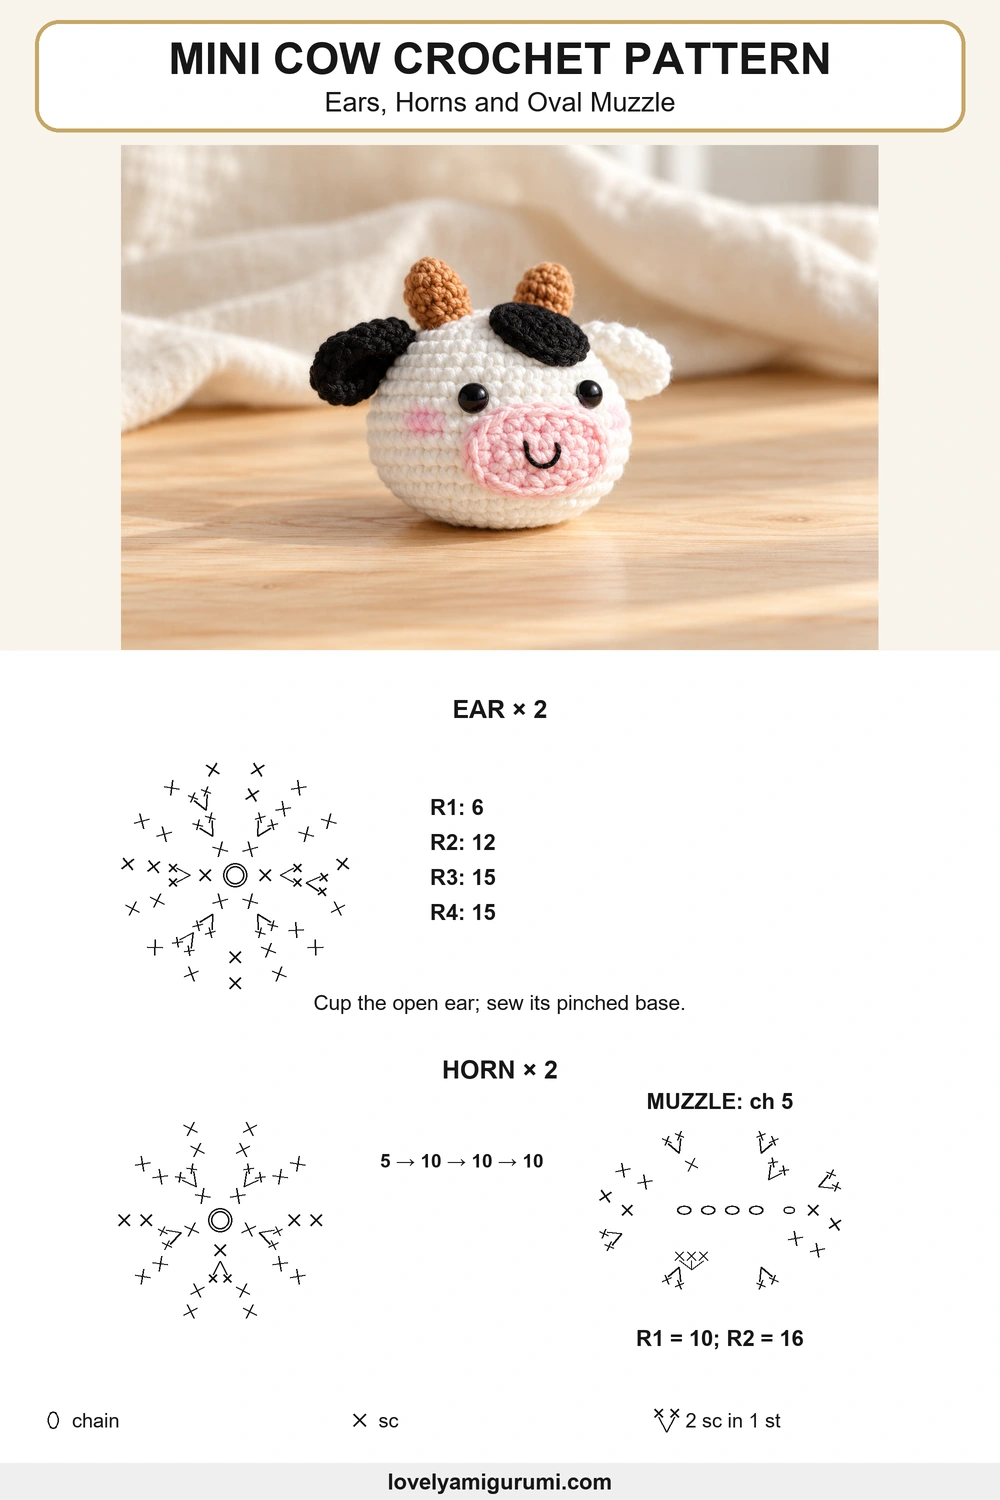
R3: [3 sc, inc] × 3. (15)
R4: 15 sc. (15)
Fasten off with a sewing tail. Leave the ear unstuffed and its opening unclosed. Bring the lower edges together slightly to make a shallow crescent, then secure that pinch with two stitches. Sew the pinched base to a side of the head; keep the cupped face of the ear visible. Do not try to close a fifteen-stitch opening with only four or five paired stitches.
Short horns: make 2
With light brown or beige, R1: 5 sc in MR. (5)
R2: inc × 5. (10)
R3–4: 10 sc in each round. (10; 2 rounds)
Fasten off with a long tail. Add only a tiny amount of filling if needed. Sew the ten-stitch opening to the top of the head between the ears, with the magic-ring tip pointing upward. The horns should remain short and soft.
Pink oval muzzle
Ch 5 and work around both sides of the four usable chains. The muzzle is a flat applique, not a stuffed tube.
R1: 2 sc in the second chain from the hook, 2 sc, 3 sc in the last chain; rotate, 2 sc, then 1 sc in the first worked chain. (10)
R2: inc × 2, 2 sc, inc × 3, 2 sc, inc. (16)
Join with a sl st and leave a long sewing tail. Pin the oval horizontally across the front cheeks around head R11–14, with room above for the eyes. Sew around its entire sixteen-stitch edge with pink yarn, using loose enough stitches to keep the oval flat.
Black forehead patch
R1: 6 sc in MR. (6.) R2: inc × 6. (12.) Join with a sl st and leave a sewing tail. Pin the patch high on one side of the forehead, below the horns and clear of the eye. Shape it gently into a slightly tilted oval while sewing its edge to the head.
Face and final assembly
- Embroider two matching black eyes above the pink muzzle if you did not insert safety eyes.
- Use black thread to make a short vertical stitch at the center of the muzzle and a small U-shaped smile beneath it.
- Pin the horns side by side on the crown, then pin one ear outside each horn. Check the arrangement from the front.
- Sew the ears, horns and forehead patch with matching yarn and hide the ends inside the head.
- Add one or two tiny pale pink cheek stitches beside the muzzle if desired. Avoid large patches of loose thread.
Using the three mini cow charts
Chart 1 shows R1–6 of the head. Chart 2 shows the exact cheek sequences of R7, R8, R12 and R13; these are whole-round sequences, not repeats around the entire head. Chart 3 shows the ear and horn starts and the two oval muzzle rounds. Plain rounds and assembly positions are labeled in the written instructions.
Finishing checks for the mini cow crochet pattern
Look at the head from both the front and top before tightening the sewing tails. Both horns should be the same height, the muzzle should sit horizontally and the ears should cup forward. A slightly flattened back lets the rounded cheeks face outward without needing a separate body.
Does this pattern include a body?
No. The mini cow crochet pattern here makes the decorative head shown on the cover, including its ears, horns and muzzle. A full cow body would require a separate pattern.
Why are there 44 stitches in the middle?
R6 has 36 stitches. R7 adds six increases to reach 42; R8 adds two more to reach 44. R12 removes two stitches, and R13 removes six, bringing the count back to 36.
Should I stuff the ears or muzzle?
No. The ears are cupped with a pinched base, and the muzzle is sewn flat. Only the head needs substantial filling; the horns can receive a tiny amount to support their shape.
Can I sew everything without glue?
Yes. Every separate piece has a sewing edge and a tail. Pin the parts first, sew with matching yarn and hide the ends inside the head.
More farm crochet projects
Pair this mini cow crochet pattern with the baby duck, chill chicken and bunny amigurumi for a small farm-inspired display.
Save the mini cow crochet pattern and three charts to Pinterest. I would love to see whether you choose the black ear on the left or right and where you place the little forehead patch.