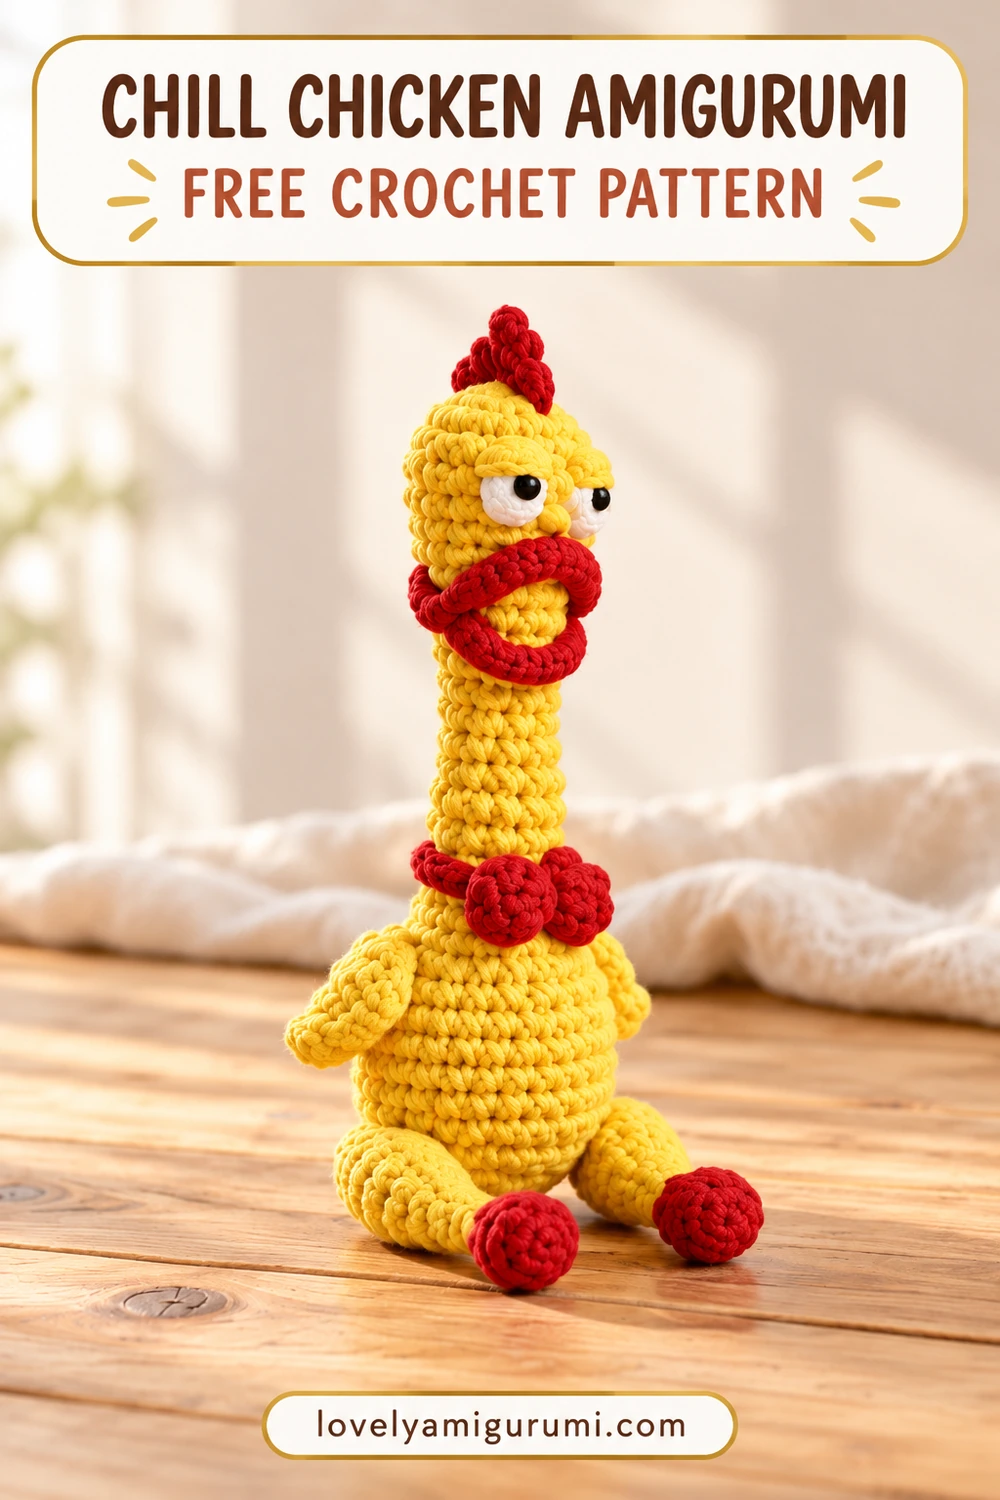
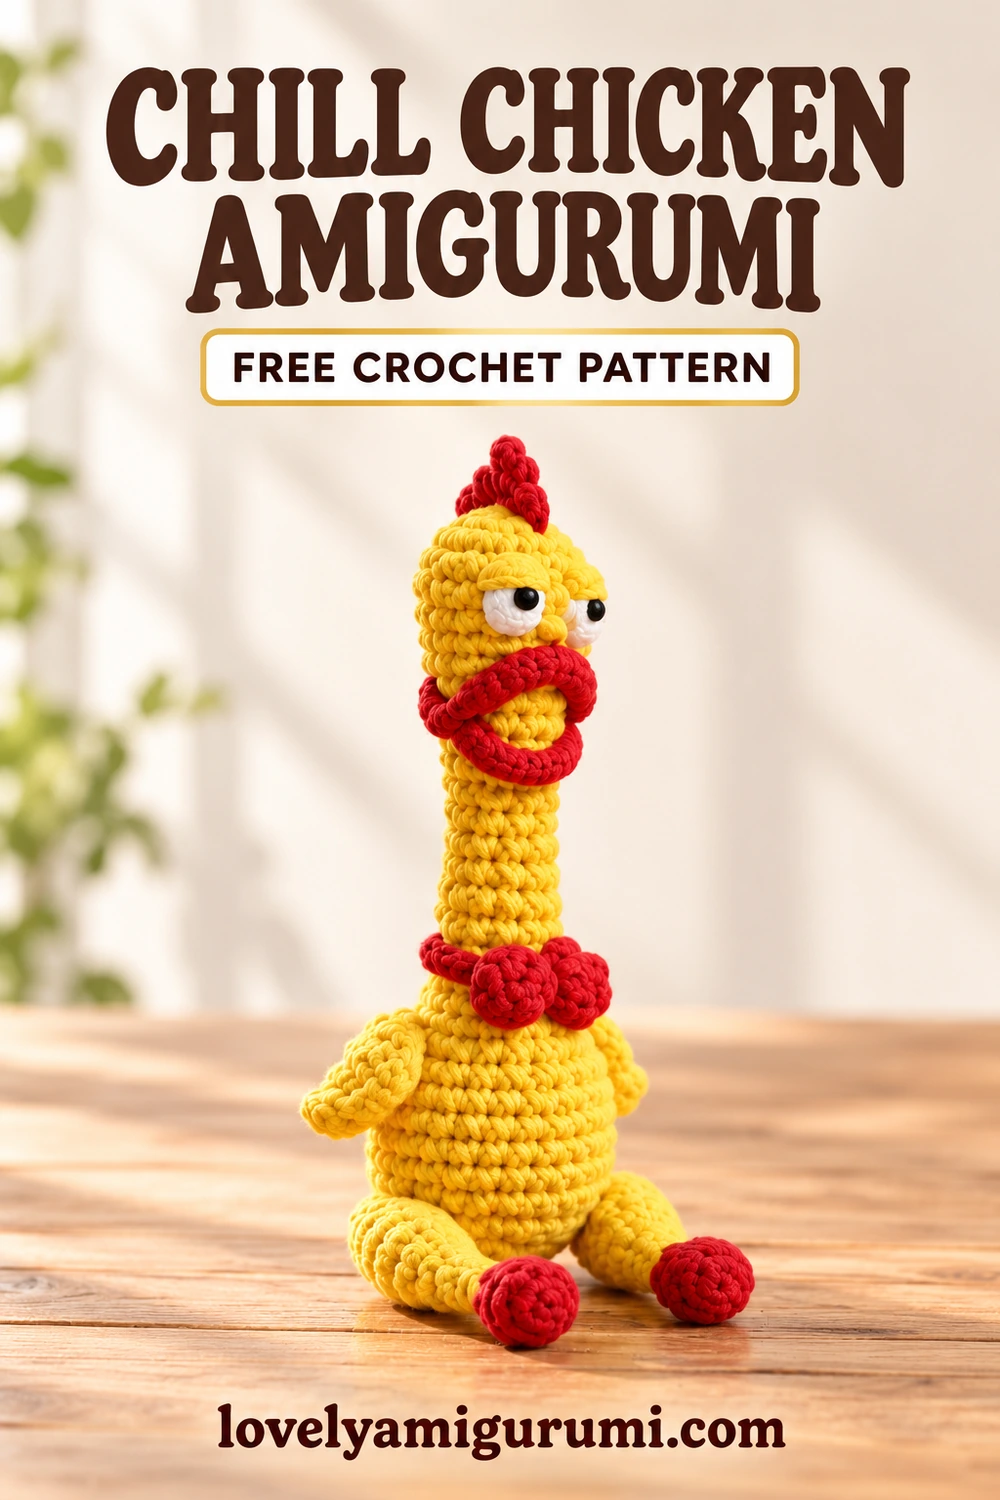
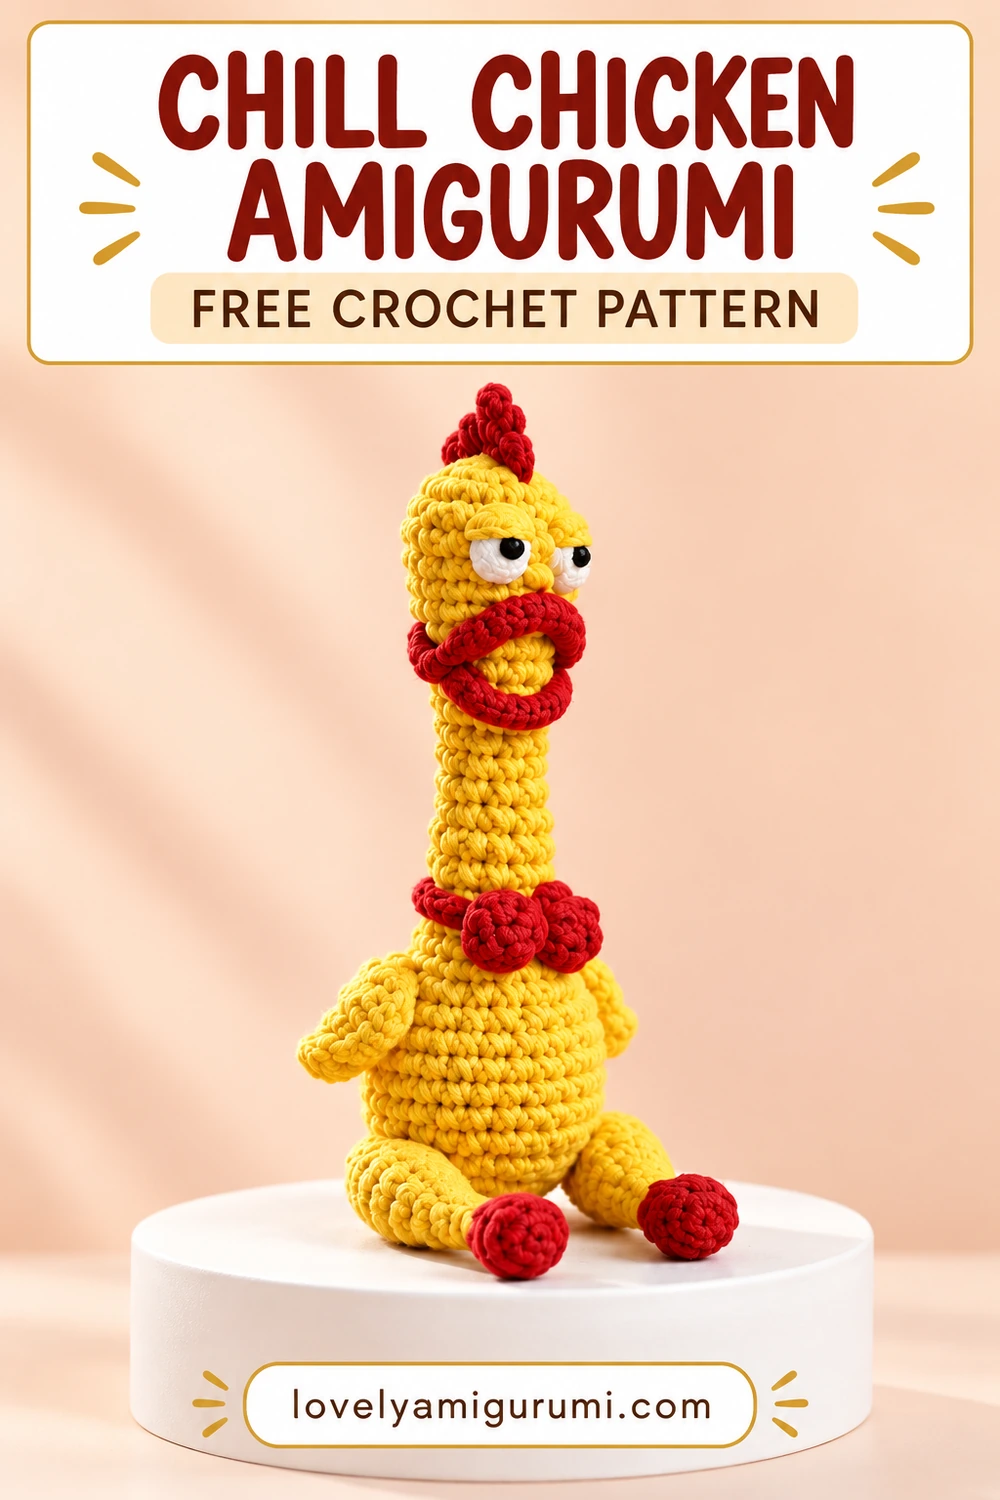
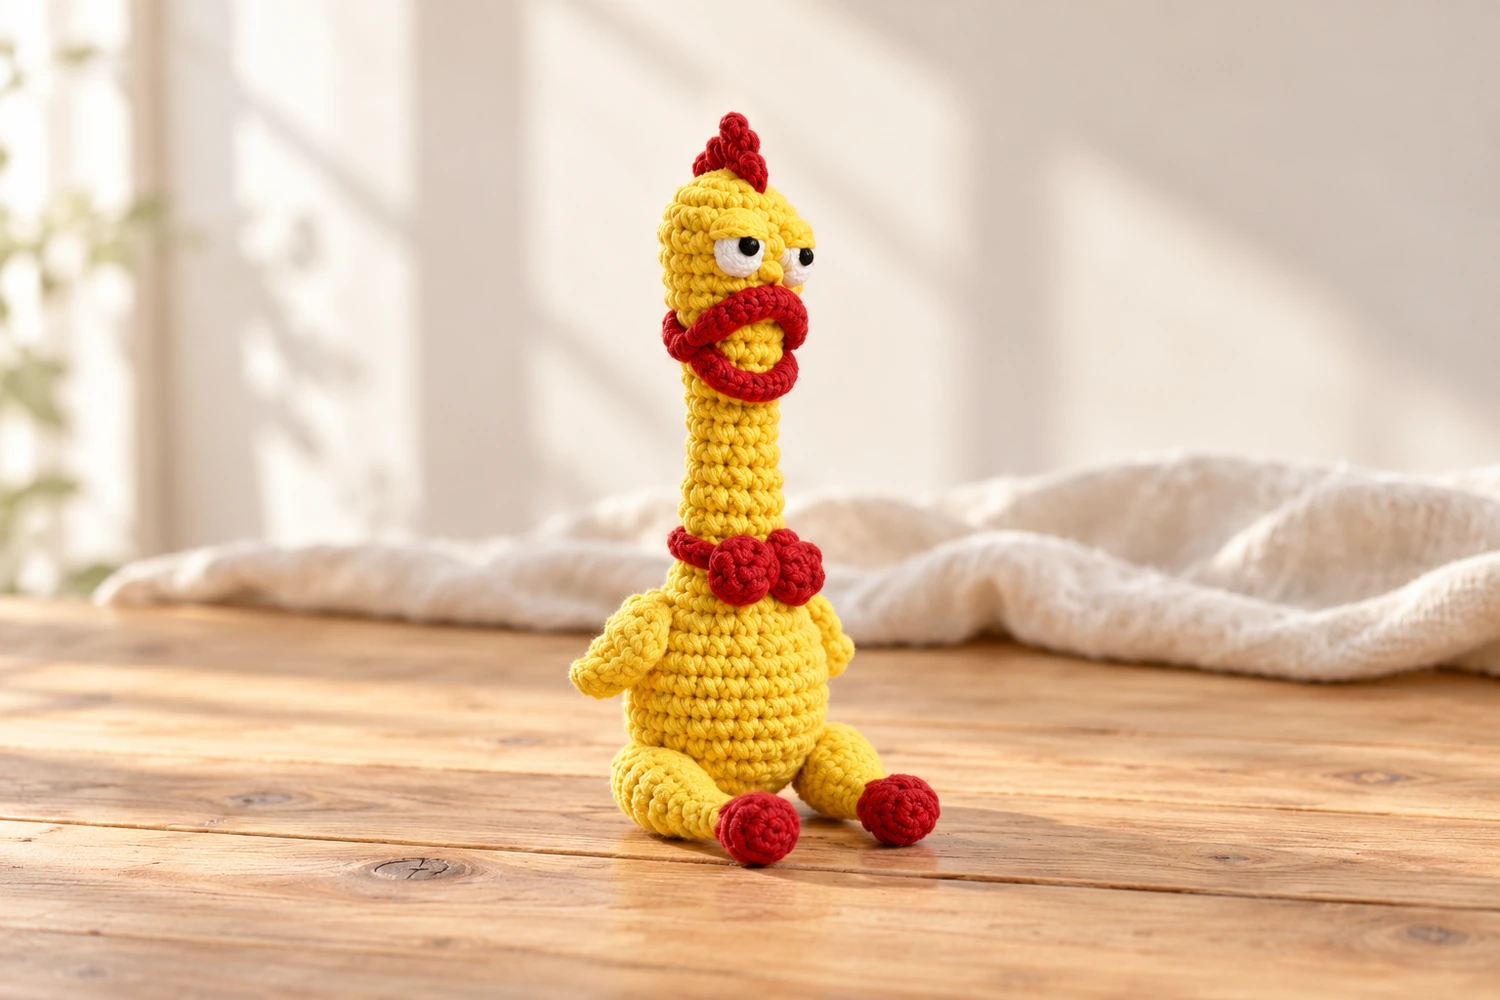
I like the contrast between a very long neck and a tiny sleepy face in this Chill Chicken Amigurumi. The yellow body stays simple, while the red comb, curved wattle and bow tie do most of the character work. My recommendation is to pin the eyelids before sewing them: a small change in their angle can shift the expression from relaxed to mildly unimpressed.
This pattern builds the seated body, narrow neck and head in one piece from the bottom upward. Separate wings, legs and facial details are sewn on afterward. The three charts below show the body base, the neck-to-head shaping and the small red accents.
Materials for Chill Chicken Amigurumi
- Yellow DK cotton yarn and a small amount of red yarn.
- White and black embroidery thread for the eyes; yellow thread for the beak.
- A 2–2.5 mm hook adjusted to make a dense fabric.
- Fiberfill, a marker, yarn needle, scissors and assembly pins.
Use smooth yarn so the small stitches remain visible. Keep the same yarn weight for the red and yellow pieces. The finished height depends on yarn and tension; the long neck is part of the design, not an extra piece or a wire-supported feature. This version is a decorative crochet figure.
Stitches and pattern notes
MR = magic ring; ch = chain; sc = single crochet; hdc = half double crochet; dc = double crochet; sl st = slip stitch; inc = 2 sc in the same stitch; dec = single crochet two stitches together; st(s) = stitch(es). FLO and BLO mean front loops only and back loops only. For an invisible decrease, pick up the front loop of each of the next two stitches, yarn over and pull through both front loops, then complete the single crochet.
Work the round sections in a continuous spiral without joining unless a section says otherwise. Move the marker to the first stitch of each round. Numbers in parentheses are the counts after completing the round. Repeat only the bracketed sequence the stated number of times. Turning chains and joining slip stitches do not count as stitches. Leave sewing tails on separate parts and secure all ends inside the work.
Chill Chicken Amigurumi: body, neck and head
Begin in yellow at the bottom of the body. Add filling gradually as the opening narrows; do not wait until the whole figure is finished.
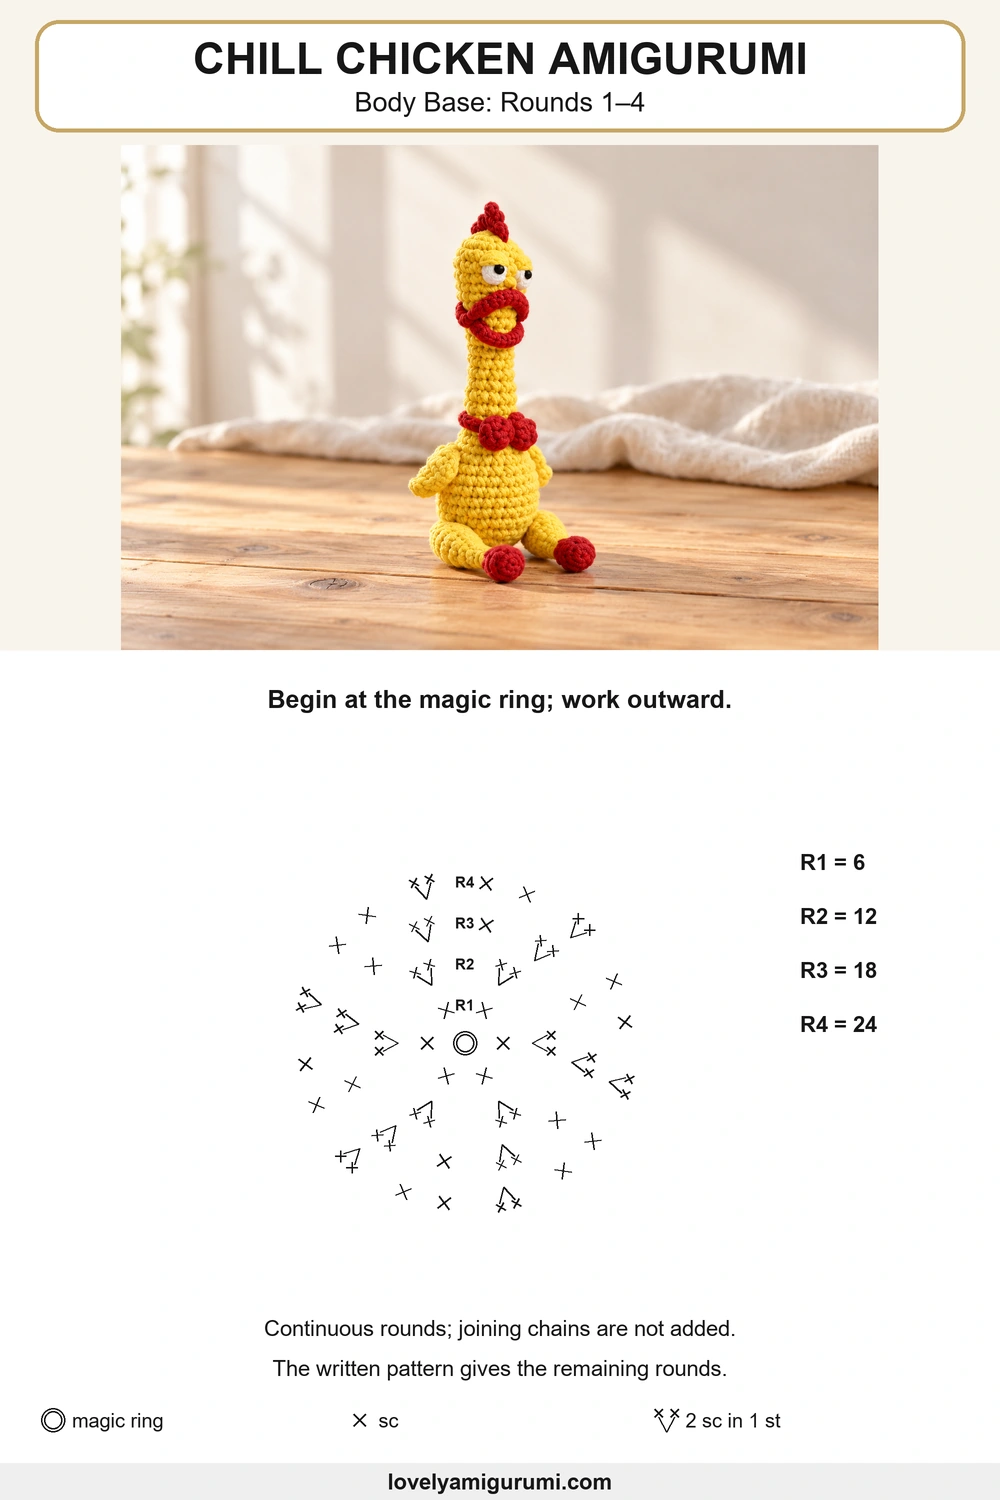
R1: 6 sc in MR. (6)
R2: inc × 6. (12)
R3: [sc, inc] × 6. (18)
R4: [2 sc, inc] × 6. (24)
R5–10: 24 sc in each round. (24; 6 rounds)
R11: [2 sc, dec] × 6. (18)
R12–13: 18 sc in each round. (18; 2 rounds)
Fill the body, keeping its bottom rounded.
R14: [sc, dec] × 6. (12)
R15–18: 12 sc in each round. (12; 4 rounds)
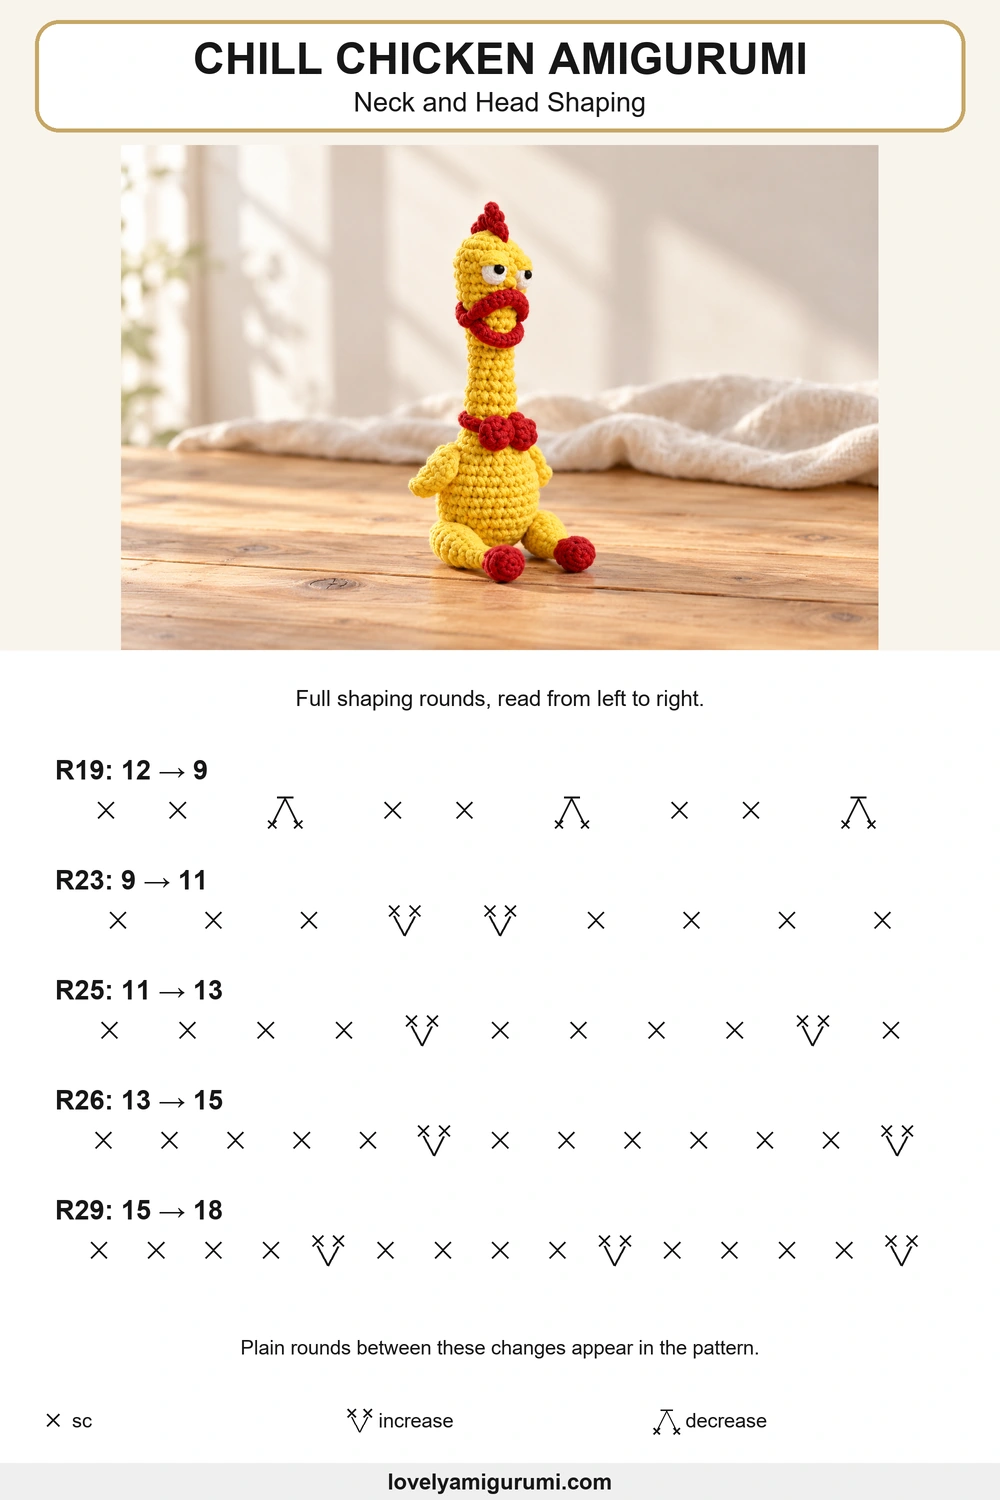
R19: [2 sc, dec] × 3. (9)
R20–22: 9 sc in each round. (9; 3 rounds)
R23: 3 sc, inc × 2, 4 sc. (11)
R24: 11 sc. (11)
R25: [4 sc, inc] × 2, sc. (13)
R26: 5 sc, inc, 6 sc, inc. (15)
R27–28: 15 sc in each round. (15; 2 rounds)
R29: [4 sc, inc] × 3. (18)
R30–31: 18 sc in each round. (18; 2 rounds)
R32: [sc, dec] × 6. (12)
Fill the head and top of the neck.
R33: dec × 6. (6)
Fasten off, pass the tail through the last six front loops and pull closed. Use small pieces of filling along the neck to support the head without stretching the nine-stitch section. R23 uses the nine existing stitches once and adds two increases to reach eleven.
Yellow legs with red feet: make 2
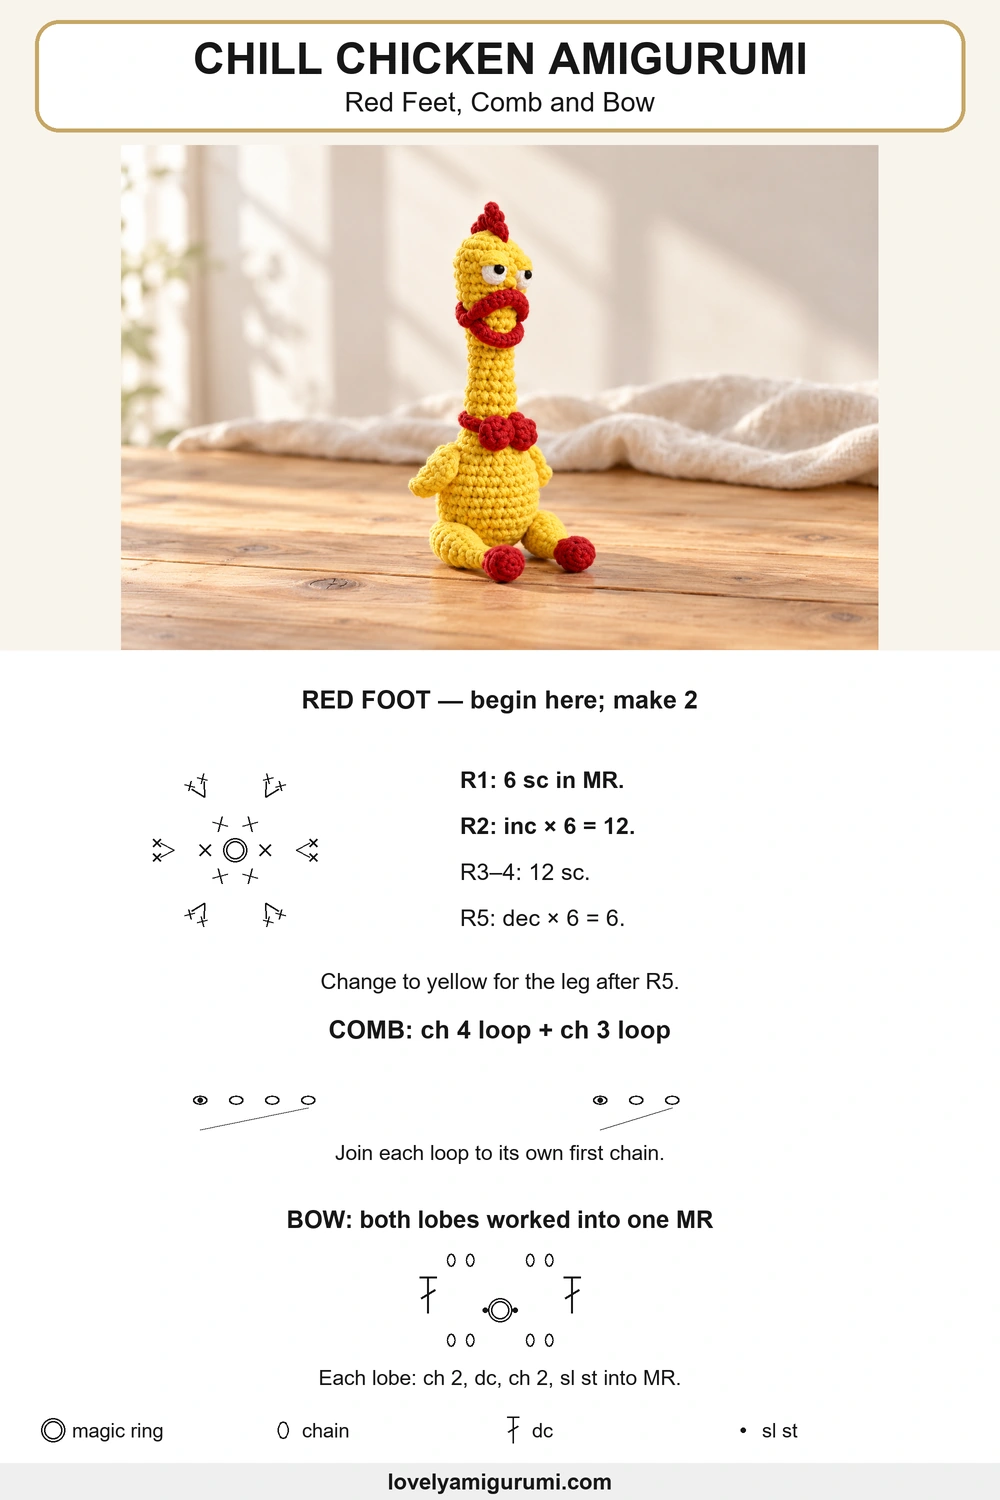
With red, R1: 6 sc in MR. (6)
R2: inc × 6. (12)
R3–4: 12 sc in each round. (12; 2 rounds)
Add a little filling to the red foot.
R5: dec × 6. (6)
Change to yellow.
R6–9: 6 sc in each round. (6; 4 rounds)
R10: [sc, inc] × 3. (9)
R11–12: 9 sc in each round. (9; 2 rounds)
Leave the nine-stitch upper opening unclosed with a long sewing tail. Keep the yellow leg softly filled so it can angle forward. Pin each opening to the lower front of the body around R4–6, distribute the nine stitches around that attachment area and sew all the way around. Position the red feet toward the front.
Small wings: make 2
With yellow, ch 4. Work sc in the second chain from the hook, hdc in the next chain and 3 hdc in the last chain. Rotate to the unused side: hdc in the middle chain and 2 sc in the first worked chain. (8 stitches: 3 sc and 5 hdc.) Join to the first sc with a sl st. Leave a tail and sew the straight end to the side of the body around R10–12; let the rounded end point down.
Red comb
Ch 4 and sl st into the first chain to form one loop. Ch 3 and sl st into that same first chain to form a second loop. Fasten off with a sewing tail. Stitch the two loop bases together, then sew that base to the crown around head R30–31. The two red loops remain visible above the head; do not attach the comb to body R1–2.
Curved red wattle
Make two matching red strips. For each strip, ch 7; work sc in the second chain from the hook and in the next five chains. (6 sc.) Fasten off with a tail. Pin one strip in a shallow curve above the beak and the second in a deeper U beneath it. Sew the ends and a few middle stitches to the front of the head, leaving the yellow beak visible between them.
Yellow beak and sleepy eyes
Use yellow embroidery thread to make a small horizontal beak at the front of the head, around R27–28. Build it with several short parallel stitches rather than a large knot. Place the curved wattles above and below it, then check the whole face before sewing the eyes.
With white thread, embroider two small upright ovals above the beak, around R29–30. Leave about two stitches between them. Add small black pupils near the upper inner sides. Use matching yellow yarn to stitch a short, slightly slanted eyelid across the top of each white oval. Keep some white visible beneath the lids for the relaxed expression.
Red bow tie
In a magic ring, work [ch 2, dc, ch 2, sl st into the ring] twice. Pull the ring closed, fasten off and wrap the center with the sewing tail to separate the two lobes. The chains form the bow edges and do not count as extra dc.
For the neck band, make a red chain long enough to fit comfortably around the lower neck near R14–15. Join its ends with a needle at the back without tightening the neck. Sew the bow to the front of the band, then add a few matching securing stitches through the band and neck. Fit the chain to your own figure instead of forcing a fixed ten-chain length.
Finishing checks for Chill Chicken Amigurumi
- Check the head from the front before tightening the final facial stitches; keep the pupils and eyelids at matching heights.
- The feet should face forward and the two leg openings should sit at the same body level.
- The comb belongs at the crown, while the bow sits near the lower neck.
- Secure the wings, wattle and bow with thread or yarn; glue is not required.
- Support the neck with evenly distributed filling. Do not insert pipe cleaners or exposed wire.
How to use the three chicken charts
Chart 1 shows body R1–4 followed by the labeled plain rounds. Chart 2 shows the exact neck and head increase sequences, including the nine-to-eleven transition in R23. Chart 3 shows the foot start and the two-loop comb and bow construction. Use the written instructions for the face and sewing positions.
Why does the neck look narrow?
R19–22 has only nine stitches around. That narrow section gives Chill Chicken Amigurumi its long-necked silhouette. Fill it little by little and avoid pulling the bow band tight.
Can I change the expression?
Yes. Raise the lids to expose more white for an alert look, or lower them slightly for a sleepy face. Pin the placement first so you can compare both eyes before securing the thread.
Do I need glue for the small pieces?
No. This version gives sewing instructions for every separate piece. Leave enough tail to secure the comb, wings, feet and bow, then hide the ends inside the figure.
More farm animal crochet
Pair this Chill Chicken Amigurumi with the baby duck and mini cow head. The white bunny adds a seated rabbit to the collection.
Save the Chill Chicken Amigurumi pattern and charts to Pinterest for your next crochet session. I would love to see the sleepy or sassy expressions you choose.