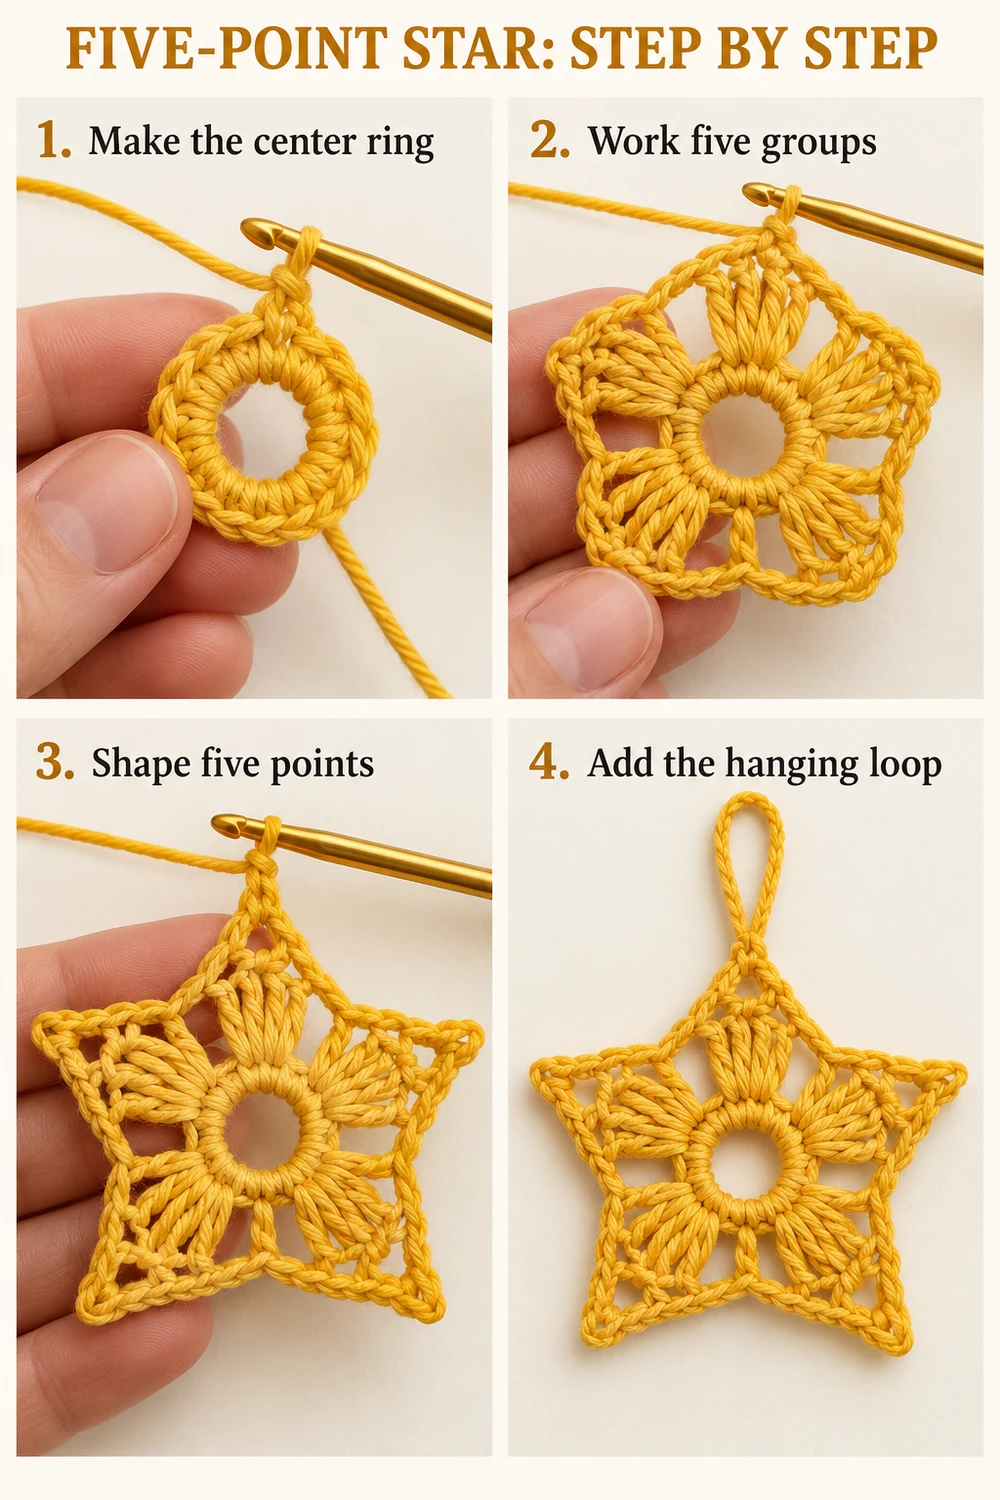
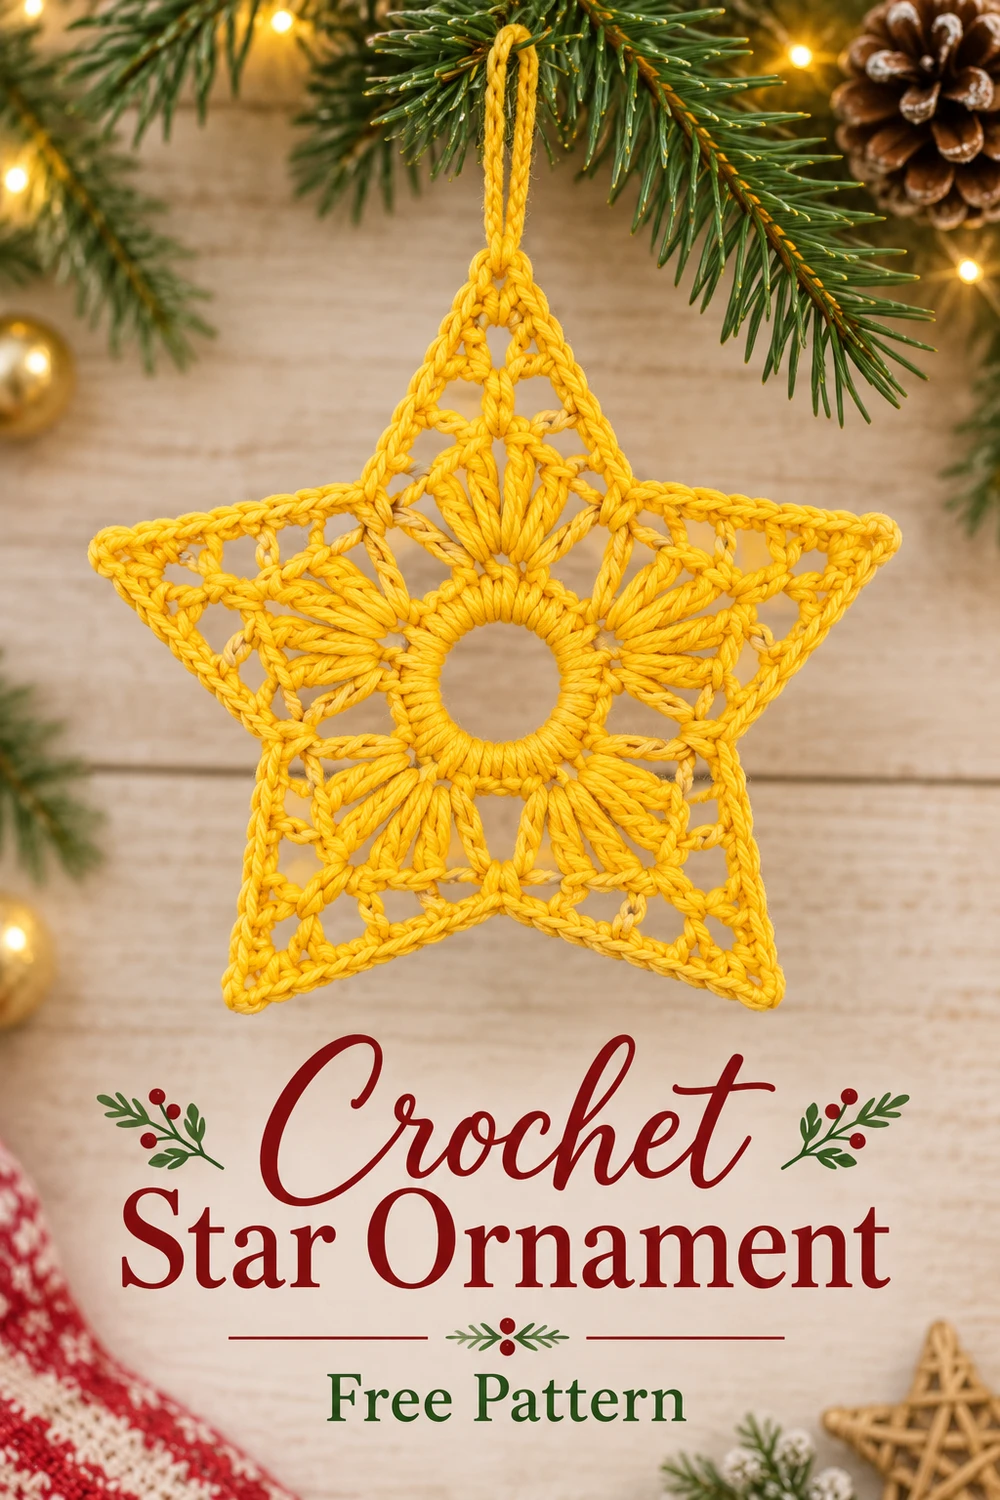
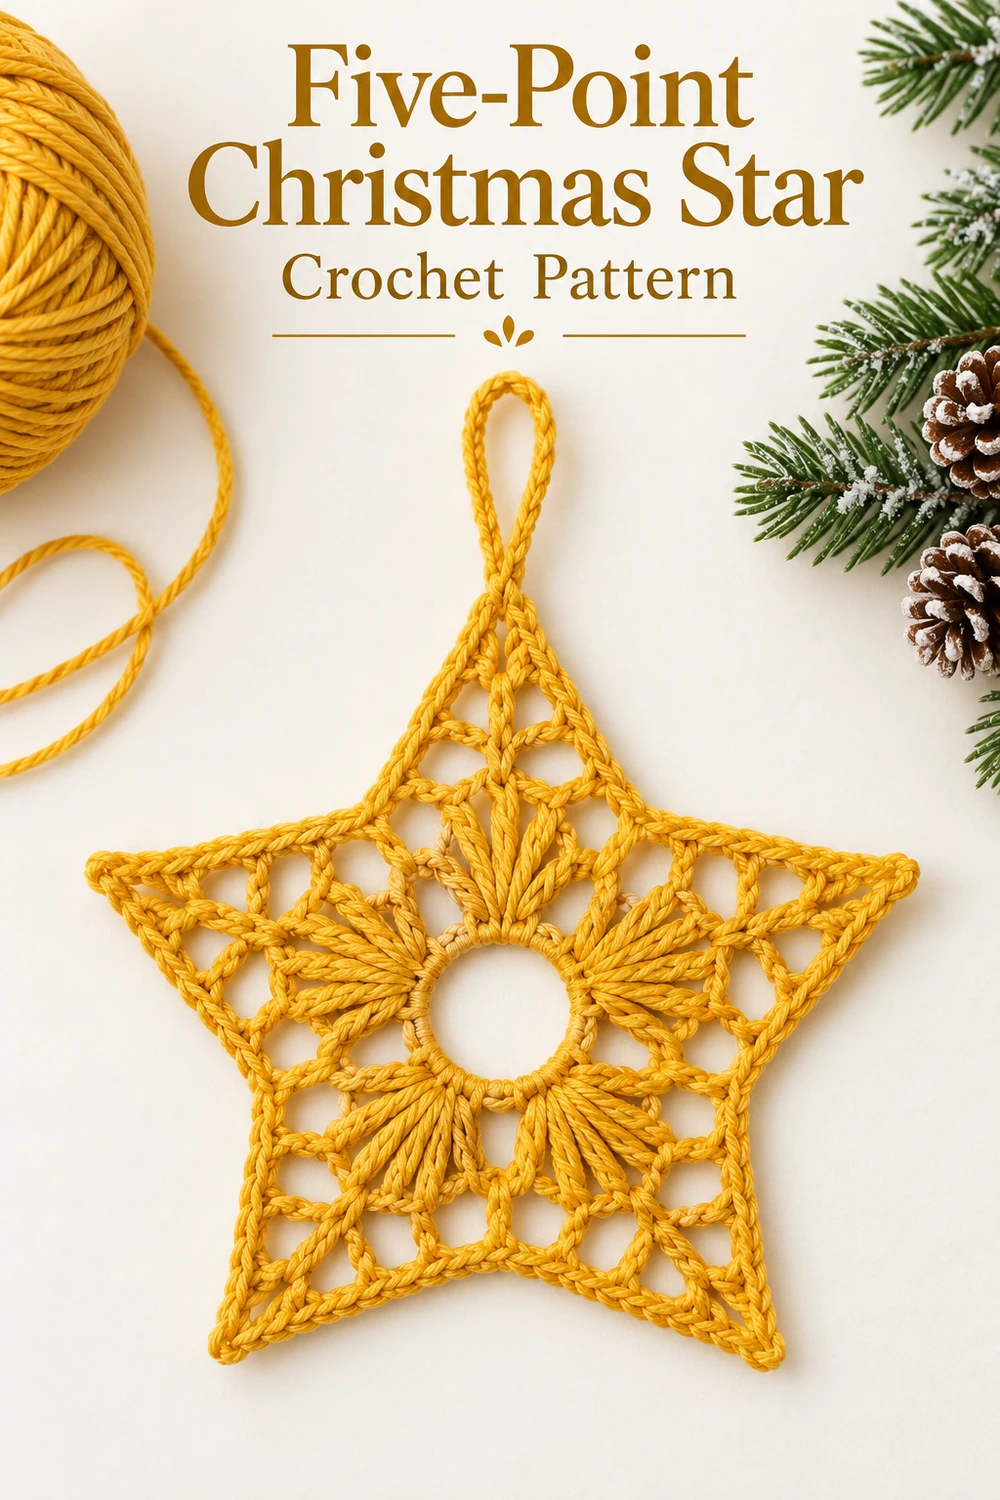
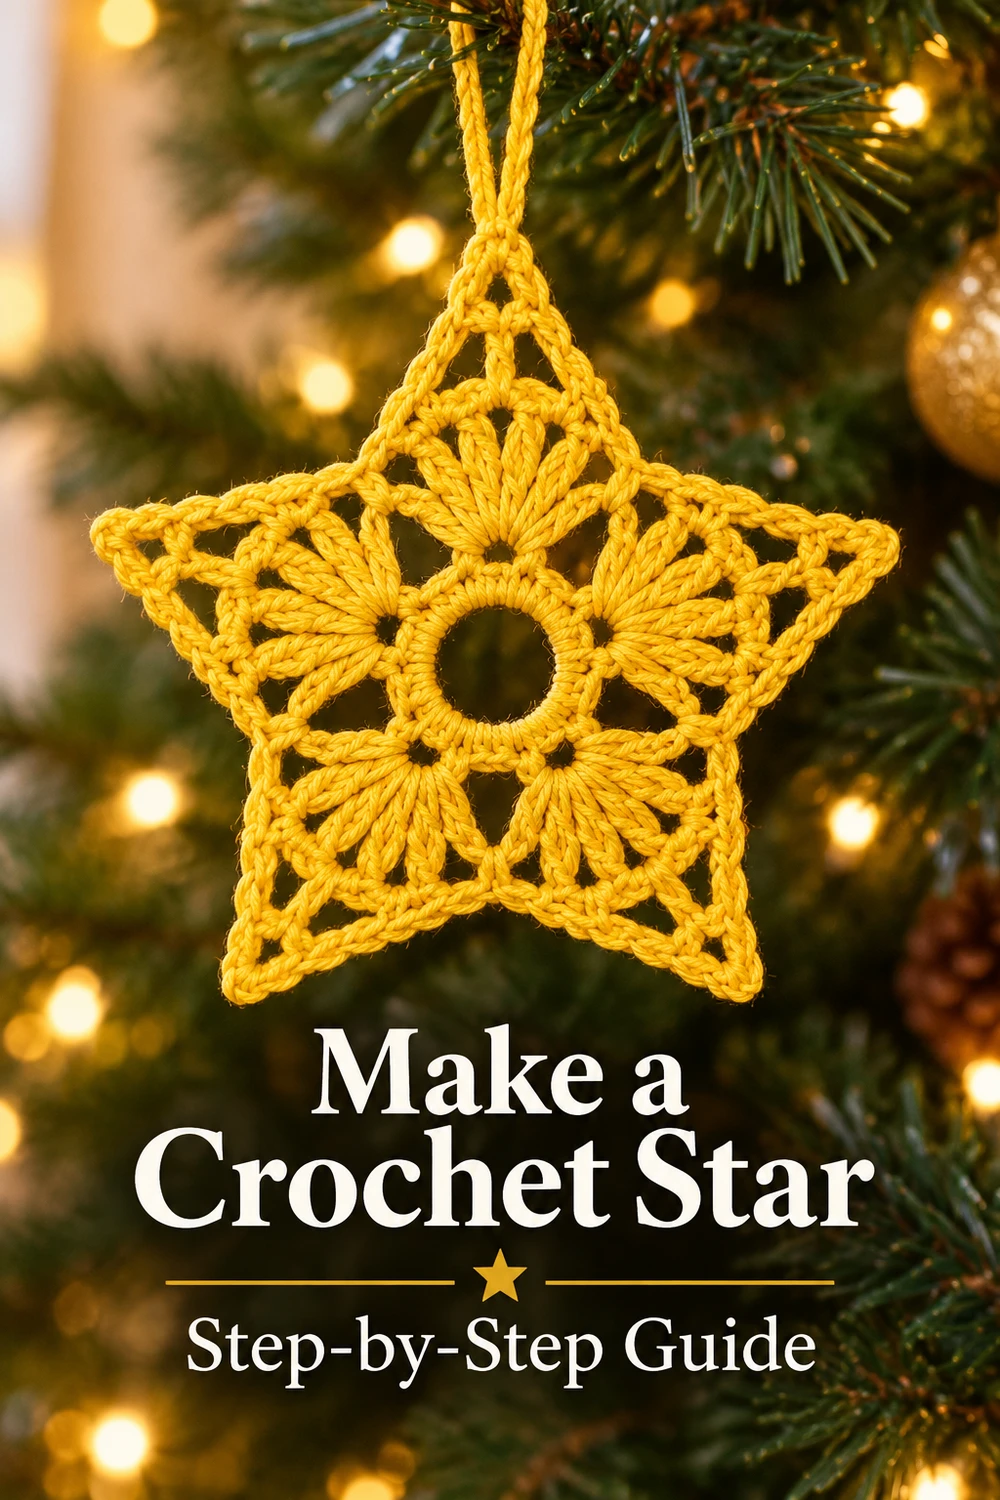
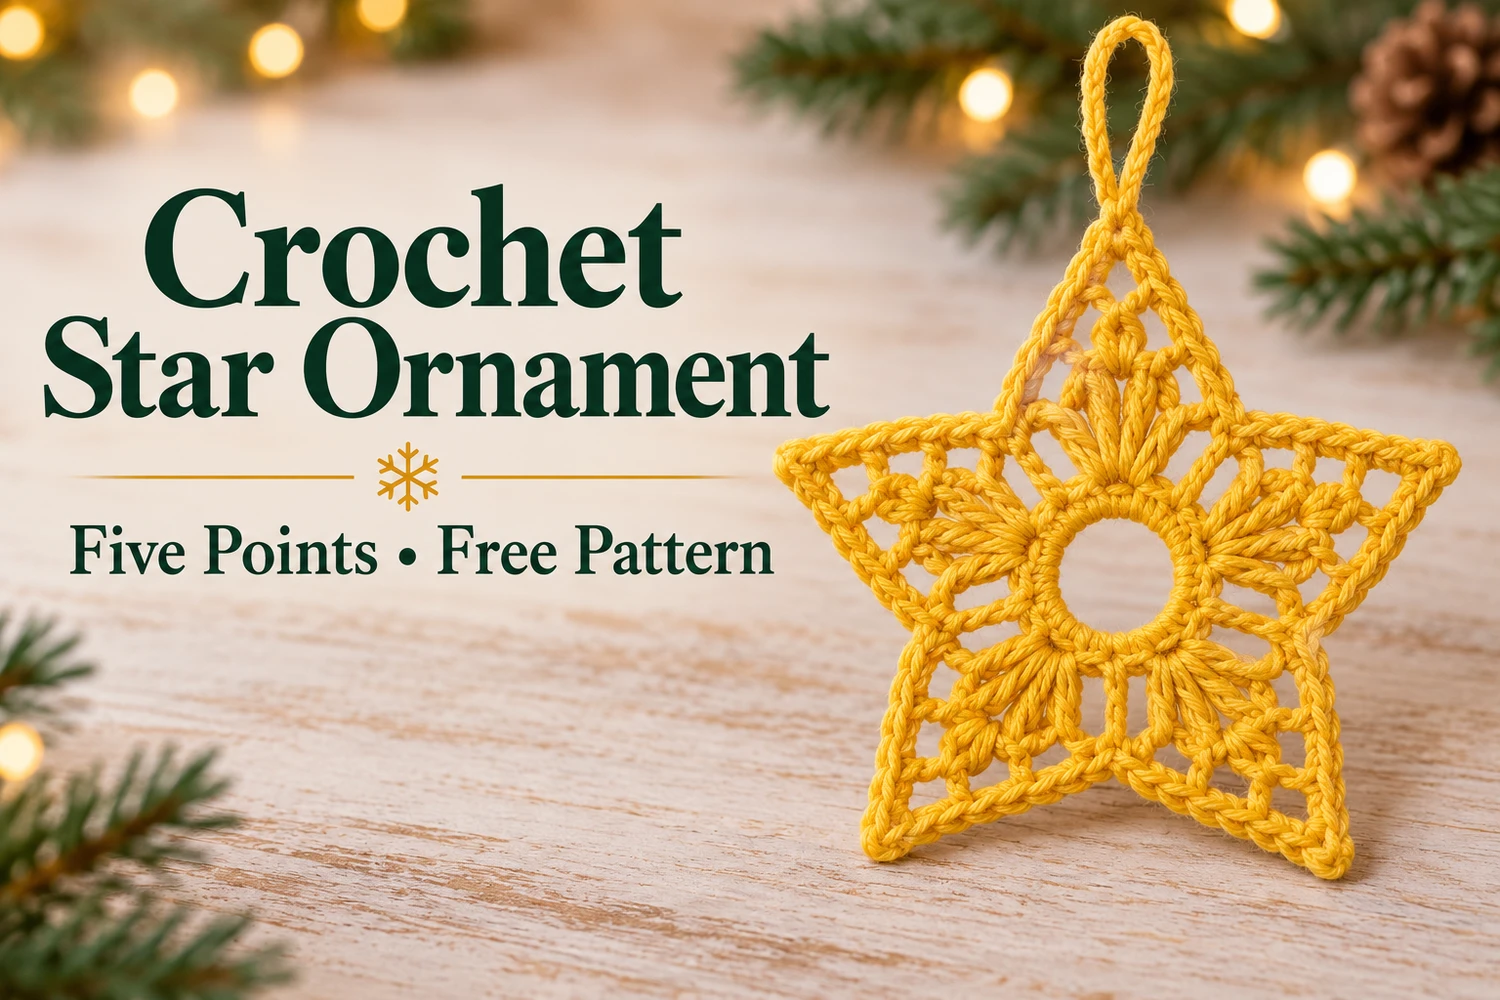
This Yellow Five Point Star Crochet Pattern creates a flat golden-yellow Christmas ornament with five pointed tips, an open circular center, and a matching yarn loop. Small groups of double crochet form the inner wheel, while taller stitches and chain spaces shape the five outer points.
The airy star is worked in two joined rounds. A light blocking opens the chain spaces and defines each point. Use it as a small tree decoration, a gift topper, or part of a handmade garland.
Pattern Information
- Skill level: confident beginner; working into a ring, treble crochet, and identifying the middle stitch of a group.
- US crochet terminology throughout.
- Estimated width: 9–12 cm with sport cotton and a 2.5 mm hook; actual size depends on yarn and tension.
- Construction: one flat, unstuffed five-point star plus a separately made hanging chain.
- Color: golden yellow, including the hanging loop.
This is an image-inspired adaptation, not a transcription of the reference chart. Stitch totals and repeats have been reviewed, but the design has not been physically crocheted or independently tested. Follow the written construction and use the photographs as appearance references.
Materials
- Sport cotton in golden yellow, approximately 10–15 g.
- 2–2.5 mm crochet hook, or a hook that makes firm but flexible stitches with your yarn.
- Tapestry needle and scissors.
- Blocking mat and rustproof pins.
- Optional cotton-compatible fabric stiffener for a firmer ornament.
Abbreviations and Working Notes
- ch: chain; sl st: slip stitch; sc: single crochet.
- dc: double crochet; tr: treble crochet.
- sp: space; st: stitch; Rnd: round.
- Starting ch 3 counts as one dc in both rounds.
- The foundation ch-5 ring is a small open circle. Do not pull it closed like a magic ring.
- Work into the chain spaces unless a stitch is specifically named. Do not turn between rounds.
- Use a removable marker in the middle dc of each three-dc group if it helps.
Yellow Five Point Star Crochet Pattern
1. Open Foundation Ring
Ch 5. Sl st into the first chain to form a small ring, taking care not to twist the chain. Leave a tail long enough to weave through the back of the first round. The center should remain visibly open.
Do not make the foundation chain excessively tight. You will work all fifteen first-round dc into this ring, around the chains rather than into individual chain loops.
2. Round 1: Five Inner Groups
Rnd 1: ch 3 (counts as the first dc), work 2 dc into the ring, ch 2. Repeat (3 dc into the ring, ch 2) four more times. Join with a sl st to the top of the beginning ch 3. Fasten off.
Total: 15 dc arranged in five groups of three, with five ch-2 spaces between the groups. The slip-stitch join does not count as a stitch.
Spread the groups evenly around the ring. Mark the second dc of each group: this is the middle stitch. The first group includes the starting ch 3 as its first dc, so its middle stitch is the first actual dc worked after that chain.
3. Round 2: Five Pointed Fans
With the right side facing, join yellow yarn with a sl st in any ch-2 space. Each of the five points is worked entirely into one of these spaces. Between points, a sc anchors the valley into the middle dc of the following three-dc group.
First point: ch 3 (counts as a dc), then work 1 dc, 1 tr, ch 3, 1 tr, and 2 dc into the same ch-2 space. Ch 1, sc into the middle dc of the next three-dc group, ch 1.
Next four points: repeat (2 dc, 1 tr, ch 3, 1 tr, 2 dc) in the next ch-2 space; ch 1, sc into the middle dc of the next three-dc group, ch 1. Work this full repeat four times, once in each remaining ch-2 space.
After the fifth valley and its final ch 1, join with a sl st to the top of the starting ch 3. Fasten off and weave in the tail on the back, passing through dense stitch bases without closing the chain spaces.
Round 2 totals: 20 dc, 10 tr, five sc, five ch-3 tip spaces, and ten ch-1 spaces. There are exactly five pointed fans. The starting ch 3 is included in the 20 dc; neither joining sl st is counted.
The two tr stitches sit on either side of each ch-3 tip, making that area taller than the dc on the sides. The sc between fans pulls each valley inward. Do not add sc into the unused outer dc of the first-round groups: those are intentionally skipped.
4. Block the Five-Point Shape
Weave in the foundation and join tails securely. Dampen the star gently and blot with a towel. Lay it flat, then pin each of the five ch-3 tips outward to form a balanced star. Pin the five sc valleys inward and open the center ring without stretching it disproportionately.
Check that all five points project a similar distance from the center. Smooth the two halves of each fan and spread the chain spaces evenly. Let the cotton dry completely before removing the pins. Blocking defines the outline; do not force a tightly cupped piece flat by excessive stretching.
5. Matching Hanging Loop
With yellow yarn, ch 28 and fasten off, leaving long tails at both ends. Fold the chain into a loop. Sew both ends to the back of one ch-3 tip, spreading the attachment across the adjacent tr stitch tops and the tip chain rather than one loose loop.
Take several small sewing passes, then weave the tails through the backs of nearby stitches. Keep the knot and seam behind the star. The hanging chain is separate from the structural ch-3 point and is not included in either round total.
Lift the finished ornament gently by the loop and check that the star hangs upright. Adjust the sewn attachment if it twists forward. A shorter loop can be used for a gift topper; keep both ends securely attached.
Reading the Two Complete Charts
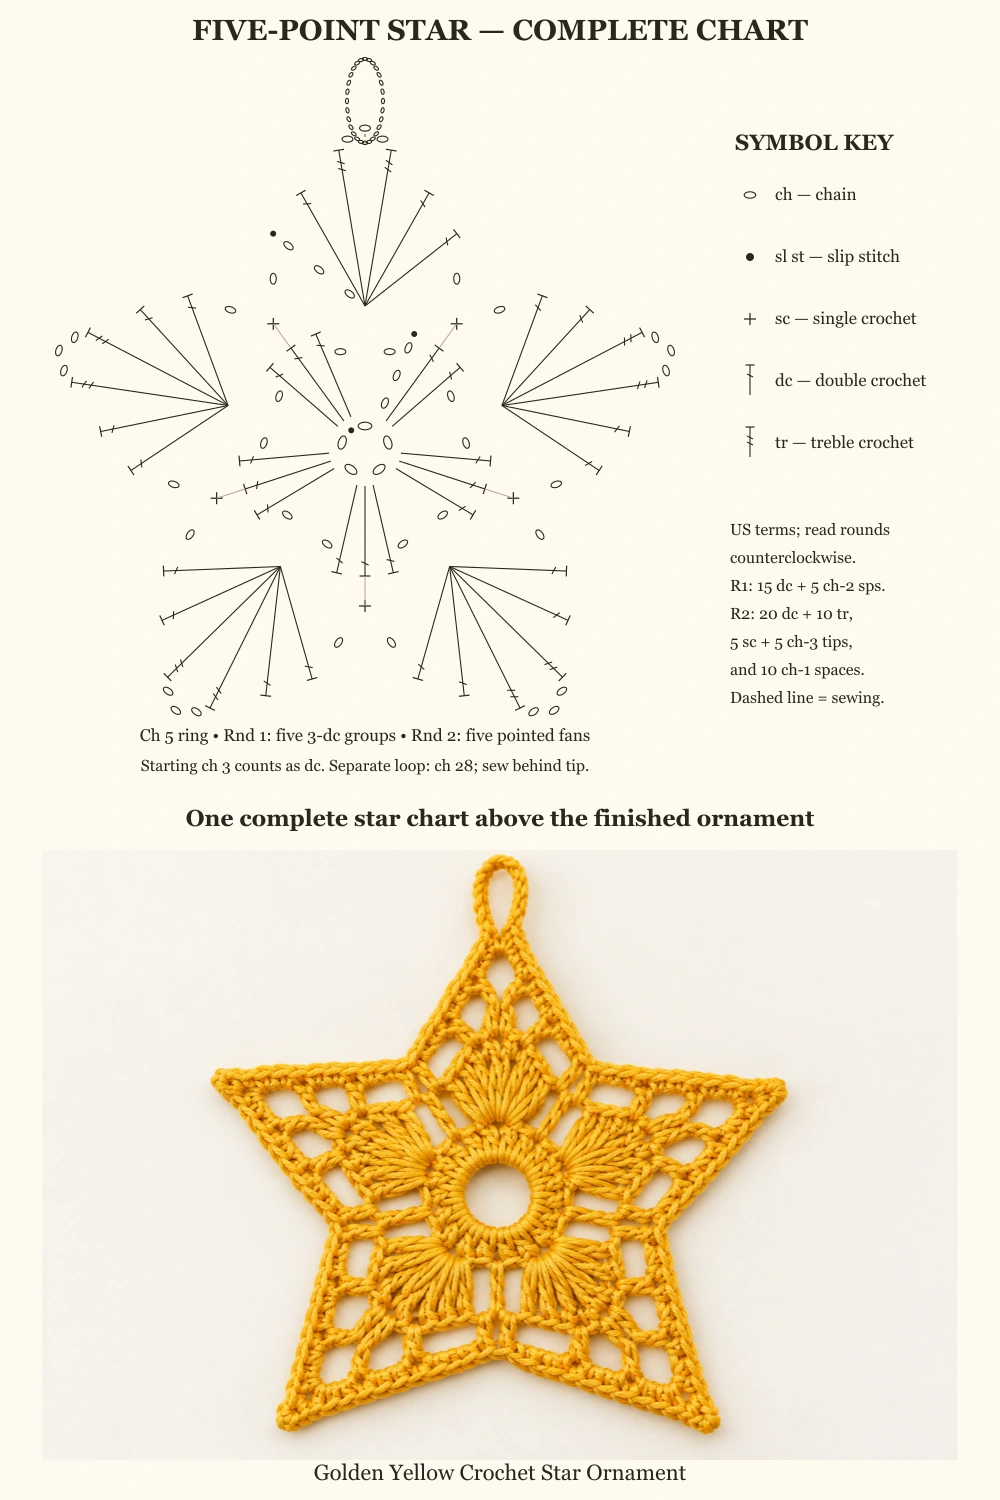
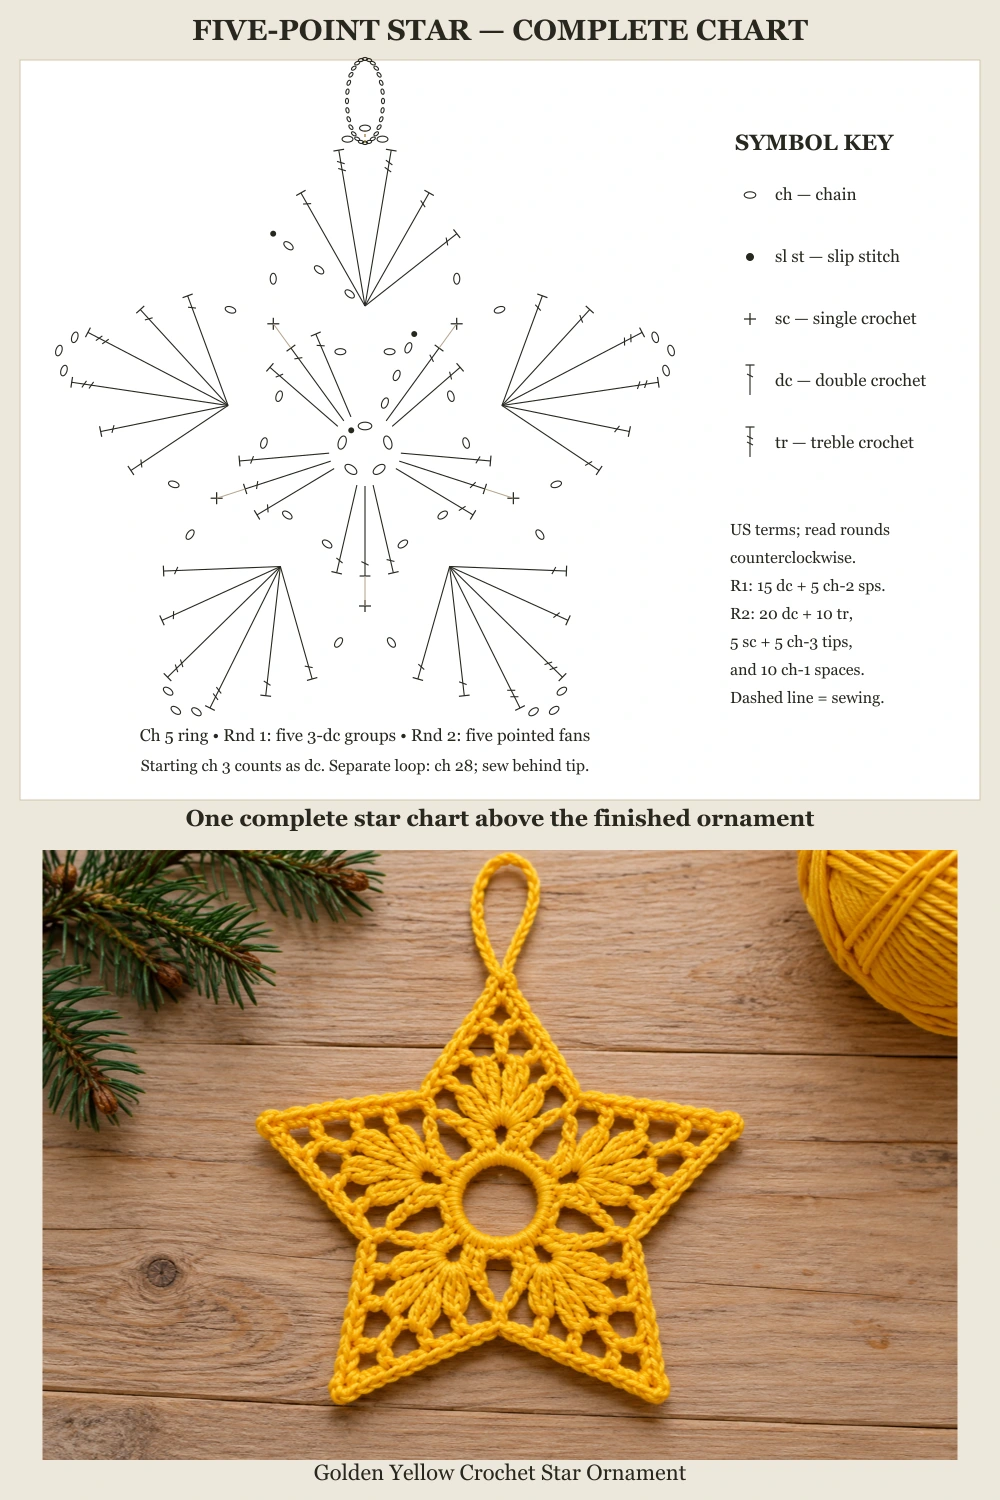
Each chart shows the whole five-point star, not a single point repeat: a ch-5 foundation ring, five inner groups, all five outer pointed fans, the valley anchors, and a separate hanging-loop guide. The finished yellow ornament appears below the chart in two different photo settings.
An oval means ch, a filled dot means sl st, a plus means sc, a T with one diagonal bar means dc, and a T with two diagonal bars means tr. Read the rounds counterclockwise with the right side facing. The beginning chain substitutes for the first dc; the remaining points use ordinary dc. Dashed attachment marks indicate sewing for the separate hanging chain.
Finishing and Care
For extra firmness, test a suitable fabric stiffener on a yarn sample and follow its label. Apply lightly so the holes stay open. Shape the points while drying. Store the star flat between tissue to protect the tips and prevent the loop from catching.
Spot-clean gently, reshape while damp, and dry flat. This is a decorative hanging ornament; keep the long loop away from young children and pets.
Questions and Tips
Why do I have six points? Count the first-round spaces. There must be five ch-2 spaces, and each receives exactly one pointed fan. Do not add a fan over the join.
Why is my star curling? Check that each first-round group has three dc, each point has four dc and two tr, and each valley has two ch-1 spaces around one sc. Loosen overly tight chains and block lightly. Try a slightly larger hook if the fabric remains too tight.
Can I use a magic ring? A ch-5 ring gives a reliable visible opening for this version. If you substitute a magic ring, keep its center open and secure the tail carefully rather than cinching it shut.
Can I change the color? Yes. White, red, or green cotton uses the same stitch counts. Golden yellow matches the supplied reference. Changing yarn weight changes the finished size and stiffness.
Can I join several into a garland? Make each star separately and attach it by its loop to a display cord. Leave room between stars so the tips retain their shape.
More Free Christmas Crochet Patterns
Save This Pattern
Save this yellow star for your handmade holiday decorations. Happy crocheting from Lovely Amigurumi!
Tutorial, Two Complete Charts, and Pinterest Gallery
The six 1000 × 1500 images are grouped below: one photo tutorial, two complete chart-above-photo guides, and three Pinterest images.