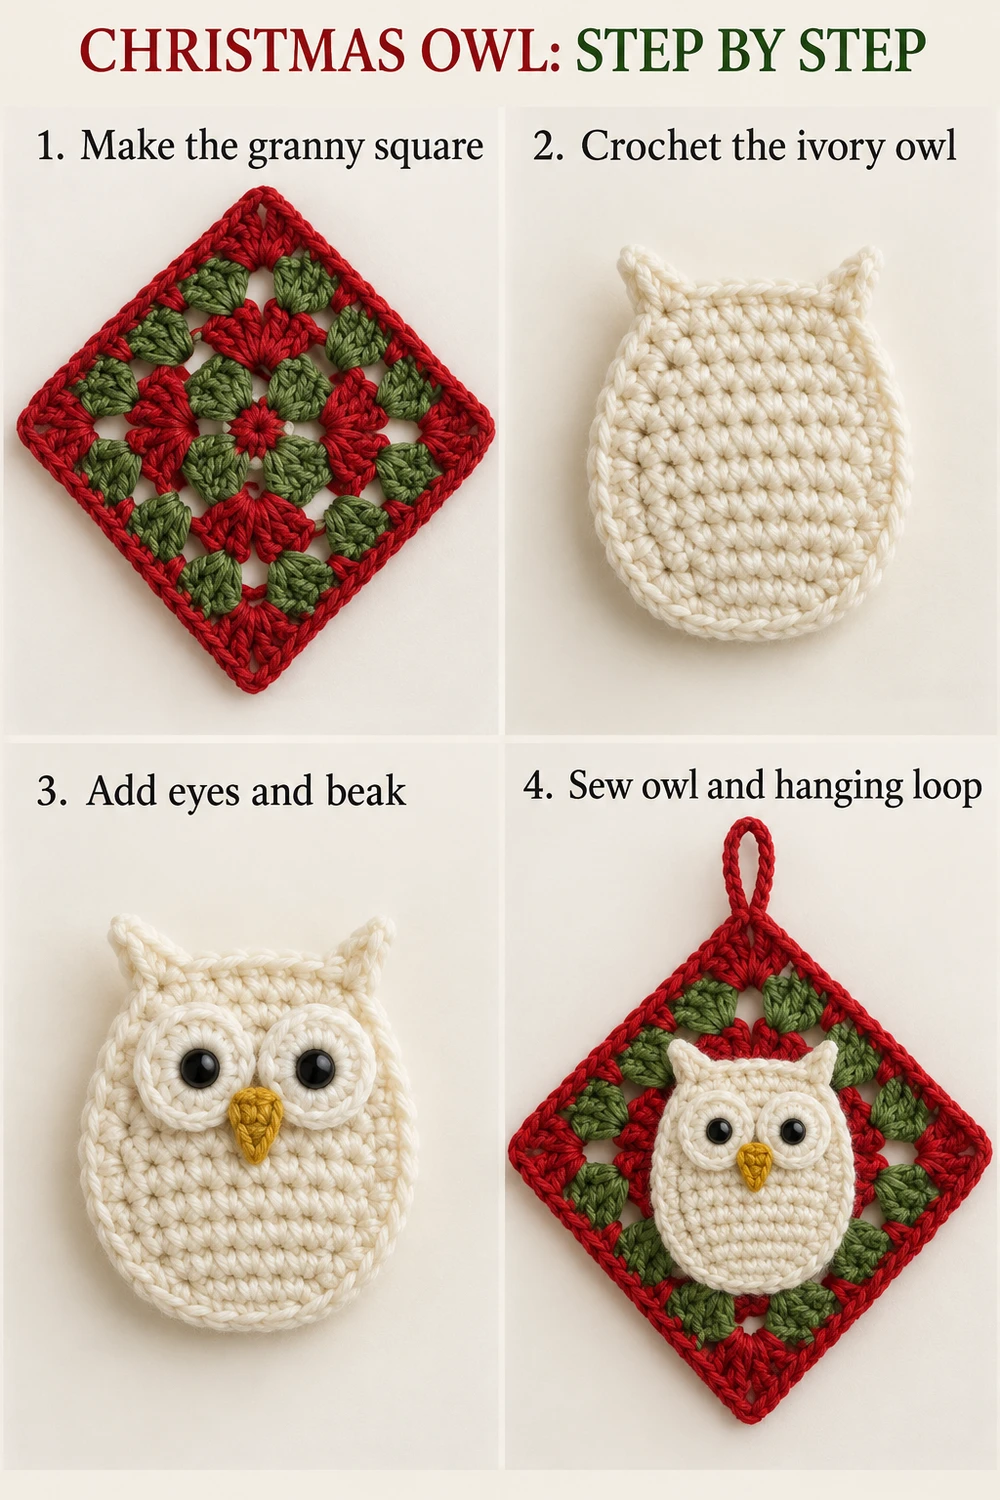
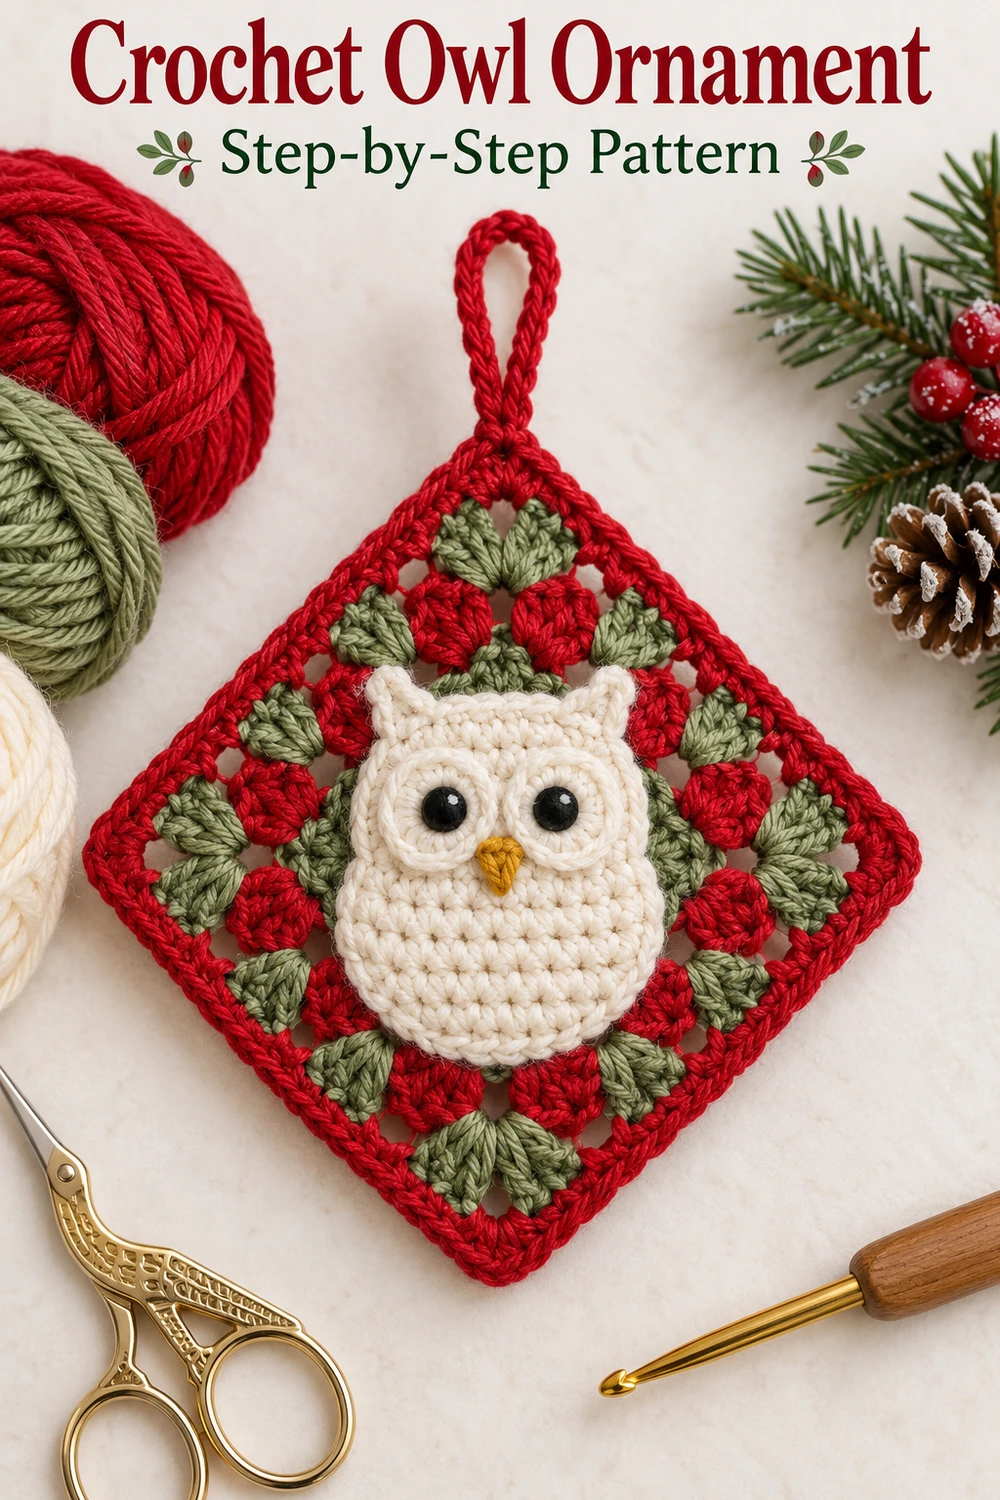
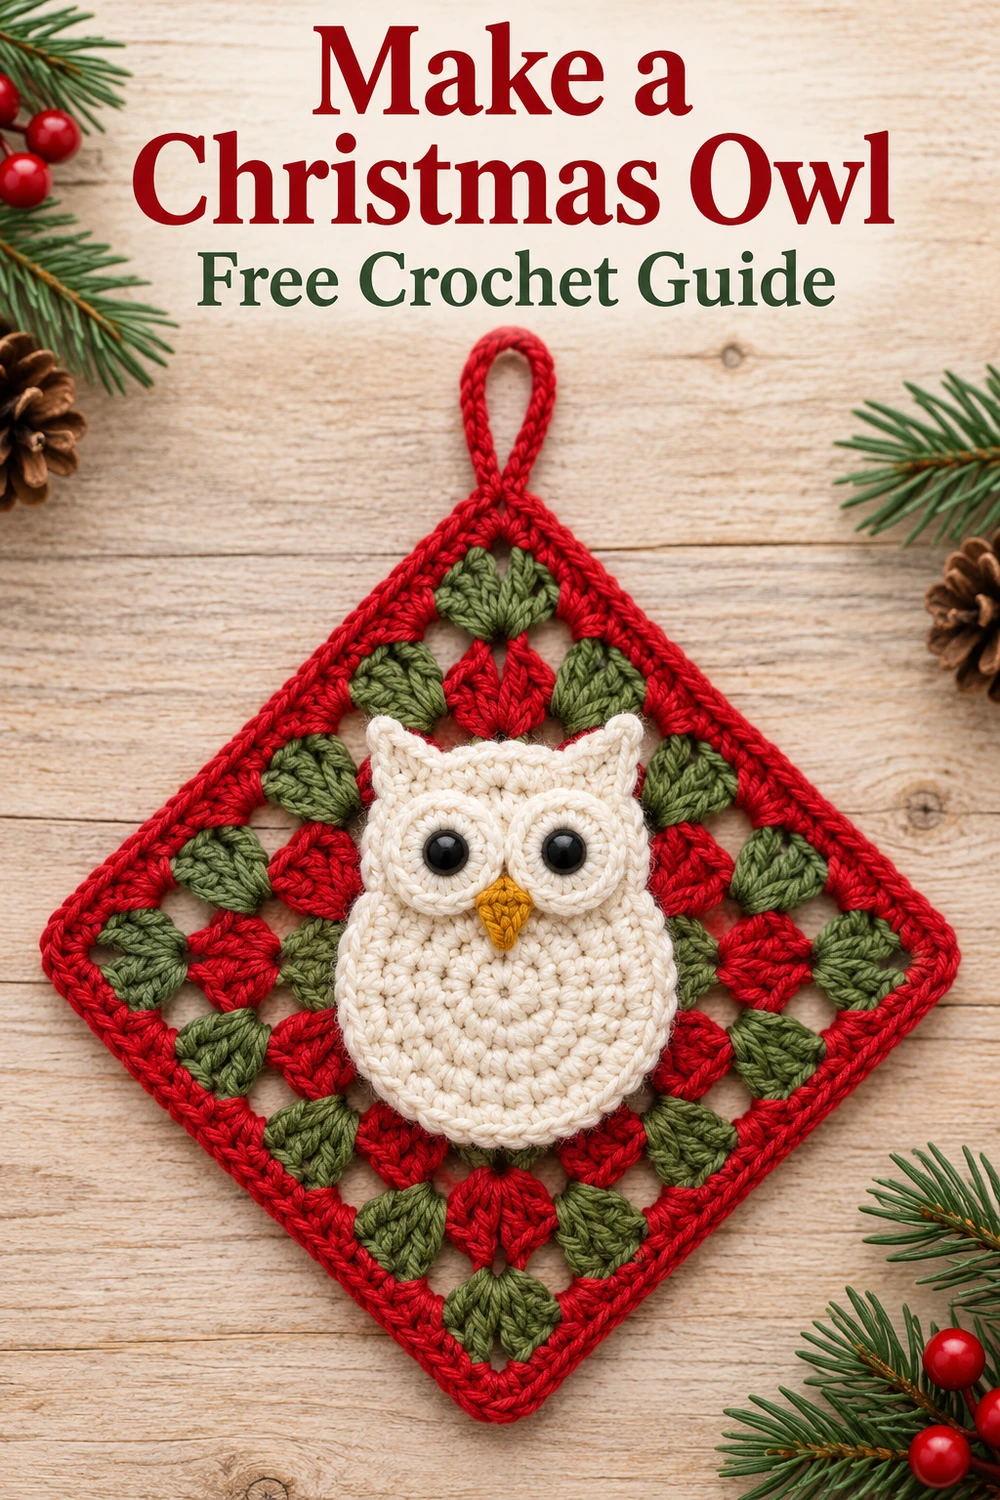
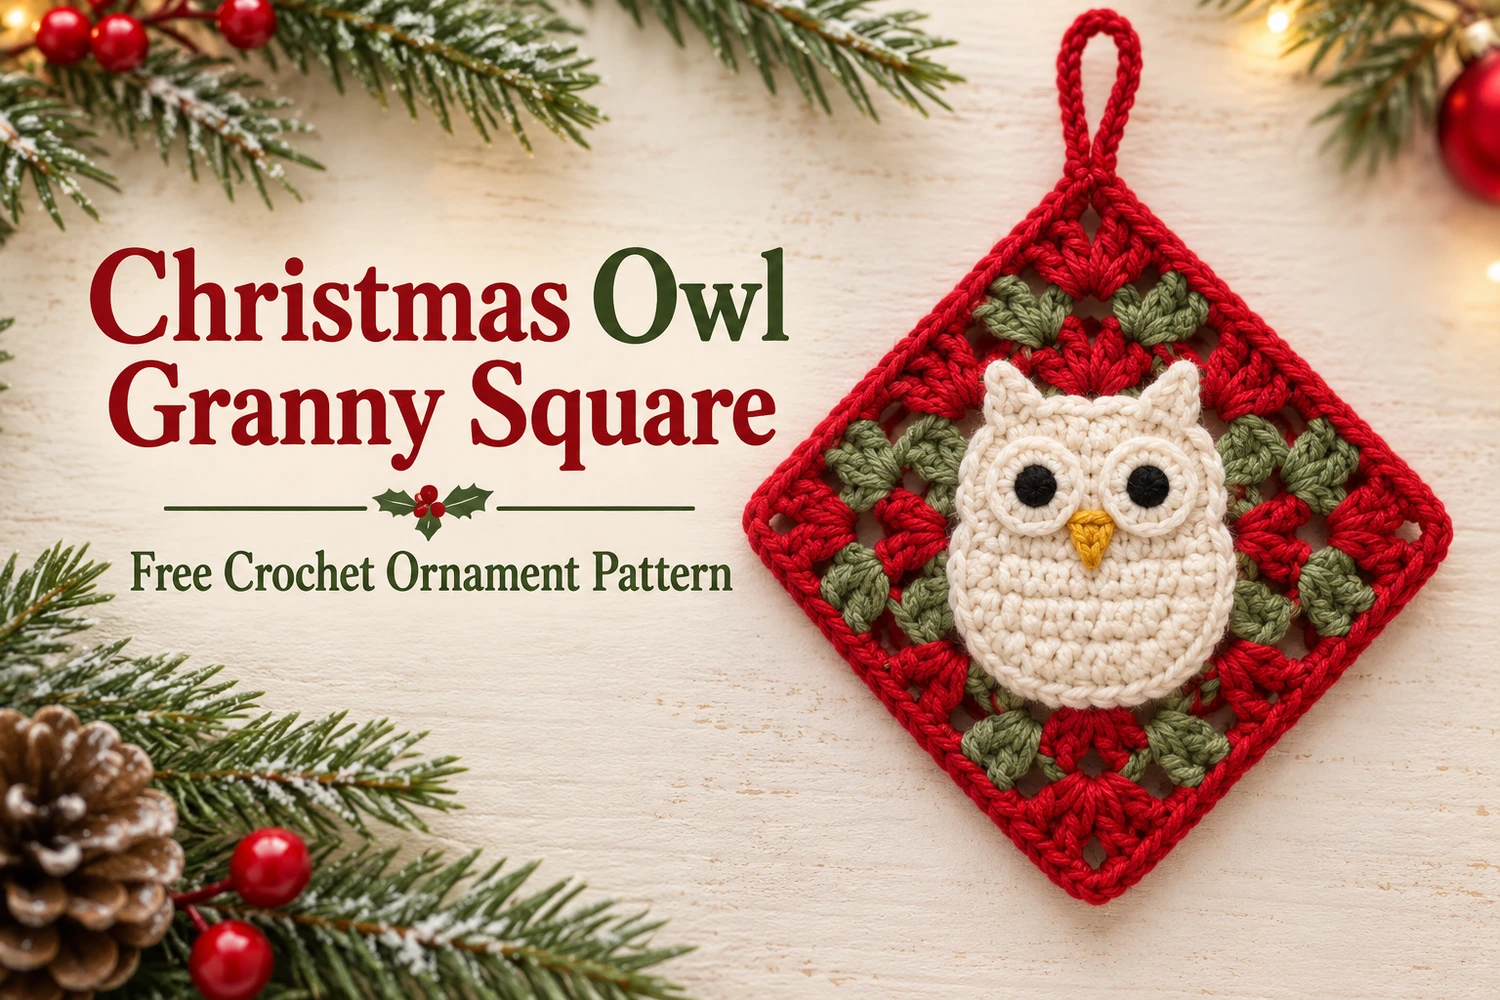
This Christmas Owl Granny Square Crochet Pattern makes a red-and-green Christmas square displayed as a diamond, with an upright ivory owl sewn at its center. Large round eyes, a tiny mustard beak, two pointed ear tufts, and a red corner loop follow the supplied reference.
Crochet a traditional granny square in alternating colors, finish it with a red border, then add the flat owl applique. Rotate the square before positioning the owl so the bird stays upright beneath the top hanging corner.
Pattern Information
- Skill level: intermediate; granny-square corners, color changes, an oval applique, and small sewn details.
- US crochet terminology.
- Estimated diagonal: 15–18 cm with sport cotton and a 2.5 mm hook. Tension affects size.
- Colors: Christmas red, muted olive or sage green, ivory, black, and mustard gold.
- Construction: five granny rounds, one red border round, a flat ivory owl, two ear tufts, eyes, beak, and a corner loop.
- The square and owl remain unstuffed.
This is an image-inspired adaptation. Stitch totals and repeats have been reviewed, but the design has not been physically crocheted or independently tested. The written instructions define this version; photographs illustrate its intended appearance.
Materials
- Sport cotton: approximately 15 g red, 10 g olive green, and 10 g ivory, plus small amounts of black and mustard.
- 2–2.5 mm crochet hook suited to the yarn.
- Tapestry needle, scissors, sewing thread, and stitch markers.
- Blocking mat and rustproof pins.
- Optional fabric stiffener suitable for cotton ornaments.
Abbreviations and Notes
- MR: magic ring; ch: chain; sl st: slip stitch; sc: single crochet; dc: double crochet.
- inc: two sc in one stitch; sc2tog: single crochet two stitches together.
- A granny group means three separately completed dc in the same space; it is not a joined cluster stitch.
- A corner group means (3 dc, ch 2, 3 dc) in a corner space.
- Starting ch 3 counts as one dc in the granny rounds.
- Join each granny round to the top of its starting ch 3 and fasten off. Do not turn.
- The owl oval is worked in continuous rounds with a marker.
Christmas Owl Granny Square Crochet Pattern
1. Red Center — Round 1
With red, make a MR. Ch 3 (counts as dc), 2 dc into the ring, ch 2. Repeat (3 dc, ch 2) in the ring three more times. Join to the top of the starting ch 3, fasten off, and close the ring securely.
Total: four three-dc groups, or 12 dc, and four ch-2 corner spaces. This is a square center, even though the finished ornament will hang diagonally.
2. Green Granny Round 2
Join green in any ch-2 corner. Ch 3, 2 dc, ch 2, 3 dc in the same corner. Ch 1. In each of the next three corners work (3 dc, ch 2, 3 dc), followed by ch 1. Join and fasten off.
Total: 24 dc in eight groups, four ch-2 corners, and four ch-1 side spaces.
3. Red Granny Round 3
Join red in a corner and work the starting corner as before: ch 3, 2 dc, ch 2, 3 dc. Ch 1, 3 dc in the next side ch-1 space, ch 1. Work a corner group in the next corner, then ch 1, 3 dc in the next side space, ch 1.
Continue around, placing one corner group in each corner and one three-dc group in each side space, with ch 1 between groups. Join and fasten off. Total: 36 dc, four ch-2 corners, and eight ch-1 spaces.
4. Green Granny Round 4
Join green in a corner. Work a corner group, using ch 3 for its first dc. Along each side, work ch 1, 3 dc in each of the two side spaces, with ch 1 between them and before the next corner. Work the next corner group and continue around. Join and fasten off.
Total: 48 dc, four ch-2 corners, and twelve ch-1 side spaces. There are two side groups between adjacent corner groups.
5. Red Granny Round 5
Repeat the same construction with red, now working three side groups between corners. Place one three-dc group in each of the three side ch-1 spaces, with ch 1 between neighboring groups and before each corner. Work (3 dc, ch 2, 3 dc) in every corner. Join.
Total: 60 dc, four ch-2 corners, and sixteen ch-1 side spaces. Keep red attached for the border.
6. Red Border
Ch 1, which does not count. Sc in each dc and work one sc into each side ch-1 space. In each ch-2 corner work (sc, ch 2, sc). Join to the first sc and fasten off with a long tail.
Total: 84 sc and four ch-2 corners: 60 sc over dc stitches, 16 sc in side spaces, and 8 sc in corners. Do not add stitches into the previous joining sl st.
Dampen and pin the square flat, keeping all four sides equal and the corners square. Let it dry completely. Then rotate it by one eighth of a turn so one corner points upward and the opposite corner points downward.
7. Ivory Owl Body — Flat Oval
With ivory, ch 7. Round 1: starting in the second chain, sc in each of the next five chains, 3 sc in the last chain. Rotate to work along the unused underside: sc in the next four chain positions, then 2 sc into the same chain position as the first sc [14]. Do not join; mark the first stitch.
Round 2: (sc, inc) seven times [21]. Round 3: (2 sc, inc) seven times [28]. Round 4: (3 sc, inc) seven times [35]. Round 5: (4 sc, inc) seven times [42]. Sl st in the next stitch to smooth the edge and fasten off with a long sewing tail.
The foundation chain creates an oval center. Keep the piece flat and unstuffed. Orient the oval vertically, with a rounded lower body and a broad upper face. Lightly block it before adding the ears.
8. Small Ivory Ear Tufts — Make Two
Ch 5 with ivory. Row 1: sc from the second chain across [4]. Turn. Row 2: ch 1, sc2tog twice [2]. Turn. Row 3: ch 1, sc2tog [1]. Fasten off with a long tail.
Sew the four-stitch base of one triangle behind each upper side of the oval. Keep the points small and upright, with a shallow dip between them. Hide the bases behind the oval edge so the owl reads as one simple silhouette.
9. Eyes and Mustard Beak
Ivory eye circles — make two: 6 sc in MR; inc six times in the next round [12]. Sl st in the next stitch, fasten off, and leave a sewing tail. Keep both circles flat.
Black pupils — make two: 6 sc in MR, join to the first sc, and fasten off. Sew one pupil centrally to each ivory eye circle. Add a tiny ivory embroidery stitch for a highlight if desired.
Pin the two eye circles side by side on the upper half of the owl. Their inner edges may touch. Sew the ivory perimeters to the oval with small stitches, then secure the pupil tails deeply on the back.
Mustard beak: ch 4. Row 1: sc from the second chain across [3]. Turn. Row 2: ch 1, sc2tog, sc [2]. Turn. Row 3: ch 1, sc2tog [1]. Fasten off. Sew the three-stitch edge just below the eyes, with the point facing downward.
Keep the beak small and centered. Do not add a smile, feet, scarf, or Santa hat; the reference owl has a simple face and an uninterrupted rounded lower body.
10. Sew the Owl Upright on the Diamond
Lay the blocked square with one red corner at the top. Place the owl upright on the middle, with the ears toward that upper corner and the rounded body toward the lower one. Keep the bird centered between the side corners.
Sew the owl edge to the dense dc groups beneath it with short ivory stitches. Where the edge crosses an open granny gap, carry the sewing strand discreetly behind the applique to the next dense group instead of pulling the gap closed.
Add a few hidden tacking stitches through the owl center to prevent lifting. Keep the ears and the white eye edges visible. The applique hides some central granny stitches, while red-and-green groups remain visible around all sides.
11. Red Hanging Loop
Ch 28 with red, fasten off leaving long tails, and fold into a loop. Sew both ends behind the upper diamond corner, catching the red border and adjacent corner-group stitches. Use several passes spread across dense loops.
Secure and weave in the tails. Lift gently to confirm that the diamond hangs with the owl upright. Avoid attaching the loop only to a loose corner chain.
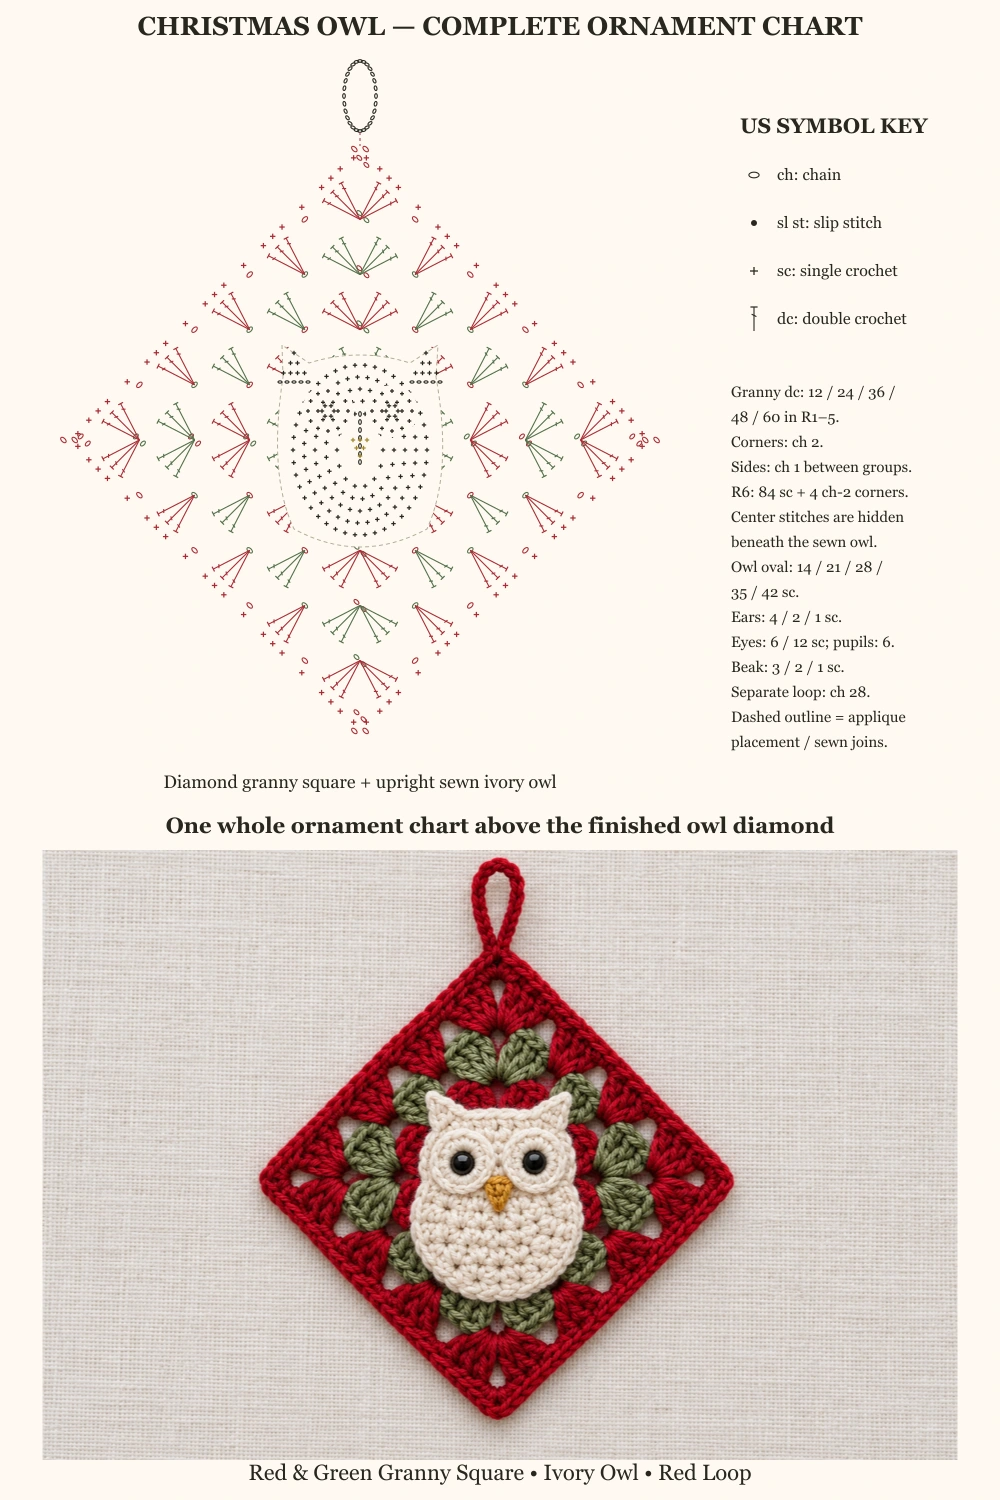
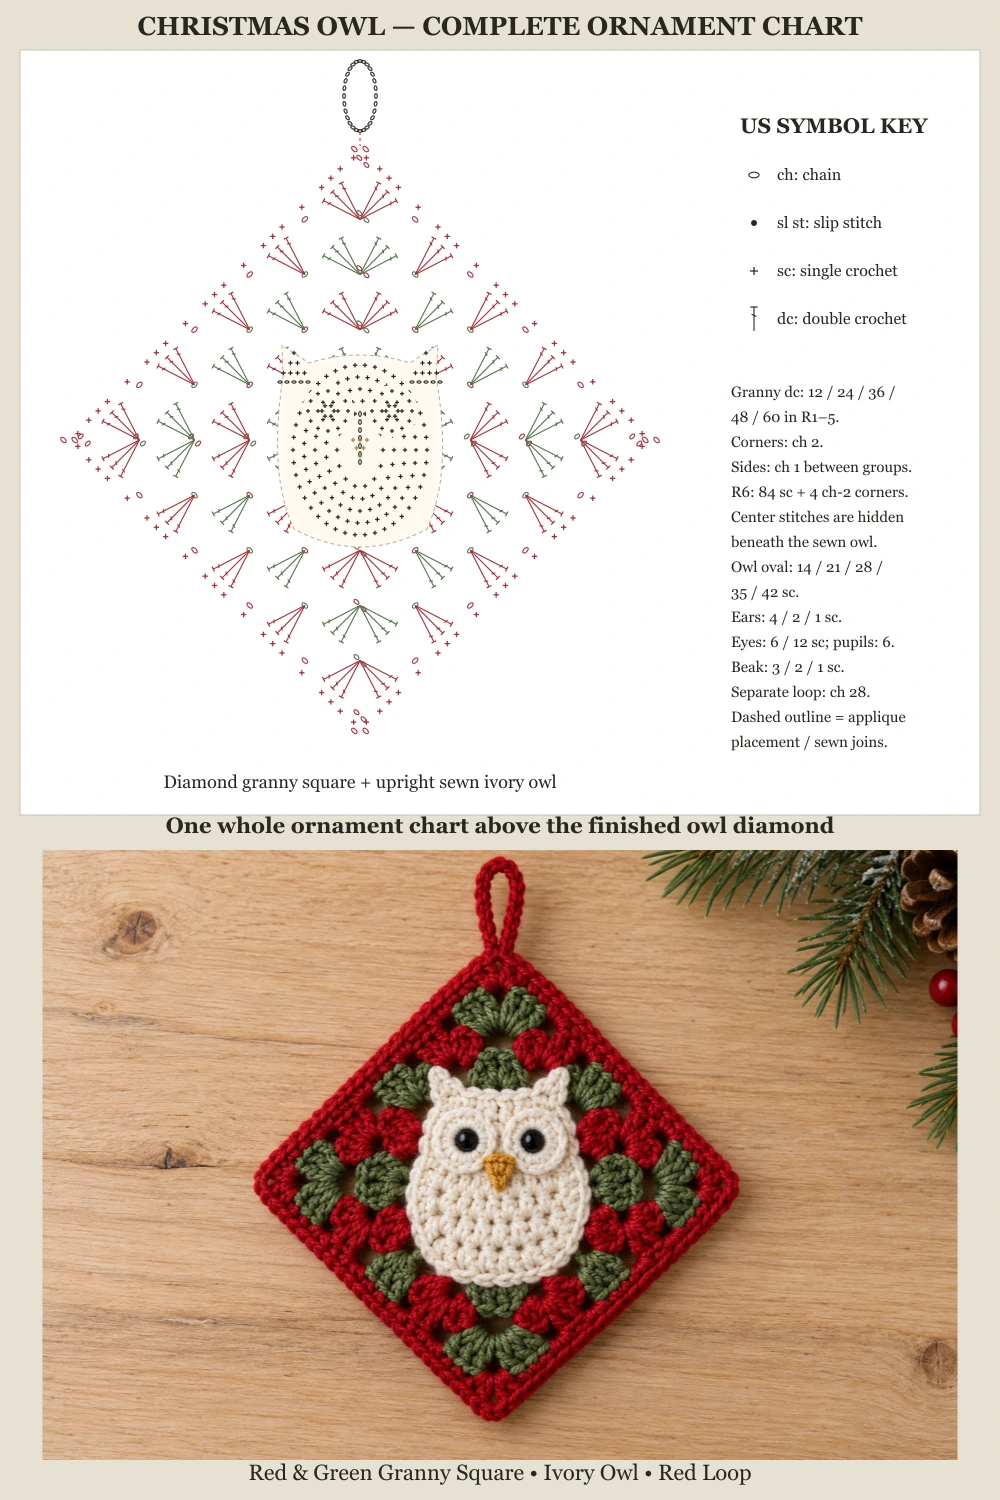
Reading the Two Complete Charts
Both whole-ornament charts show the five granny rounds and red border in their diamond orientation, with the upright owl body, ears, eyes, beak, and loop at their assembly positions. The central granny stitches are worked first and then covered by the sewn applique.
Color distinguishes red, green, and ivory components. Dashed marks indicate sewing. The owl pieces are separate from the granny rounds; use their written oval and triangle counts. A finished ornament photo appears below each complete chart in two different settings.
Finishing and Care
Weave in every color-change tail on the back, passing through several stitches in different directions. Give the diamond a final light blocking while keeping the owl flat and the corner loop clear.
If more firmness is needed, test cotton-compatible stiffener on a sample and follow its label. Keep the granny spaces open. Spot-clean gently, reshape while damp, and dry flat. Store between tissue to protect the ear points. This hanging decoration has a long loop; keep it away from young children and pets.
Questions and Tips
Why is the owl tilted? Position it only after rotating the square into a diamond. The bird should align with the top and bottom corners, rather than with a flat side.
Why does the square ripple? Check the dc and chain-space totals for each round. Keep one ch between neighboring side groups, with two chains only in corners.
Can I use different greens? Yes. Muted olive or sage matches the reference. Use the same yarn weight as the red so the square remains even.
Can I leave off the owl? The red-and-green granny base works on its own, but the ivory owl is the focal detail of this reference-inspired ornament.
More Free Christmas Crochet Patterns
Save This Pattern
Save this little Christmas owl for your handmade ornament collection. Happy crocheting from Lovely Amigurumi!
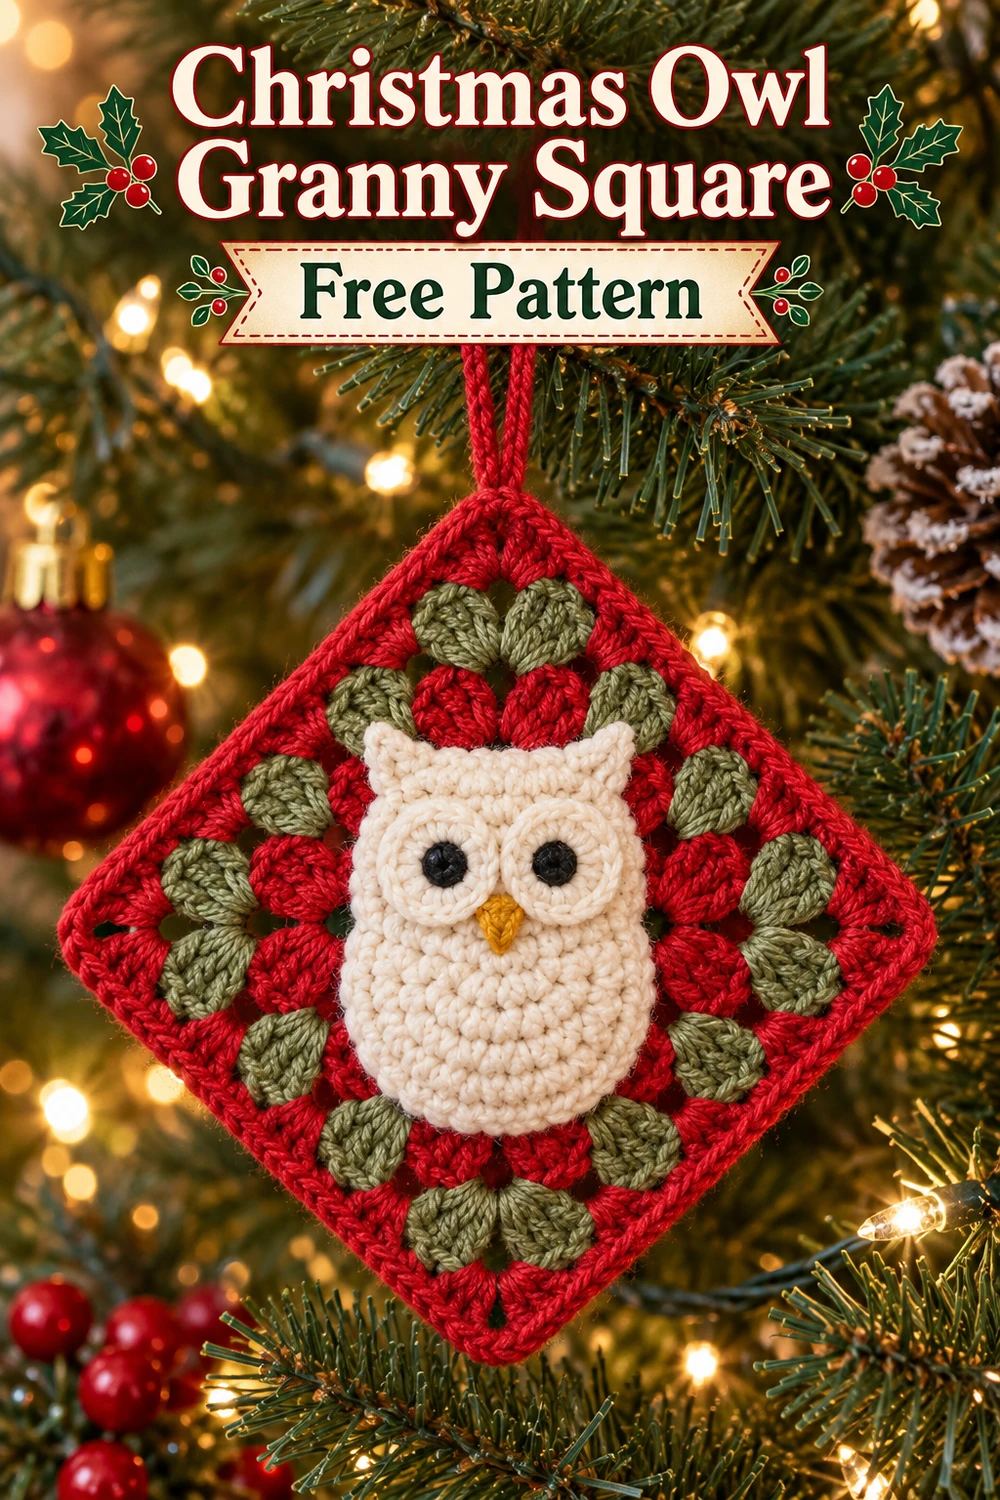
Tutorial, Two Complete Charts, and Pinterest Gallery
All six 1000 × 1500 images are grouped here at the end: one visual tutorial, two complete chart-above-photo guides, and three Pinterest images.