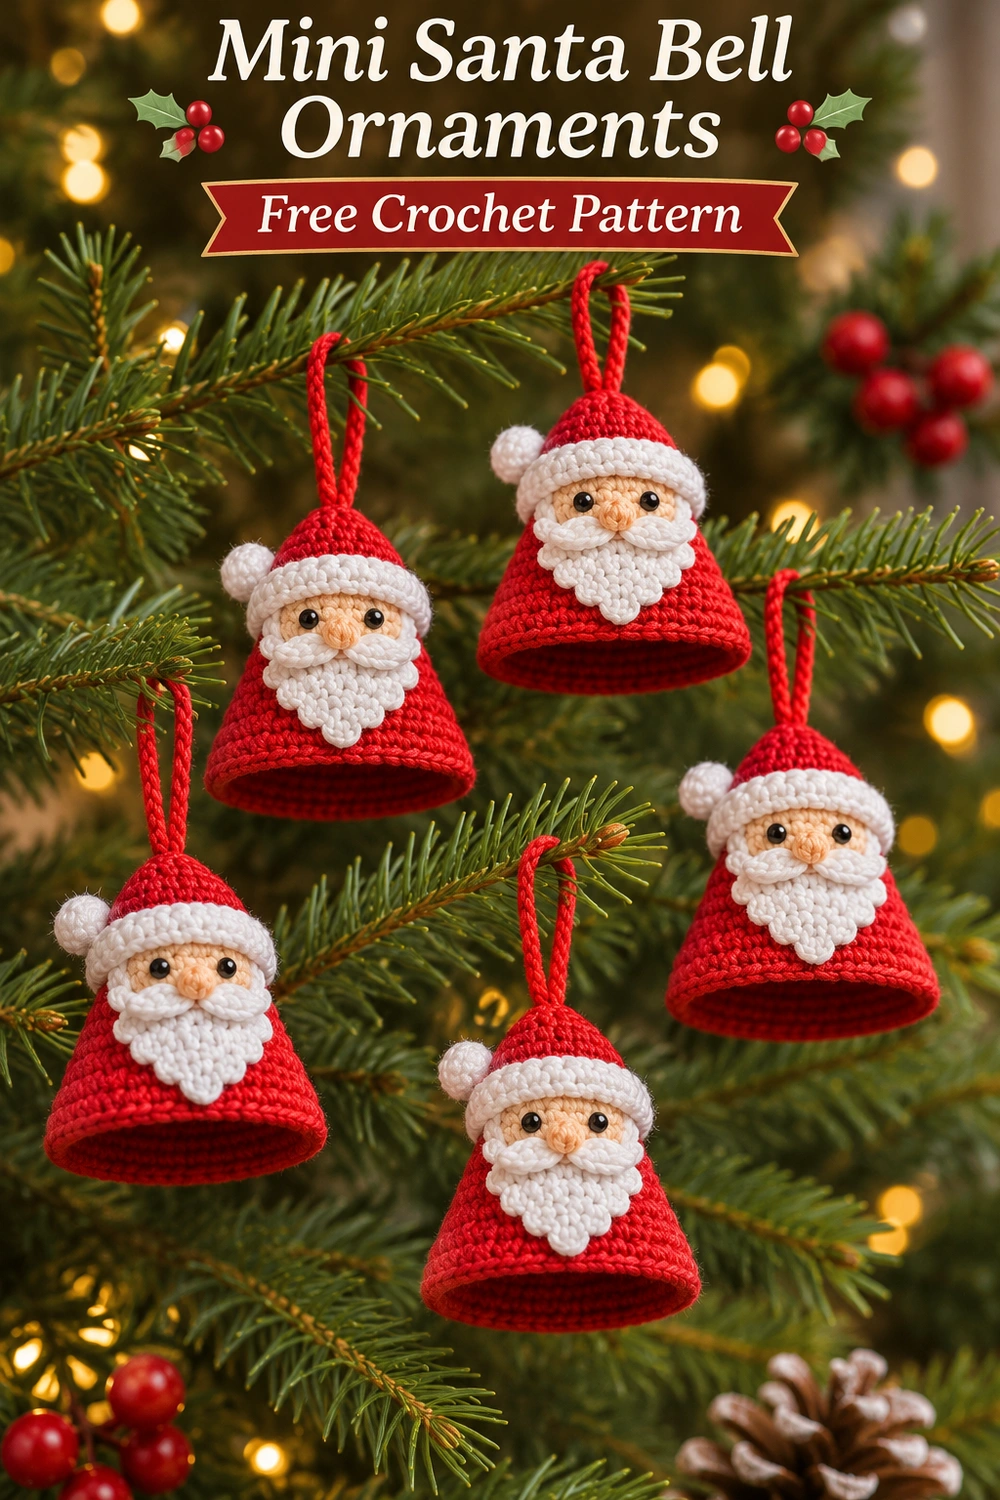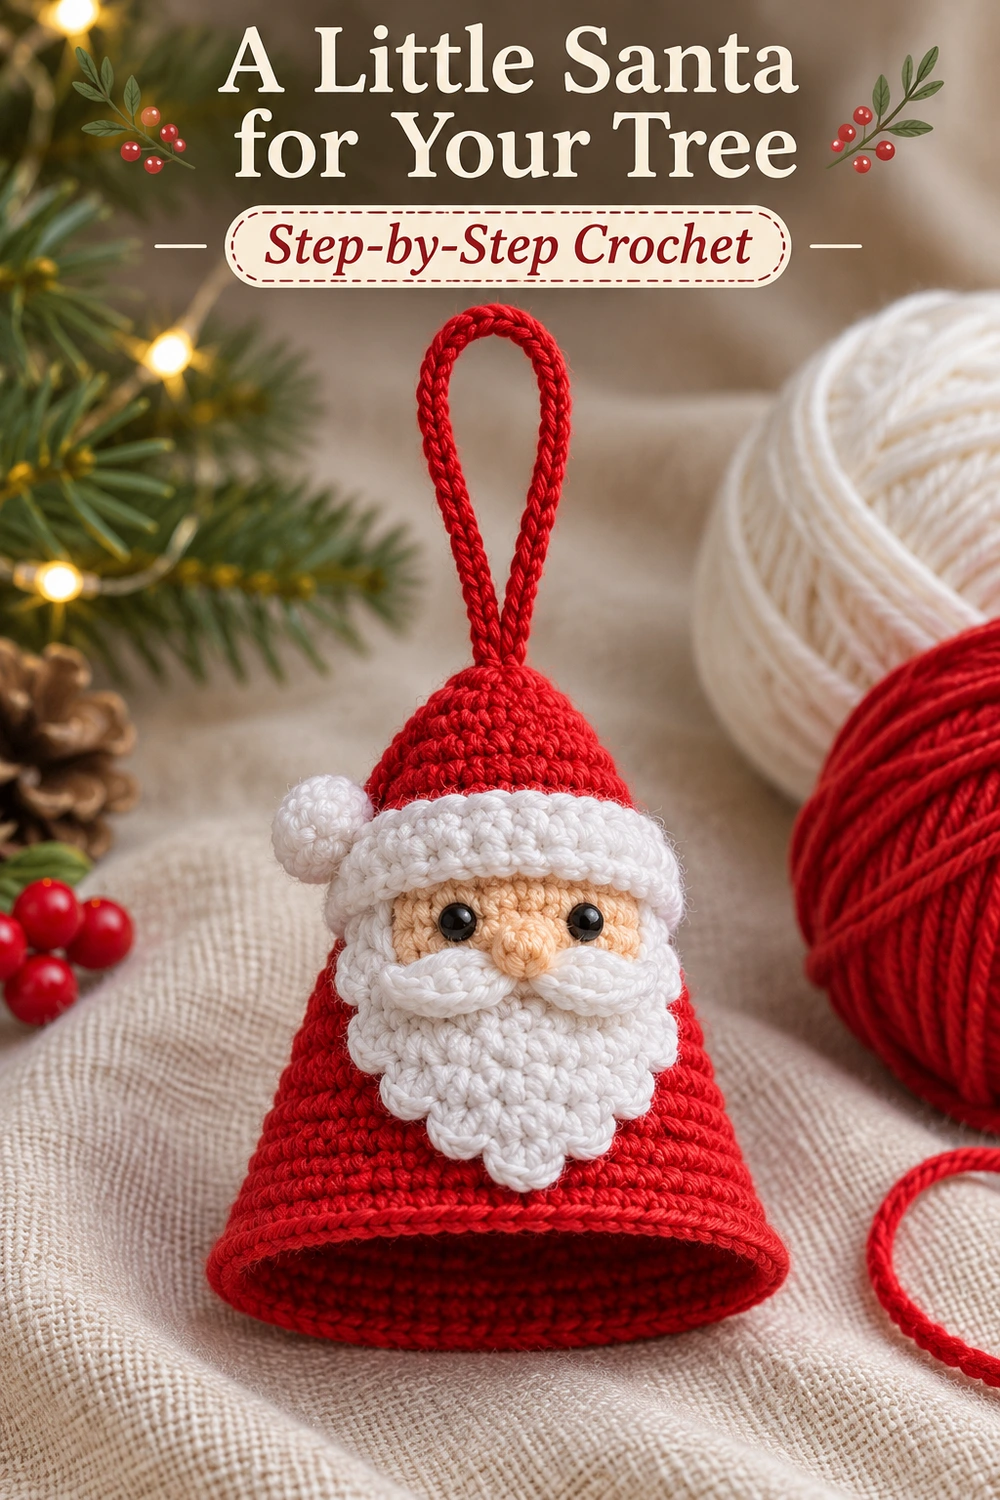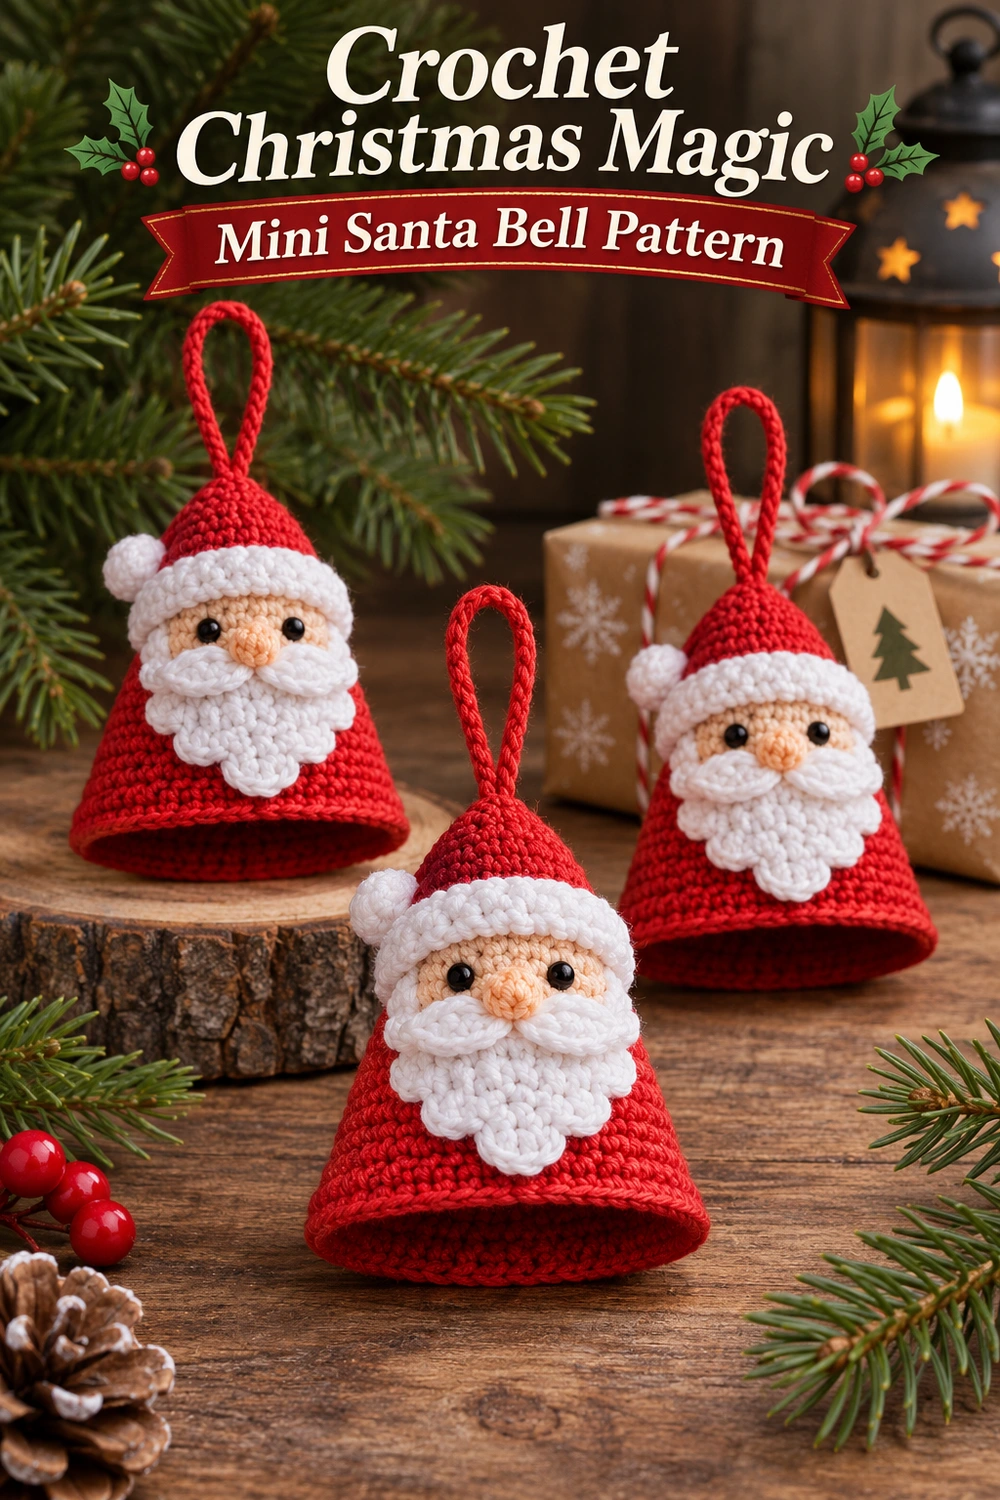
This Mini Santa Bell Crochet Pattern makes a tiny Father Christmas decoration with a red bell-shaped body, a peach face, a white moustache and scalloped beard. A thick white hat brim, a little side pompom, and a red hanging loop complete the festive look.
Make one for a gift tag or a small collection for your Christmas tree. The red shell is hollow and open underneath, so the ornament stays light and keeps the flared silhouette of the reference.
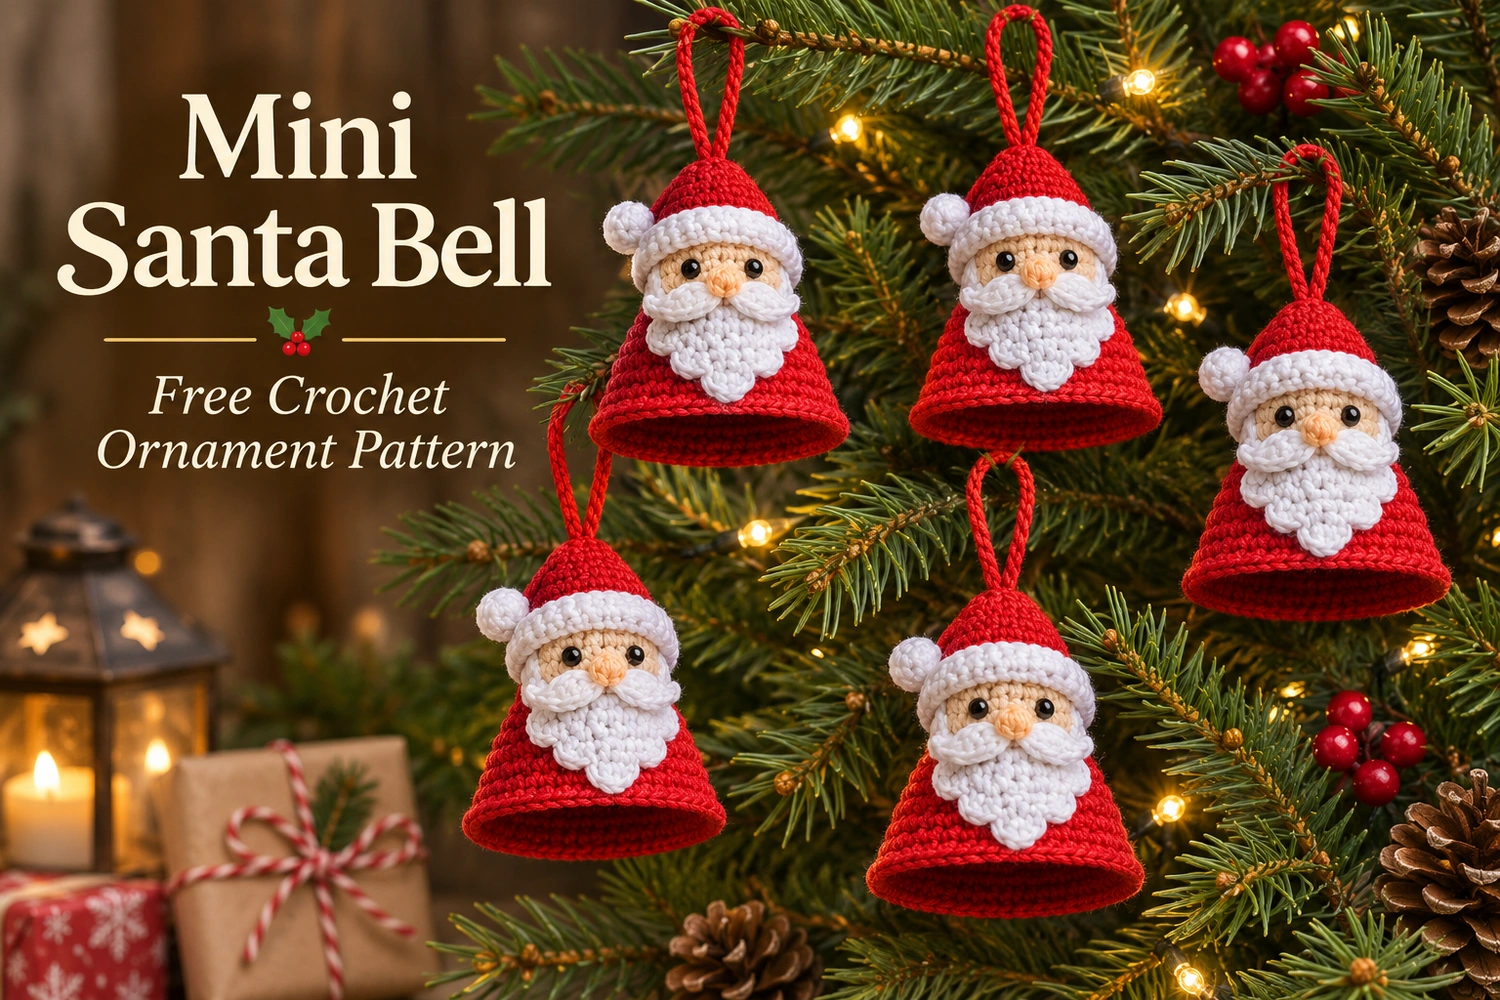
Mini Santa Bell Crochet Pattern: Project Details
- Level: intermediate, including small pieces and sewing.
- Terms: US crochet terminology.
- Estimated size: 7–9 cm tall, excluding the loop; yarn and tension affect the result.
- Construction: one continuous red bell shell with separately sewn face, nose, moustache, beard, brim, pompom, and loop.
- Colors: red, white, peach, and black for the eyes.
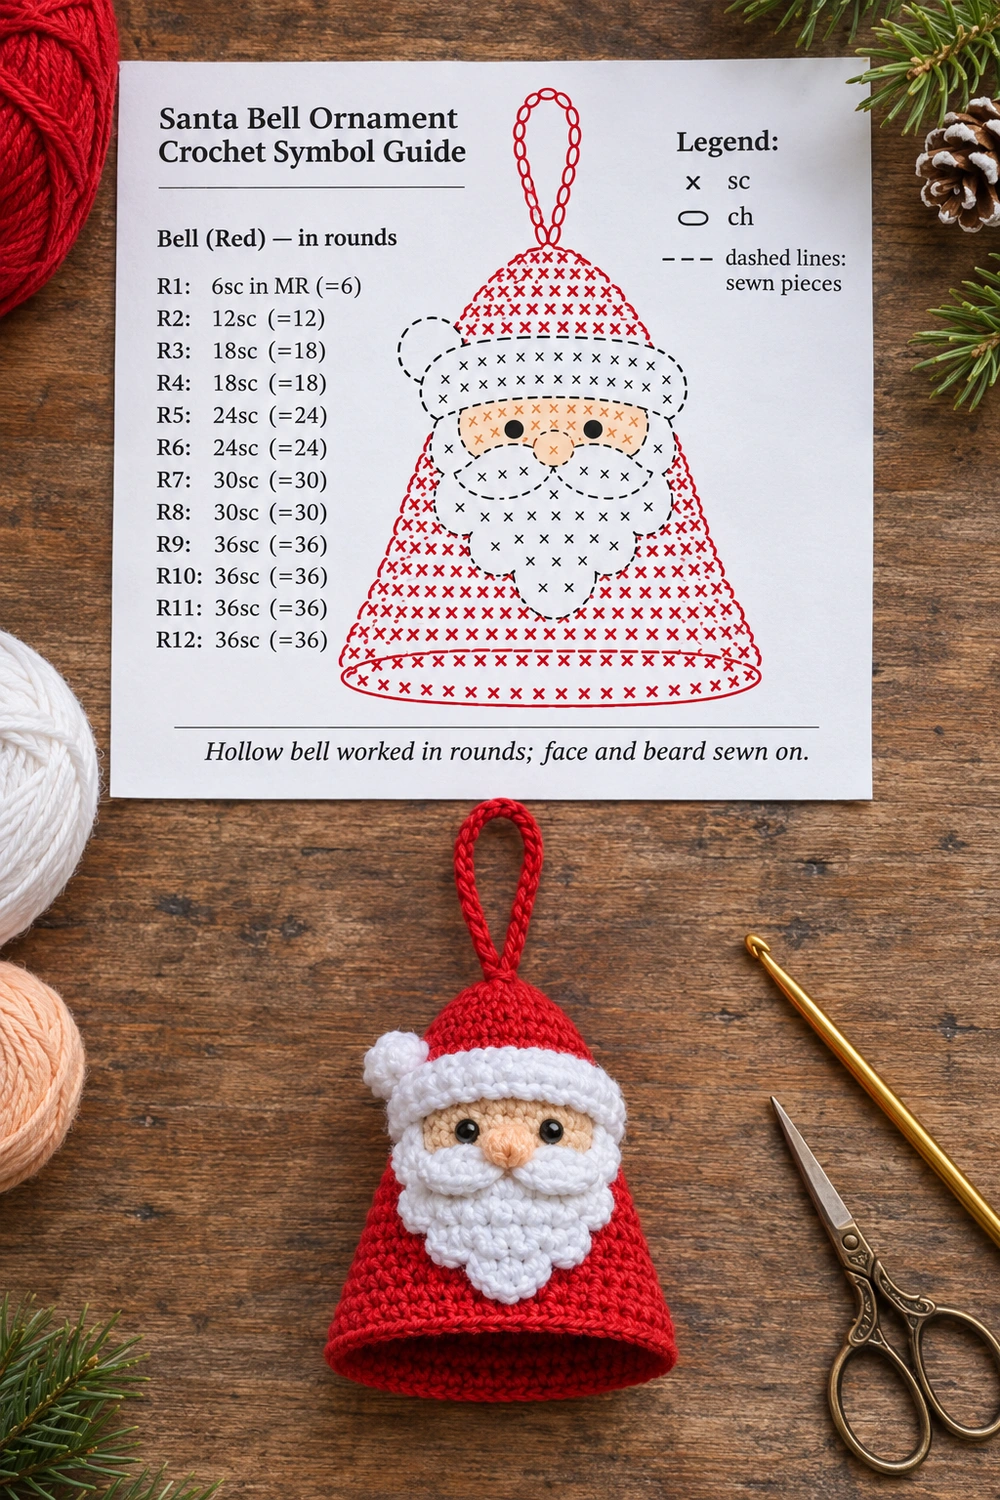
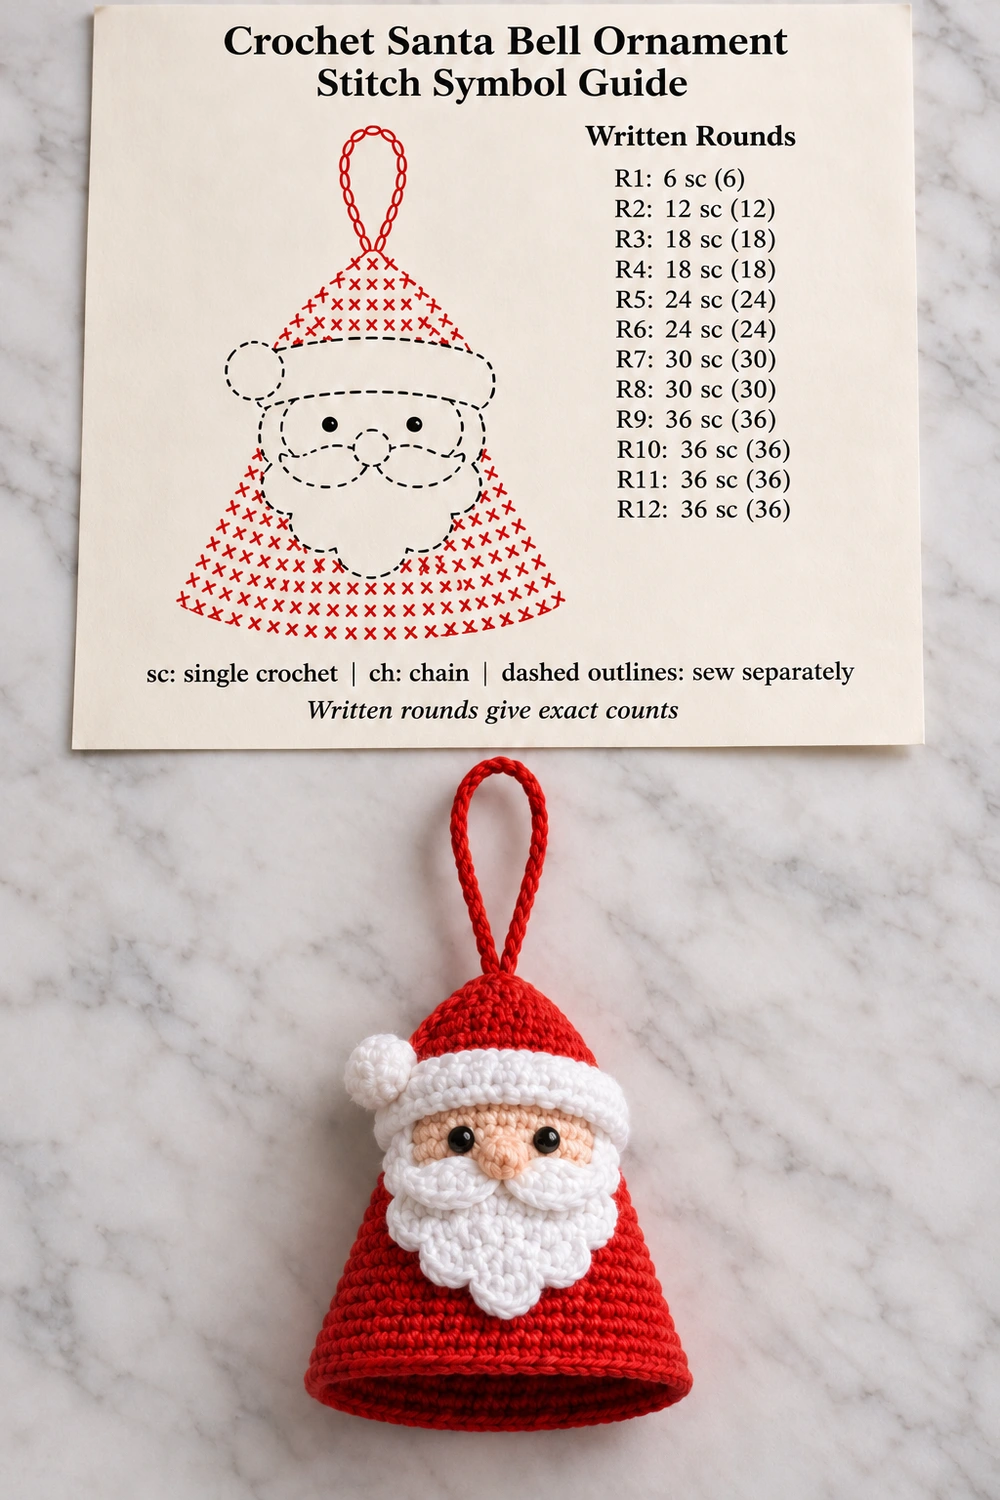
This is an original image-inspired adaptation. Stitch totals have been reviewed, but the pattern has not been physically crocheted or independently tested. The photographs illustrate the intended finish. Follow the written rounds for exact counts and use the charts as construction and placement guides.
Materials
- Sport-weight cotton: approximately 12 g red, 5 g white, and a small amount of peach.
- A 2.25–2.5 mm hook, or a hook that produces firm, tidy stitches.
- Black embroidery thread for eyes, or two approximately 4 mm safety eyes.
- A tiny amount of stuffing for the nose and pompom only.
- Tapestry needle, scissors, stitch marker, and pins.
Smooth cotton gives the bell enough structure to stay open at the lower edge. If your fabric is too soft, try a smaller hook before changing the stitch counts. Make the first red shell before cutting long sewing tails for the decorative pieces.
For an ornament that children may handle, embroider the eyes and omit detachable small parts. The hanging loop is a decoration feature, and the finished piece is not intended as a toy.
Abbreviations and Working Notes
- MR: magic ring.
- ch: chain.
- sc: single crochet.
- hdc: half double crochet.
- dc: double crochet.
- inc: 2 sc in the same stitch.
- dec: single crochet 2 stitches together.
- sl st: slip stitch.
- st / sts: stitch / stitches.
- R: round. Numbers in parentheses show the total stitch count.
Work the red shell in a continuous spiral without turning. Mark the first stitch of each round. Turning chains on the small flat pieces do not count as stitches. The white brim is sewn around the shell rather than worked as a color change in the red body.
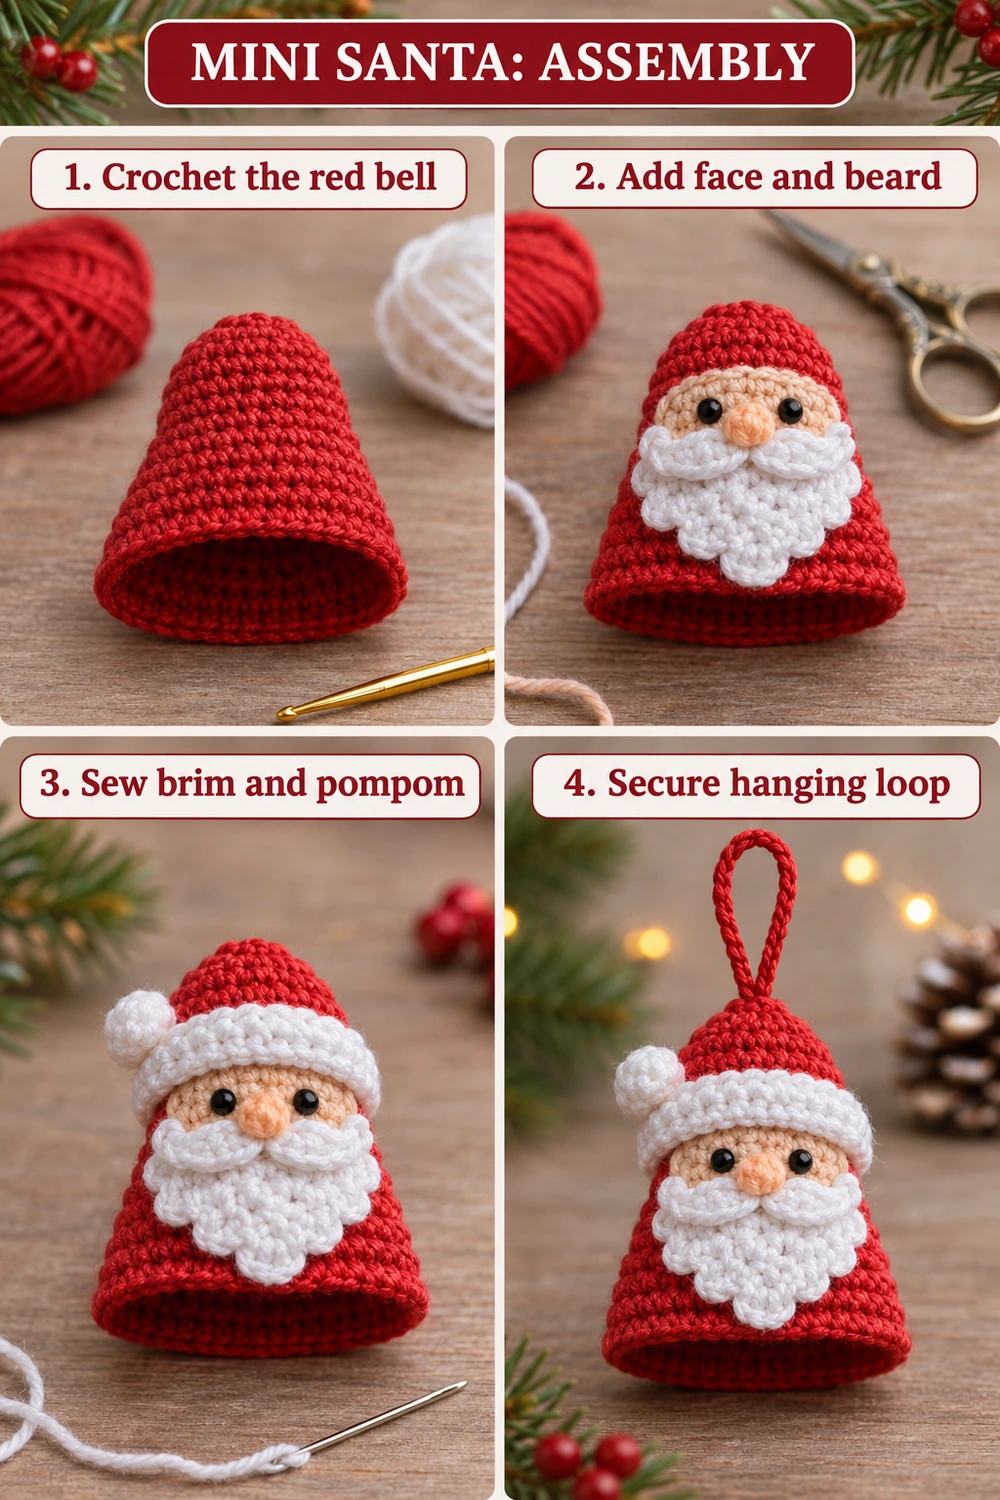
1. Crochet the Hollow Red Bell
Start at the top with red yarn. Leave the lower edge open; do not stuff or close the bell.
- R1: 6 sc in MR. (6)
- R2: inc in each st. (12)
- R3: (sc, inc) × 6. (18)
- R4: sc in each st. (18)
- R5: (sc in next 2 sts, inc) × 6. (24)
- R6: sc in each st. (24)
- R7: (sc in next 3 sts, inc) × 6. (30)
- R8: sc in each st. (30)
- R9: (sc in next 4 sts, inc) × 6. (36)
- R10–R12: sc in each st. (36 each round)
Sl st into the next stitch, fasten off, and weave in the end inside the shell. This finishing slip stitch is not an additional stitch. Gently spread the lower opening with your fingers to shape a bell.
The rounded top forms Santa’s hat, while the lower red section becomes the bell skirt. There is no separate red hat to attach. The white brim and face placement create the hat effect on the upper part of this one-piece shell.
2. Make the Peach Face
With peach yarn, ch 5. Work an oval around both sides of the chain.
- R1: starting in the second chain, sc in the next 3 chains, 3 sc in the last chain; continue along the underside, sc in the next 2 chains, 2 sc in the first chain used. (10)
- R2: inc, sc in next 2 sts, inc in next 3 sts, sc in next 2 sts, inc in next 2 sts. (16)
Join with a sl st, fasten off, and leave a long sewing tail. Flatten the oval with the long axis horizontal. Place it on the front of the shell below the future brim. Pin it before sewing to make sure its lower edge will be covered slightly by the moustache and beard.
If using safety eyes, insert them through the peach face and the red shell so the washers sit inside the hollow bell. Space the eyes about three peach stitches apart, adjusting visually for the eye size. Keep the washers accessible until you are satisfied with the expression.
3. Crochet the Nose
With peach yarn, work 6 sc in MR. Work one more round of 6 sc. Add a tiny wisp of stuffing, then work 3 dec. (3)
Fasten off with a sewing tail. Pass the tail through the front loops of the final three stitches and draw closed. Sew the nose between and a little below the eyes. It should project gently rather than cover most of the face.
4. Make the White Beard
The beard is a small tapered flat piece. With white yarn, ch 10.
- Row 1: sc in the second chain and every remaining chain. (9)
- Row 2: ch 1, turn, dec, sc in next 5 sts, dec. (7)
- Row 3: ch 1, turn, sc in all 7 sts. (7)
- Row 4: ch 1, turn, dec, sc in next 3 sts, dec. (5)
- Row 5: ch 1, turn, dec, sc in next st, dec. (3)
- Row 6: ch 1, turn, dec, sc in next st. (2)
- Row 7: ch 1, turn, dec. (1)
Continue around the outside without cutting the yarn. Along the first sloping side, work one sc at the end of each row. At the row ends of Rows 6, 4, and 2, replace that sc with (sl st, ch 1, 2 hdc, ch 1, sl st) in the same row-end space to make a small scallop.
Work 9 sc across the straight starting edge. Work down the other sloping side in the same way, with scallops at Rows 2, 4, and 6. At the bottom tip, work one final scallop. Join and fasten off with a sewing tail. There are seven decorative scallops: three on each side and one at the tip.
Place the straight edge under the nose and across the lower part of the face. The pointed tip should extend down over the red skirt while leaving some red visible beneath it. Sew the upper edge and sides, taking small stitches through the red shell. Keep the scallops free enough to retain their shape.
5. Crochet Two Moustache Lobes
For each lobe, use white yarn and ch 5. Starting in the second chain, work sc, hdc, dc, then 3 hdc in the last chain. Working along the underside, work dc, hdc, and 2 sc in the first chain used. (10 stitches)
Join with a sl st and fasten off with a sewing tail. Make two. Turn them into mirror positions under the nose, with the narrower ends pointing outward. Sew the inner ends firmly and tack the outer ends slightly upward for the curled moustache look.
These are flat pieces, not stuffed tubes. Keep the joining stitches light so they sit on top of the beard without pulling it inward.
6. Make the White Hat Brim
With white yarn, ch 25.
- Row 1: hdc in the second chain from the hook and every remaining chain. (24)
- Row 2: ch 1, turn, hdc in all 24 sts. (24)
Fasten off with a long tail. Wrap the strip around the shell near R6, with the lower edge just above the eyes. The ends should meet at the back without gathering the red shell. Join the short ends, then sew the lower edge around the shell.
Because hdc and sc have different widths, check the fit before finishing Row 2. If your strip is too loose or too tight, remake it with a different starting-chain length and keep the same stitch count in both rows. Record your adjusted count. The standard starting count is 24 hdc per row.
7. Add the Side Pompom
With white yarn, work 6 sc in MR, then one round of 6 sc. Add a tiny amount of filling and work 3 dec. (3)
Fasten off, draw the remaining stitches closed, and sew the small ball to one side of the brim. The reference places it at the left side when looking at the ornament. Keep it small so the hat remains compact.
8. Make and Secure the Red Hanging Loop
With red yarn, ch 30. Fasten off, leaving a long tail at each end. Fold the chain into a loop and stitch both ends through the top of the red shell near the magic ring.
Bring the tails inside the hollow bell and secure them through several neighboring stitches. Make multiple small sewing passes so the ornament’s weight is spread across the fabric. Hide all ends inside. The loop should stand above the hat without pulling the shell into a point.
Final Assembly and Shaping
Check the face, beard, and brim together before making the final knots. The eyes should remain visible below the brim; the nose should cover the inner ends of the moustache; and the beard should taper toward the center of the red skirt.
Press the open lower edge gently into a circle with your fingers. If needed, dampen the red shell lightly and let it dry over a suitably sized smooth form, with the face kept free. Remove the form when dry. Avoid heat on plastic eyes.
Keep the shell hollow. The only stuffing in this version belongs in the nose and small white pompom. A large amount of stuffing would turn the piece into a cone-shaped doll and change the bell silhouette.
Tabletop Chart Notes
The two chart photographs below show one complete Santa bell silhouette above the finished ornament lying on a table. The red stitch field represents the continuous shell. Dashed face, beard, and brim outlines mark separately sewn pieces rather than extra stitches worked into the shell rounds.
Read the written round list for the exact increase sequence: 6, 12, 18, 18, 24, 24, 30, 30, 36, 36, 36, 36. Follow the separate instructions for the flat face, beard, moustache, and brim. The illustrations support the shape and placement, while the written pattern controls construction.
More Christmas Crochet Ideas
Combine these little Santas with the Red Snowflake Bauble, the Santa Star Ornament, or the White Lace Angel for a varied handmade tree.
Photo Tutorial, Tabletop Charts and Pinterest Images
All six project images are collected below the complete instructions: one photo tutorial, two tabletop chart photographs, and three images to save for Christmas inspiration.