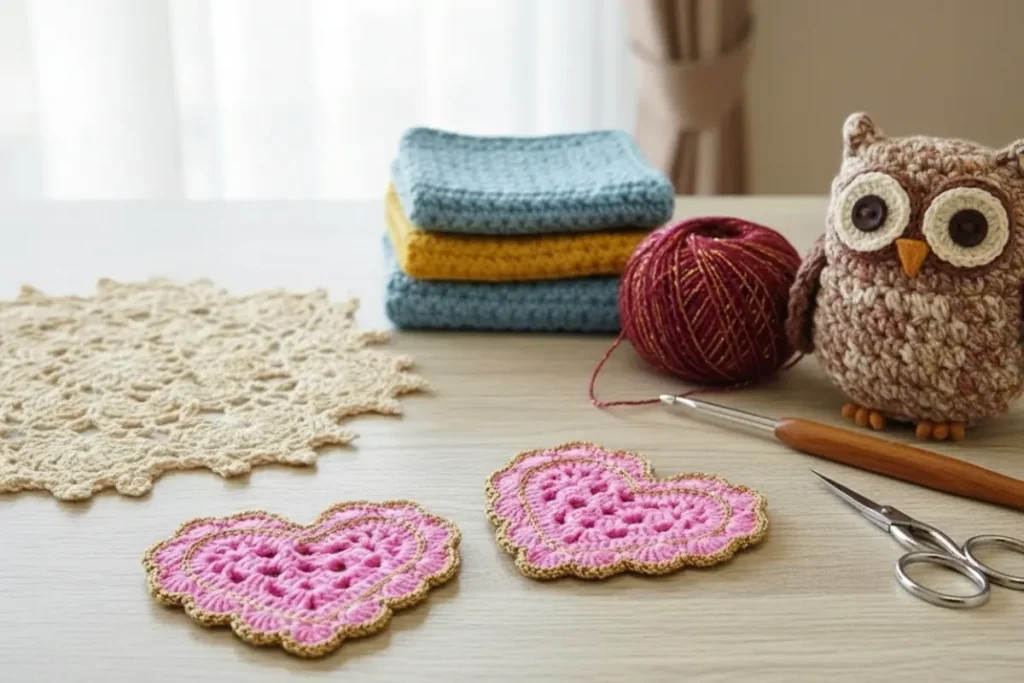
I’ve made this Heart Coaster Crochet Pattern more times than I can count, especially when I need a quick handmade gift that still feels special. It’s one of those projects that looks intricate at first glance, but once you understand the rhythm, it flows beautifully off the hook.
What I love most about this coaster is how practical it actually is. It lies flat, holds its shape after blocking, and works just as well under a coffee mug as it does styled on a tray or gifted as a small handmade set. I tested it with different cotton yarns and found that Barroco Maxcolor nº 6 gives the perfect balance between structure and softness, especially for everyday use.
If you enjoy small, satisfying projects that don’t take all afternoon, this Heart Coaster Crochet Pattern is a lovely choice. It’s also a great step up if you’re comfortable with basic stitches and ready to practice shaping and decorative borders.
What You’ll Need
🧶 Materials
- Yarn A: Barroco Maxcolor nº 6 – approx. 20 g
- Yarn B: Encanto (for decorative edging) – approx. 5 g
- Hook: 3.5 mm (E/4)
- Scissors
- Yarn needle
- Fabric glue (optional, for finishing)
Finished Size
- Width: approx. 15 cm (6″)
- Height: approx. 11 cm (4.3″)
📌 Abbreviations (US Terms)
| Abbreviation | Meaning |
|---|---|
| ch | chain |
| sl st | slip stitch |
| sc | single crochet |
| dc | double crochet |
| st(s) | stitch(es) |
| sp | space |
| rep | repeat |
| sk | skip |
🧵 Pattern Notes
- Pattern is worked back and forth, then around.
- Ch 3 counts as first dc unless stated otherwise.
- Do not change stitch counts.
- All increases are intentional and placed symmetrically.
- Decorative edging is worked after the base is completed.
❤️ Base Heart – Foundation
Row 1
Make a magic loop or adjustable slip knot.
Ch 24.
Work into the 5th ch from hook:
1 dc
Next 2 ch: 1 dc in each
(3 dc group formed)
Ch 2, sk 2 ch
In next 3 ch: 3 dc
Ch 3, in same ch as last dc:
1 dc
Next 2 ch: 1 dc in each
Ch 2, sk 2 ch
In next 3 ch: 3 dc
You will have 5 ch remaining.
Sl st into the last ch, tightening loop gently.
🧵 Row 2 – First Heart Shaping
Sl st into the 4-ch space
Sc, ch 1
(Dc, ch 2) × 6 times in same space
(6 dc separated by ch 2)
Ch 2, sk 3 dc
In next 2-ch sp: 3 dc
Sk directly to next 2-ch sp, work 3 dc
Ch 2, repeat 6 dc with ch-2 in opposite 4-ch space
Continue:
3 dc in next 2-ch sp
In 3-ch sp: (3 dc, ch 3, 3 dc) → heart point
3 dc in next 2-ch sp
Sl st to first sc to close.
🧵 Row 3 – Oval Expansion
Without chaining, pull loop through first dc, secure with sc
Begin dc directly in same space
Increases Placement
Increase (2 dc in same st) at:
- 2nd and 4th dc of each rounded side
Pattern Flow
Dc over dc
2 dc in each ch-2 space
Follow symmetry carefully
Repeat both sides identically
At the 3-ch heart point:
(2 dc, ch 1, 2 dc)
Sl st to close round.
🧵 Row 4 – Shell Border (Barroco Yarn)
Shell Pattern
6 dc in same st
Sk 1 st
Sc
Rep around
Special Placement
At curved edges: shells worked closer
At heart point:
Shells worked directly into chain spaces
No extra chains between shells
Finish round with sl st.
Fasten off and weave in ends.
✨ Decorative Edging (Encanto Yarn)
Setup
Attach yarn in 2nd dc of any shell
Leave tail for invisible finish
Edging Pattern
(Sc, ch 1) in next 4 dc
Sk first and last dc of each shell
Sc in sc between shells
At Heart Point
Work 5 sc separated by ch 1
Skip first and last sc to prevent puckering
Continue evenly around.
🔚 Invisible Finish (Recommended)
Cut yarn leaving long tail
With yarn needle:
- Pass under both loops of starting ch
- Insert back into last st
- Gently tighten
Secure with two small knots
Apply tiny drop of glue if desired
Weave ends through stitches and trim
My Experience & Practical Tips
After making several versions of this Heart Coaster Crochet Pattern, a few practical details really stood out.
First, tension matters more than you might expect. If your stitches are too loose, the heart loses its clean curves. I keep my tension slightly firm, especially in Row 3, to maintain that smooth oval shape.
Second, yarn choice makes a visible difference. Cotton yarns with good twist definition highlight the shell border beautifully. Softer, loosely spun yarns tend to blur the edging, especially after washing.
A common beginner mistake is pulling the chain spaces too tight at the heart point. That little ch-3 space needs room so the point stays defined instead of curling inward. Relax your hands there and let the stitch breathe.
Finally, don’t skip the invisible finish. It sounds optional, but it’s what takes this coaster from “homemade” to “handcrafted.” I’ve compared both finishes side by side, and the invisible one always looks cleaner.
Finishing Touches
Once finished, I like to lightly steam block the coaster under a cloth. Just a few seconds helps the shells settle and the heart lay perfectly flat. Let it cool completely before use.
FAQ – Heart Coaster Crochet Pattern
Is this Heart Coaster Crochet Pattern beginner-friendly?
It’s best for confident beginners or intermediate crocheters. You should be comfortable with dc stitches and reading stitch placement.
Can I sell items made from this pattern?
Yes, finished pieces may be sold. Please credit the designer when possible.
What yarn works best for daily use?
Cotton yarns are ideal. They handle heat well and keep their shape after washing.
Does the coaster need blocking?
Blocking is optional, but it greatly improves the final look, especially the heart point.
If this Heart Coaster Crochet Pattern caught your eye, there’s a good chance you also enjoy small, charming projects that come together quickly and make meaningful handmade gifts. Patterns like the Coffee Cup Keychain Amigurumi Crochet Pattern are perfect when you want something playful and giftable, especially for coffee lovers.
The Mini Apple Amigurumi Crochet Pattern follows the same idea of compact size with strong visual impact, making it a lovely option for keychains, classroom gifts, or small market items. And if you’re drawn to cozy themes, the Teacup Amigurumi Crochet Pattern pairs beautifully with this heart coaster, creating a coordinated handmade set for kitchens or gift baskets.
Exploring these patterns together is a great way to build a cohesive crochet collection while practicing different shaping techniques on a small, satisfying scale.
This Heart Coaster Crochet Pattern has been tested, adjusted, and made in real-life use—not just once, but many times. It’s reliable, elegant, and practical, whether you’re making a single coaster for your own table or a full set as a heartfelt gift.
If you make it, take your time with the shaping and enjoy the process. It’s one of those patterns that rewards care and attention, and the result always feels worth it.
Loved this pattern? Share it with your crochet friends or save it for your next handmade gift project. 💖