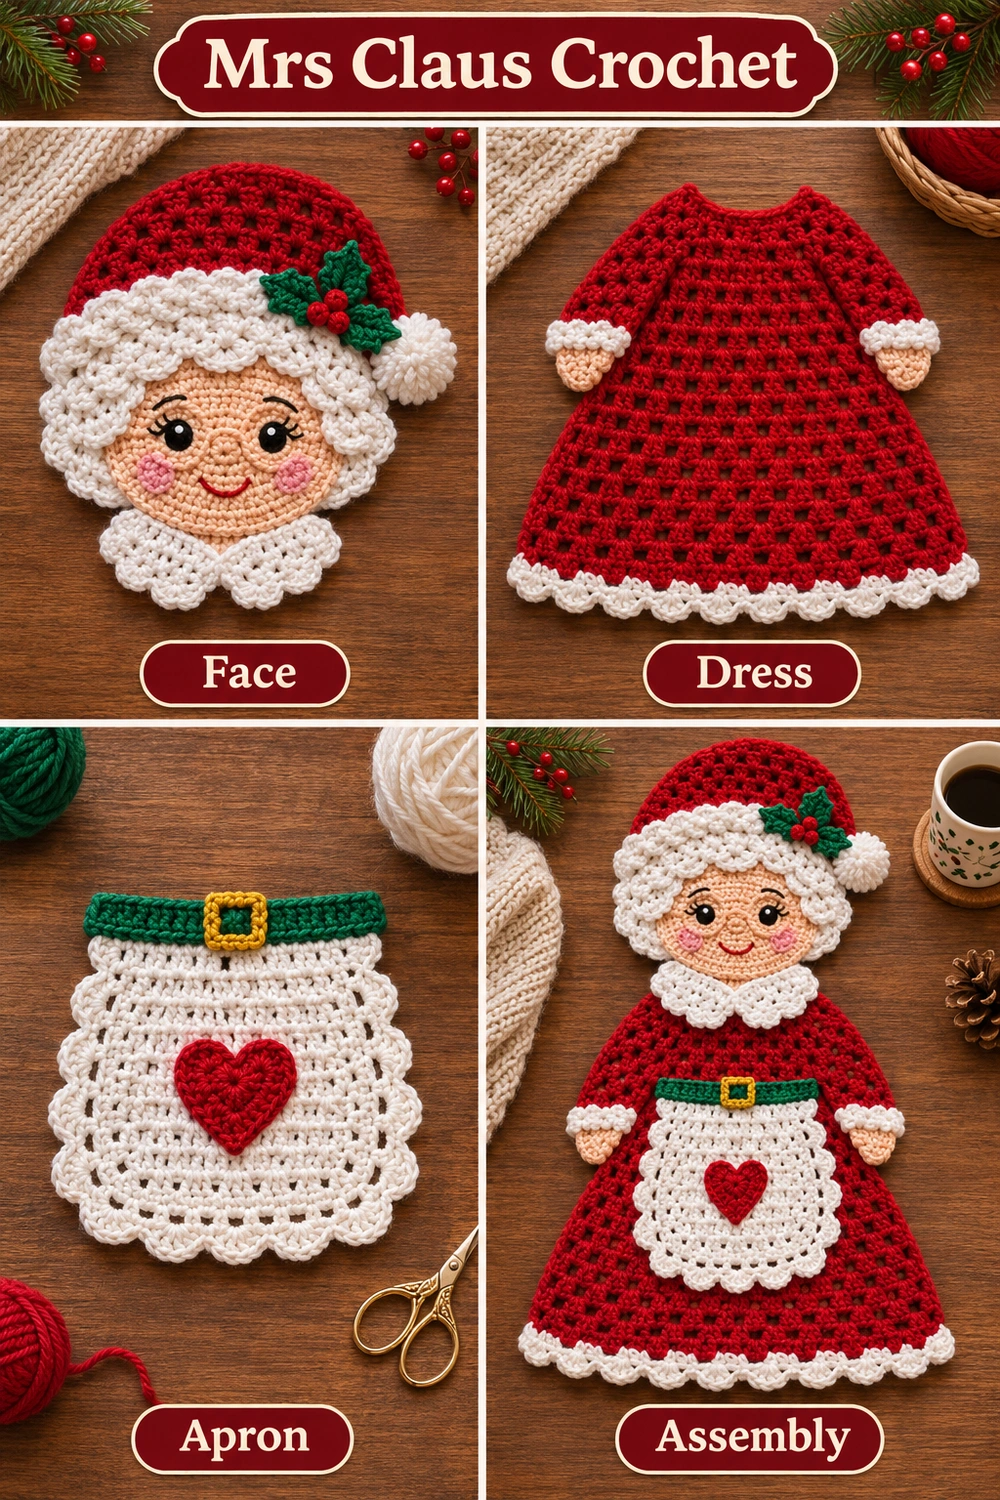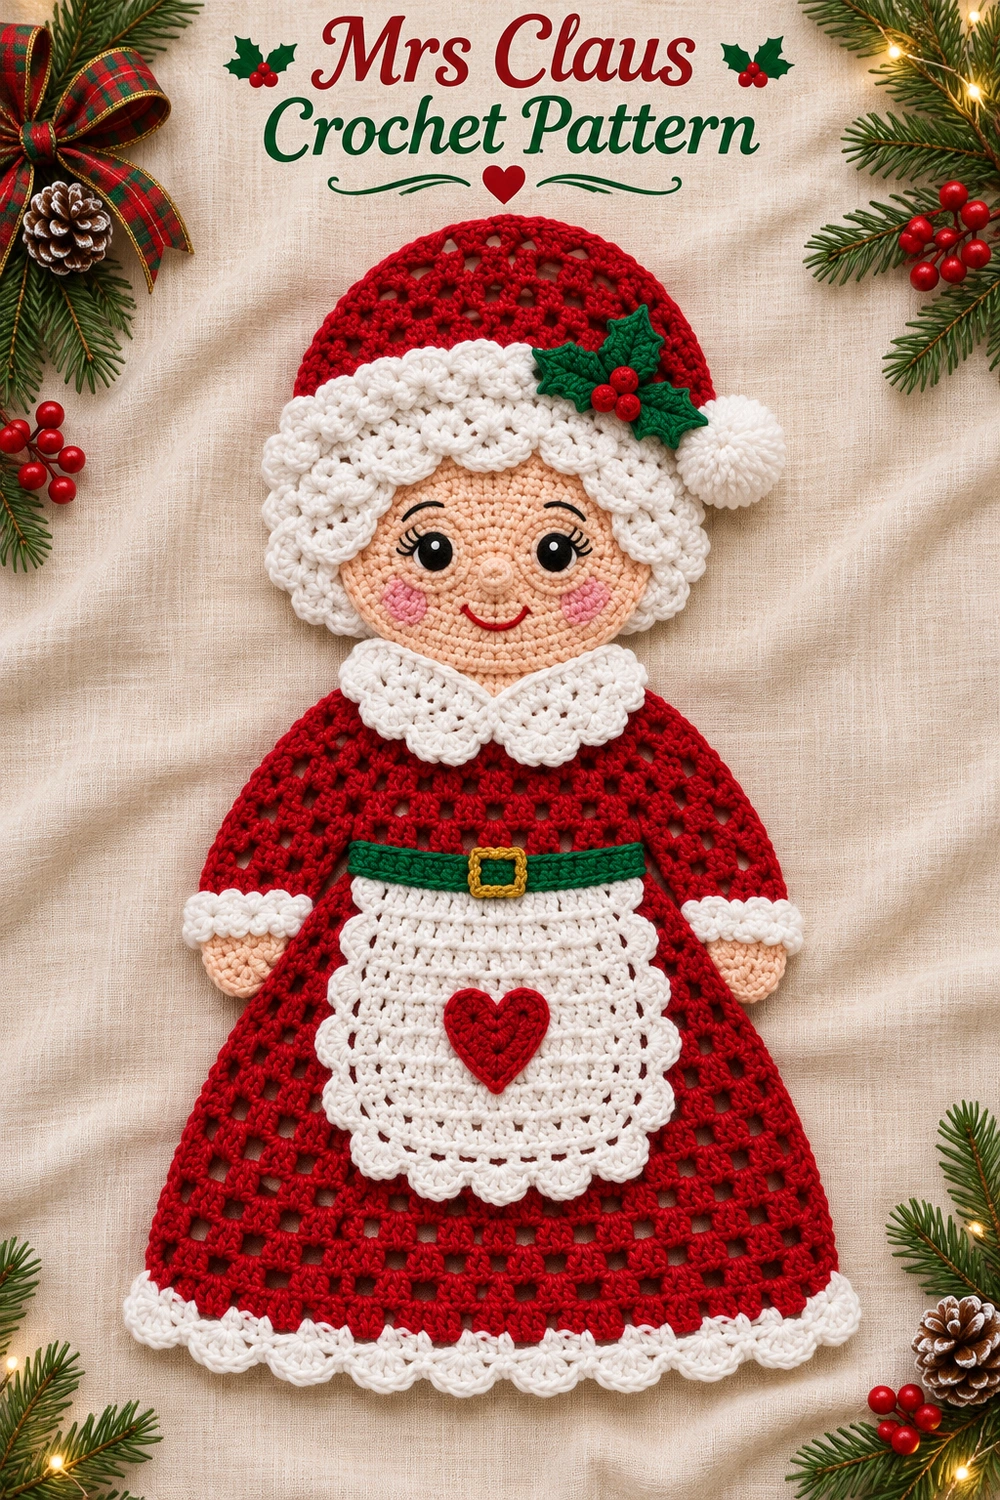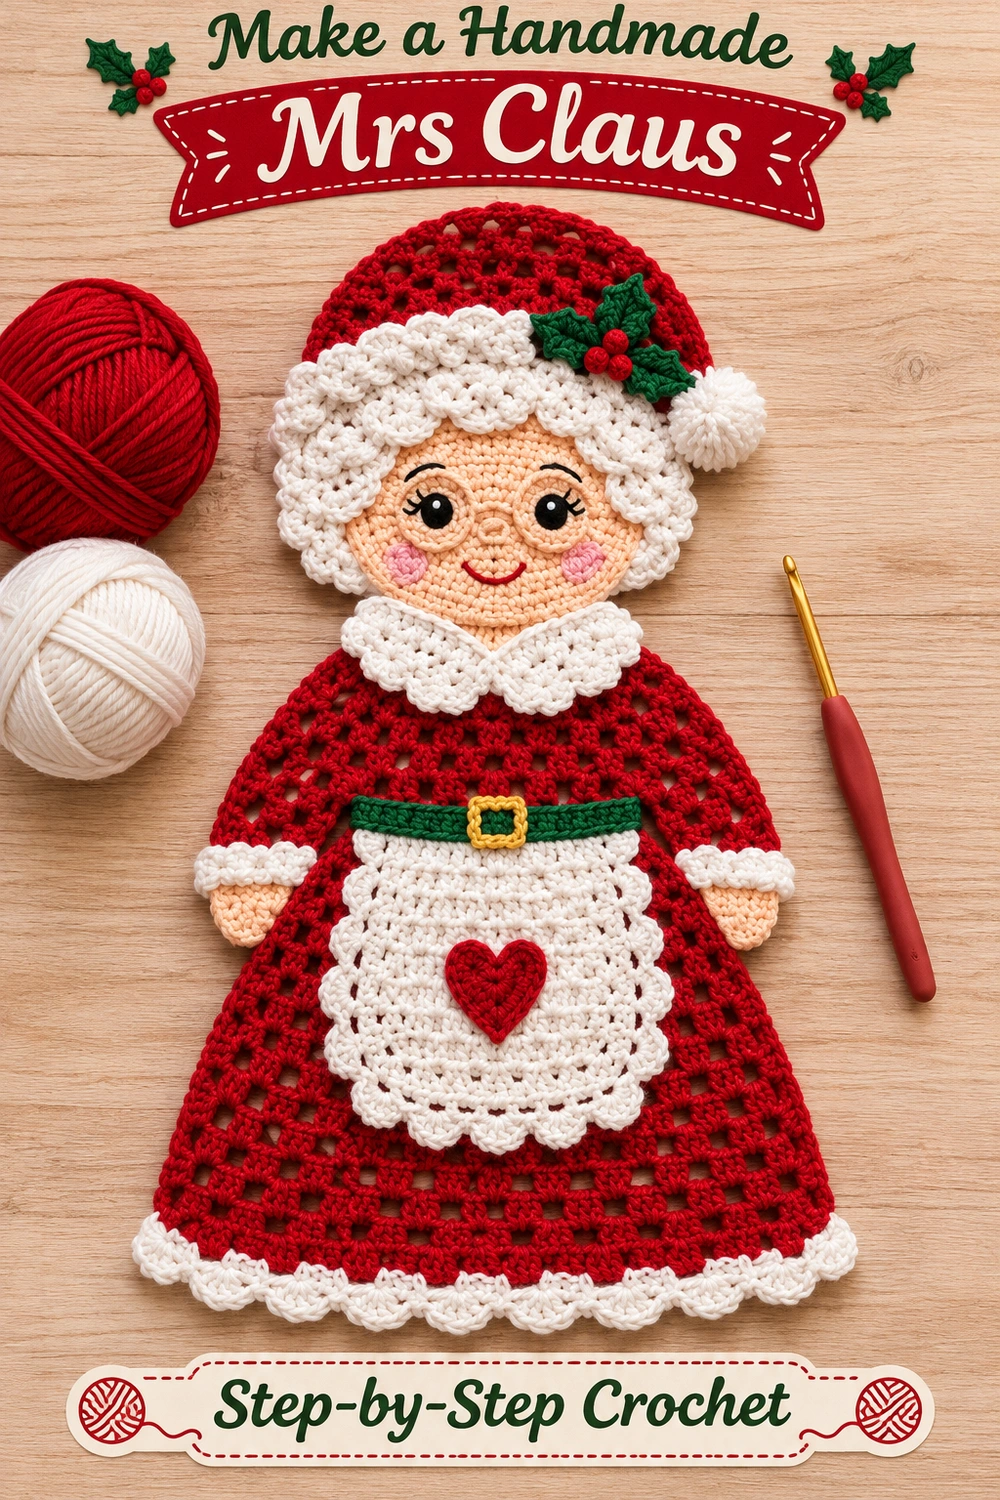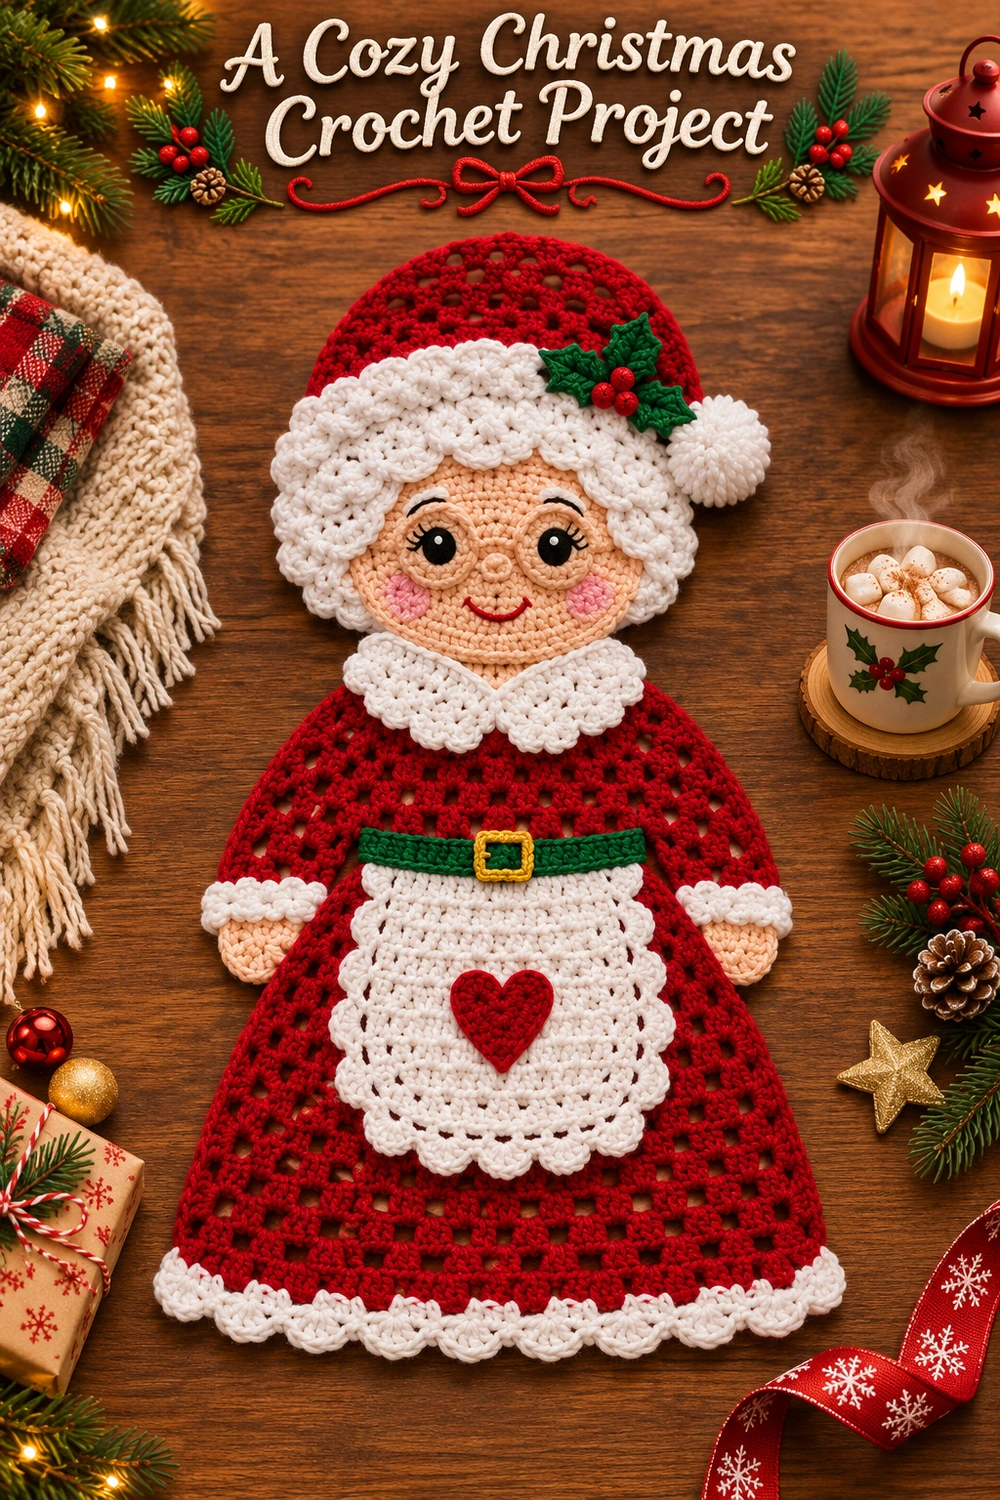
This Mrs Claus crochet pattern makes a flat Christmas decoration with a red granny-stitch dress, white scalloped hair and collar, a heart apron, and a holly-trimmed Santa hat. Each section is made separately, then arranged and sewn together while lying flat. The green belt and tiny golden buckle give the outfit its familiar festive look.
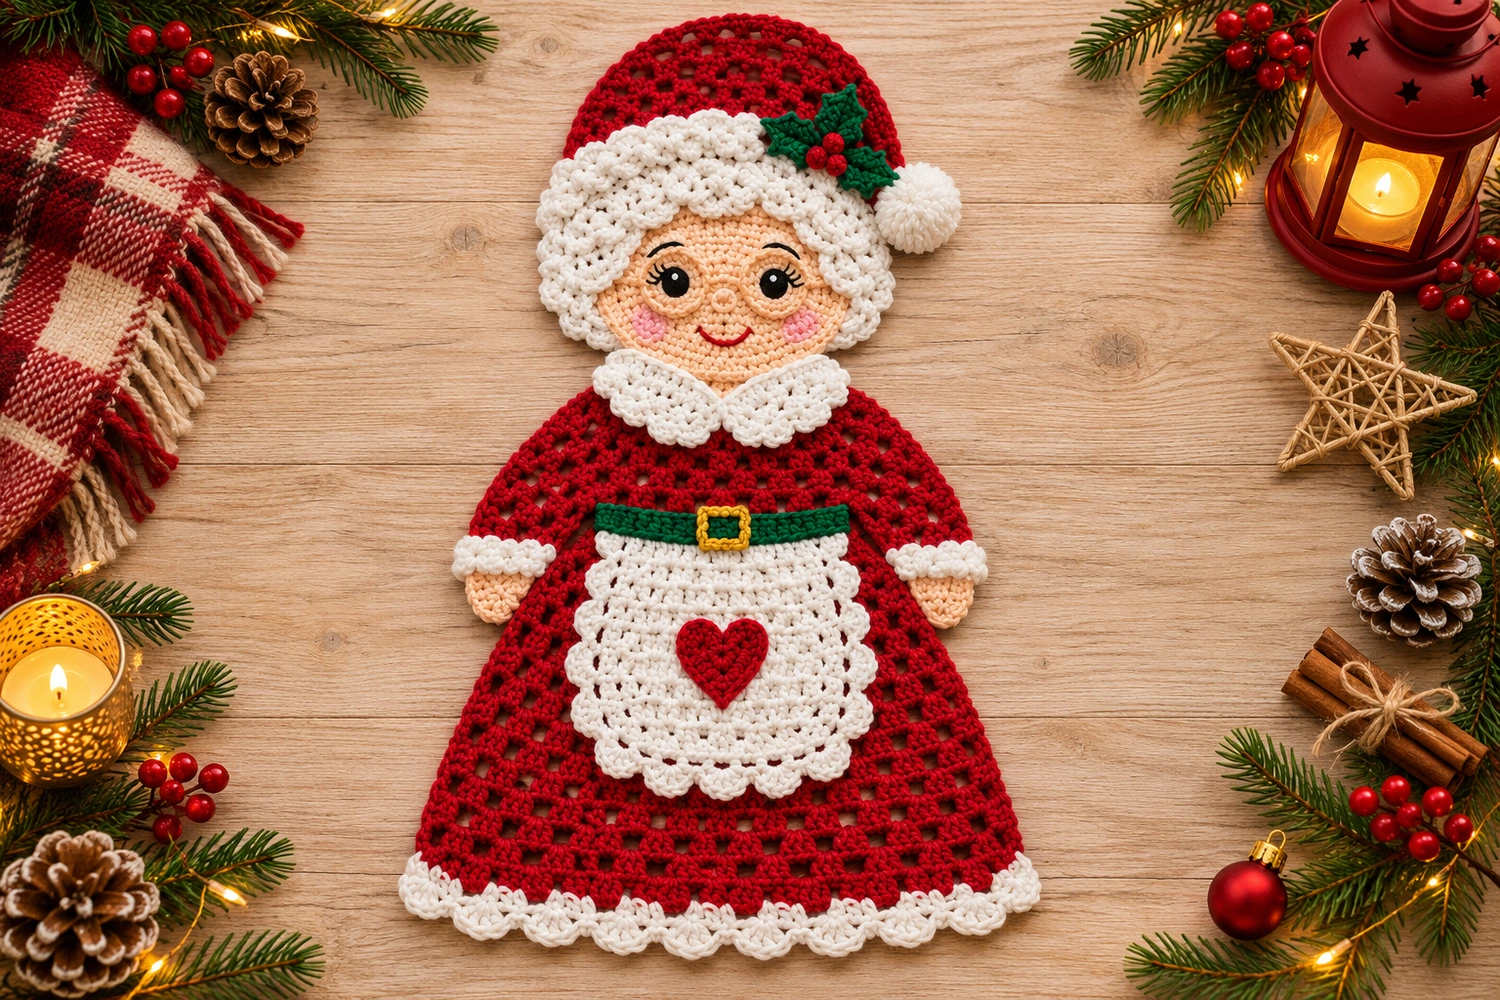
This is an image-inspired adaptation, not the original maker’s recipe. The stitch arithmetic has been checked, but a physical sample has not been crocheted. Sizes and yarn quantities are estimates. The generated charts are schematics; follow the written instructions for construction. This decorative applique is not designed or tested as protective kitchen equipment.
Mrs Claus Crochet Pattern: Materials and Size
- DK cotton: approximately 50–70 g red, 30–40 g white, 10–15 g peach, and small amounts of green, gold, black, and pink. Quantities are estimates.
- A 3 mm crochet hook, a yarn needle, embroidery needle, scissors, tape measure, and removable markers or pins.
- Black and red embroidery thread for the face; a small amount of white yarn for the pom-pom.
Estimated finished height is 28–35 cm, depending on tension and how the head and hat overlap. Make all parts with the same yarn weight and hook. The project suits a confident beginner or intermediate crocheter who can work granny groups, increase and decrease, and sew flat pieces together. No stuffing is used.
Mrs Claus Crochet Pattern: US Terms and Stitch Guide
Ch = chain; sl st = slip stitch; sc = single crochet; hdc = half double crochet; dc = double crochet; inc = 2 sc in one stitch; dec = sc two stitches together; st = stitch. A granny group is 3 separate dc worked into the same stitch or chain space; do not close the dc together.
For dc, yarn over, insert the hook, yarn over and pull up a loop, then yarn over and draw through two loops twice. For hdc, draw through all three loops after pulling up the working loop. For dec, pull up a loop in each of the next two stitches, then yarn over and draw through all three loops.
Unless specified otherwise, beginning ch 1 or ch 2 provides height only and does not count as a stitch. For joined rounds, join to the first actual stitch, not the beginning chain. The face and hair circles are not turned; the dress, apron, sleeves, and hat use turned rows.
Mrs Claus Crochet Pattern: Red Granny Dress
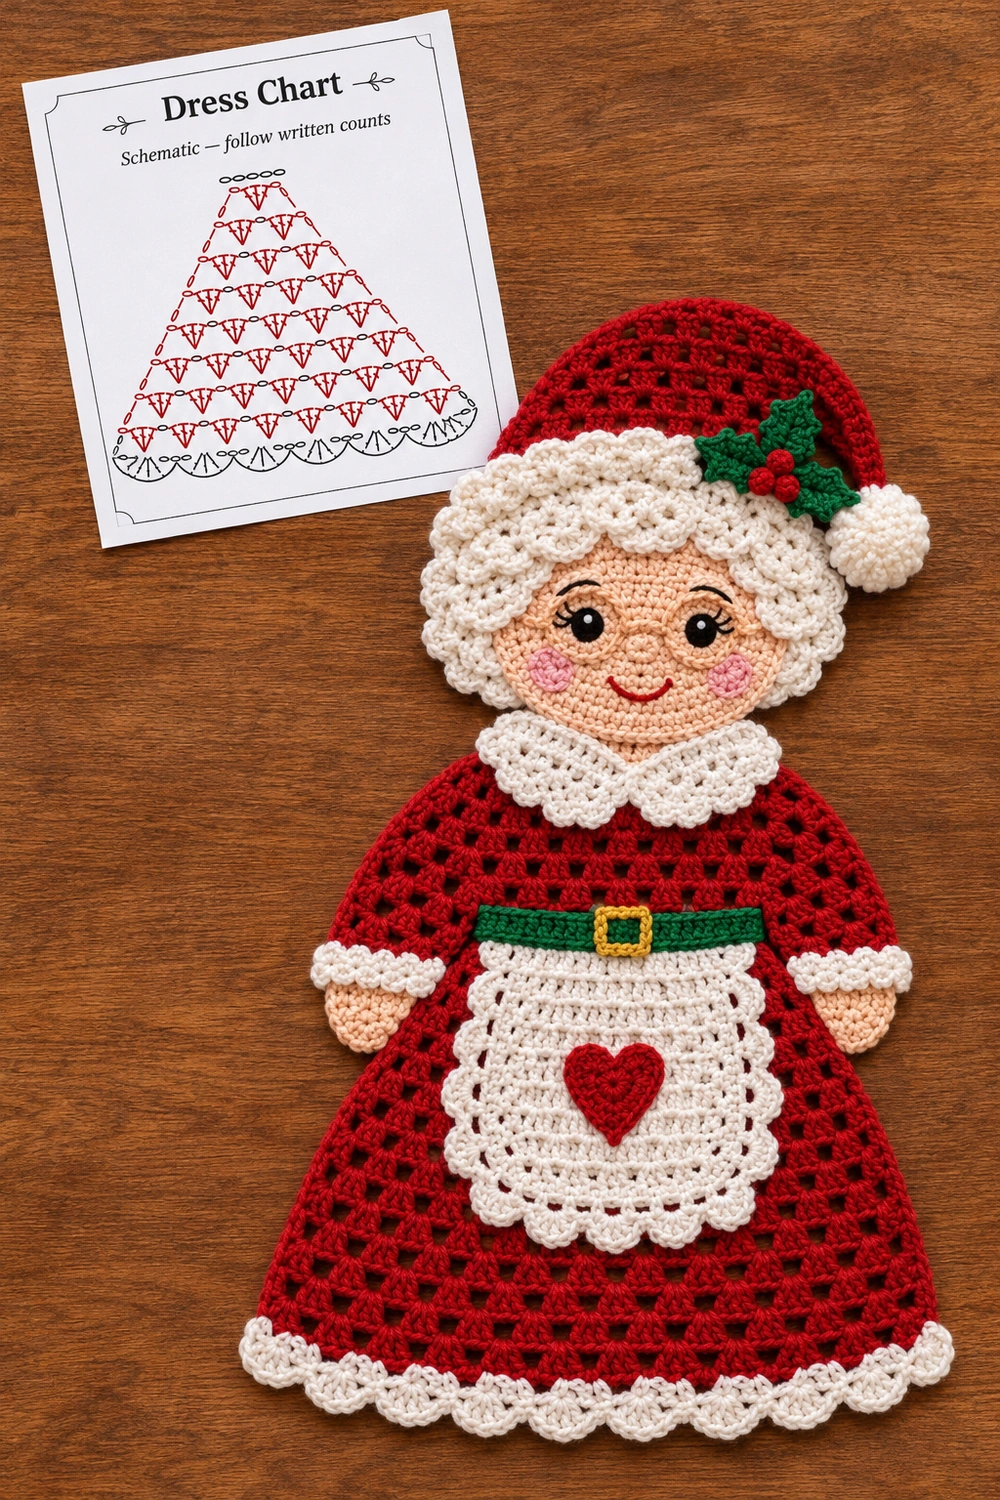
Begin at the narrow neck and work down toward the hem. In red, make a magic ring. Row 1: ch 2 and work 3 dc into the ring. Pull closed but do not join. (1 group) Row 2: ch 2, turn; 3 dc in the first dc, ch 1, 3 dc in the last dc, leaving the middle dc unworked. (2 groups; 6 dc; 1 space)
For every widening row after row 2: ch 2 and turn; 3 dc in the first dc, then [ch 1, 3 dc in the next ch-1 space] across all old spaces; ch 1 and work 3 dc in the last dc. Skip all other dc tops. Do not put an extra group in the turning chain. Each row adds exactly one group.
| Row | Action | Groups | Dc | Ch-1 spaces |
|---|---|---|---|---|
| 1 | 3 dc into magic ring | 1 | 3 | 0 |
| 2 | Groups in both endpoints | 2 | 6 | 1 |
| 3 | Widen | 3 | 9 | 2 |
| 4 | Widen | 4 | 12 | 3 |
| 5 | Widen | 5 | 15 | 4 |
| 6 | Widen | 6 | 18 | 5 |
| 7 | Widen | 7 | 21 | 6 |
| 8 | Widen | 8 | 24 | 7 |
| 9 | Widen | 9 | 27 | 8 |
| 10 | Widen | 10 | 30 | 9 |
| 11 | Widen | 11 | 33 | 10 |
| 12 | Widen | 12 | 36 | 11 |
| 13 | Widen | 13 | 39 | 12 |
| 14 | Widen | 14 | 42 | 13 |
| 15 | Widen; final dress row | 15 | 45 | 14 |
Fasten off and weave in the ends. Smooth the triangle so the neck point is centered above the hem. Choose the preferred display side and mark it. Do not fold the triangle into a cone.
Mrs Claus Crochet Pattern: Scalloped White Hem
With the display side facing, join white in the first dc of row 15. Ch 1; sc in each of the 45 dc and work 1 sc in each of the 14 chain spaces. (59 sc) Ch 1, turn.
Repeat [sl st in next st, skip 1 st, 5 dc in next st, skip 1 st] 14 times, using 56 stitches. Over the final three stitches, work sl st, skip 1, and 5 dc in the last stitch. Anchor with a sl st into the adjacent row-end corner. (15 shells) Fasten off. The corner anchor is not a sixteenth shell. Gently spread the hem evenly without pulling the triangle wider.
Mrs Claus Crochet Pattern: Peach Face
Make one flat circle in peach. Work joined sc rounds, beginning each with ch 1 and joining to the first sc.
| Round | Instructions | Count |
|---|---|---|
| 1 | 6 sc in a magic ring | 6 |
| 2 | Inc in every stitch | 12 |
| 3 | [1 sc, inc] 6 times | 18 |
| 4 | [2 sc, inc] 6 times | 24 |
| 5 | [3 sc, inc] 6 times | 30 |
| 6 | [4 sc, inc] 6 times | 36 |
| 7 | [5 sc, inc] 6 times | 42 |
Fasten off with a 40 cm sewing tail. Do not add plain rounds, which would cup the circle. Embroider two small black eyes on the upper half, approximately six stitch widths apart. Add a short curved red smile below the center and pink cheek stitches outside and below each eye. Use tiny white highlights within the eyes if desired. Secure embroidery on the wrong side without pulling the face inward.
Mrs Claus Crochet Pattern: White Hair and Fringe
Make a white backing circle using face rounds 1–7 (42 sc). Round 8: [6 sc, inc] 6 times (48). Round 9: [7 sc, inc] 6 times (54). Begin each round with ch 1 and join to the first sc. The white circle is deliberately wider than the peach face.
Hair edging: [sl st in next st, skip 2 sts, 5 dc in next st, skip 2 sts] 9 times around the 54 stitches; join to the first sl st. (9 shells) Fasten off. Center the face on the white circle, keeping a visible white border. Sew the peach edge to the white backing with small stitches, leaving the shells free.
Front fringe: ch 19 in white. Sc in the second chain and across (18 sc). Ch 1, turn; [sl st in next st, 3 hdc in next st, sl st in next st] 6 times. Fasten off with a sewing tail. Curve this six-scallop strip across the upper face, above the eyes, and sew its straight edge to the backing. The hat brim will hide its upper seam. Do not cover the eyes.
Mrs Claus Crochet Pattern: Sleeves, Hands, and Collar
Sleeves, make two: in red ch 8. Row 1: hdc in the second chain and across (7). Rows 2–5: ch 1, turn, hdc across (7 each). Change to white on the last pull-through of row 5. Row 6: ch 1, turn, sc across (7). Fasten off with a sewing tail. These are flat strips, not stuffed tubes.
Hands, make two: in peach work 6 sc in a magic ring, join; ch 1, inc in every stitch, join (12). Fasten off. Sew one side of each hand circle behind a white cuff so about half the hand extends below it. Keep the hands unstuffed.
Collar: in white ch 19. Row 1: sc in the second chain and across (18). Row 2: ch 1, turn; [sl st in next st, 3 dc in next st, sl st in next st] 6 times. Fasten off. Curve the strip into a shallow U beneath the face, with the six scallops facing downward. Do not join its short ends into a ring.
Mrs Claus Crochet Pattern: White Apron
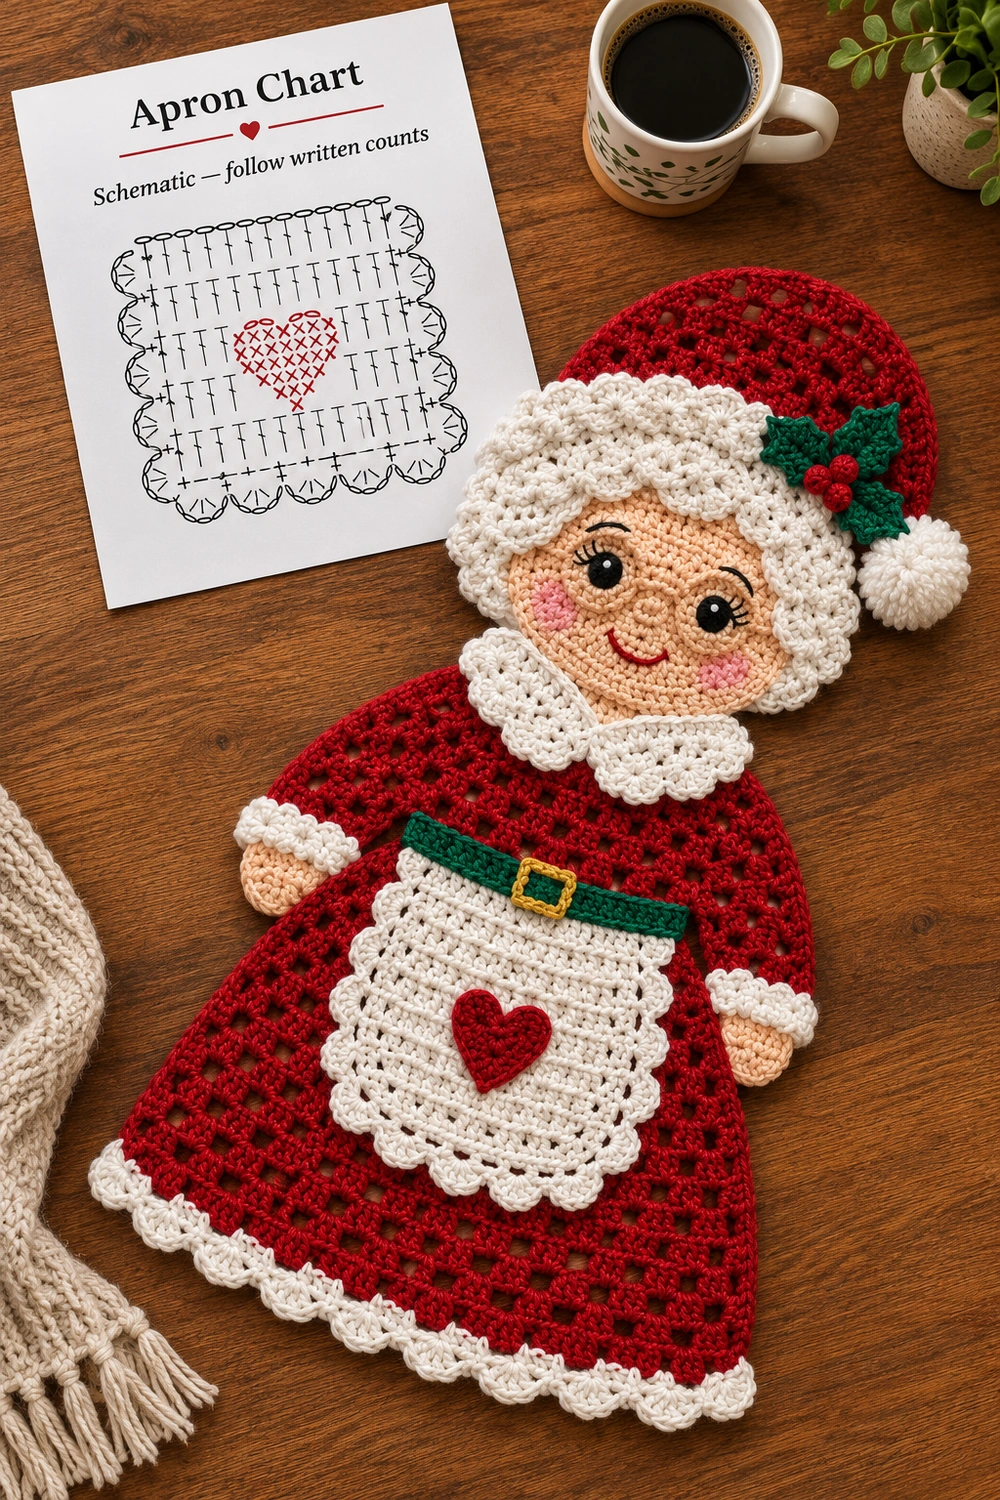
In white ch 13. Row A1: hdc in the second chain and across (12). Rows A2–A10: ch 1, turn, hdc in each stitch (12 each). Fasten off. The foundation is the straight top edge; row A10 is the bottom.
For a rounded three-sided edging, put the display side facing you. Join white at the upper-left corner. Work one sc around each of the ten row ends down the left side, one sc in each of the twelve bottom stitches, then one sc around each of the ten row ends up the right side. (32 sc) Do not work across the top. Ch 1, turn.
Work [sl st in next st, skip 1 st, 5 dc in next st, skip 1 st] 8 times over those 32 stitches. Anchor with a sl st into the top corner. (8 shells) Fasten off with a 40 cm sewing tail. The edging intentionally has no extra corner increases, helping the lower corners turn softly rather than forming sharp points. Block lightly if necessary.
Mrs Claus Crochet Pattern: Red Heart
Make a red magic ring. Ch 2, then work 3 tr, 3 dc, ch 1, 1 tr, ch 1, 3 dc, 3 tr, ch 2, and sl st into the ring. Pull the ring closed gradually to form two lobes and a bottom point. For tr, yarn over twice before insertion, then pull through two loops three times. Fasten off with a 30 cm sewing tail.
Lay the heart in the apron center, point downward. Sew around the outside with small red stitches, catching only the apron. Keep the two upper lobes open and rounded. If this heart is too large for your yarn combination, make it with a thinner red yarn and a suitable smaller hook.
Mrs Claus Crochet Pattern: Belt and Buckle
In green ch 25. Row 1: sc in the second chain and across (24). Row 2: ch 1, turn, sc across (24). Fasten off with a sewing tail. Pin the belt horizontally over the dress near rows 5–6, where the apron top will sit. If its length differs from your dress width, remake it with the required number of chains plus one, keeping two rows.
Use gold yarn to embroider a small rectangular buckle over the belt center: make four short straight sides around an area approximately two belt stitches wide, then couch the corners down. Add a tiny vertical stitch inside for the buckle tongue. Use embroidery rather than a metal fitting to preserve the flat finish.
Mrs Claus Crochet Pattern: Red Hat and White Band
Start at the wide lower edge in red. Ch 25. Row H1: sc in the second chain and across (24). Before every later row, ch 1 and turn. Work decreases through the first two and last two old stitches on shaping rows.
| Row | Instructions | Count |
|---|---|---|
| H2 | Sc across | 24 |
| H3 | Dec, 20 sc, dec | 22 |
| H4 | Sc across | 22 |
| H5 | Dec, 18 sc, dec | 20 |
| H6 | Sc across | 20 |
| H7 | Dec, 16 sc, dec | 18 |
| H8 | Sc across | 18 |
| H9 | Dec, 14 sc, dec | 16 |
| H10 | Dec, 12 sc, dec | 14 |
| H11 | Dec, 10 sc, dec | 12 |
| H12 | Dec, 8 sc, dec | 10 |
| H13 | Dec, 6 sc, dec | 8 |
| H14 | Dec, 4 sc, dec | 6 |
| H15 | Dec, 2 sc, dec | 4 |
| H16 | Dec twice | 2 |
| H17 | Dec once | 1 |
Fasten off with a sewing tail. Make the white band separately: ch 25, hdc in the second chain and across (24); ch 1, turn, hdc across (24). Fasten off. Sew the band along the red foundation edge. Bend the upper third of the hat toward the right as viewed from the front, and tack the fold on the back.
For the pom-pom, wrap white yarn approximately 35–45 times around a 2 cm-wide cardboard strip. Slide off, tie firmly through the center with a separate strong strand, knot twice, cut the loops, and trim gradually. Sew its center tie to the hat tip with several passes. Do not rely on glue.
Mrs Claus Crochet Pattern: Holly Trim
Make two small green leaves. Ch 6; starting in the second chain, work sc, hdc, dc, hdc, then 3 sc in the last chain. Rotate to the underside and work hdc, dc, hdc, then 2 sc into the first chain, which already holds the starting sc. Join to the first sc (12 stitches). Fasten off.
For three red berries, make three separate nubs of 5 sc in a magic ring, join, and fasten off. Gather each disc gently through its front loops. Sew the leaf bases together on the hat above one end of the white band and place the three nubs over the join. These small oval leaves are a simple crocheted interpretation of the holly in the image.
Mrs Claus Crochet Pattern: Assembly Order
- Arrange the dress: put the neck point upward and the white hem downward. Pin the sleeves behind the two upper side edges, angled downward, with hands just outside the dress. Sew the upper half of each red sleeve securely to the dress, keeping cuffs and hands visible.
- Attach the head: overlap the lower white hair backing onto the dress’s neck point. Center the face over the dress. Sew a broad section of the backing to the upper dress so the head is supported across several stitches.
- Add the collar: place its straight edge below the chin, covering the head/dress join. Curve it into a shallow U and sew the upper edge, leaving scallops free.
- Position the apron: center it over the skirt, with its top near dress rows 5–6 and its lower shells above the dress hem. Sew the straight top and add small hidden side tacks. Leave its lower scallops free.
- Add the belt: lay it across the waist, covering the apron top seam. Keep the gold buckle centered. Sew the green edges without pulling the granny spaces closed.
- Attach the hat: place the brim over the upper hair, keeping the fringe and face visible. Sew the overlapping lower hat and brim to the hair backing. Secure the folded tip and pom-pom so their weight does not pull the head sideways.
- Final check: smooth both sleeves, center the heart, check the smile and eye height, and weave in every remaining tail. Inspect the back for loose sewing loops.
Mrs Claus Crochet Pattern: Blocking and Display
Before assembly, lightly dampen the flat pieces if permitted by the yarn label. Pin the dress into a symmetrical triangle and the apron into a rectangle with rounded lower corners. Let all pieces dry completely before sewing. Avoid soaking the finished pom-pom.
For wall display, attach an optional white ch-30 loop behind the upper hair backing, sewing each end through several backing stitches. Place the attachment beneath the hat rather than only at its narrow tip. Lift the decoration and check balance before securing. A small fabric backing can be sewn on afterward if you want to conceal the reverse, but it is optional and is not part of the stitch counts.
The granny dress ripples: check that row N has exactly N groups and N−1 spaces. The apron edge gathers: keep its slip stitches loose and block before sewing. The face cups: check the six increases per round and exclude joining stitches from the count. The hat leans: reinforce the broad lower attachment instead of tightening the tip tack.
Dust gently or clean according to the yarn label. This flat decoration has small attached details and an optional hanging loop; keep it away from babies and young children.
Mrs Claus Crochet Pattern: Related Projects and Stitch Help
For a matching seasonal face, explore the flat Santa face crochet pattern. For US stitch terminology, consult the Craft Yarn Council crochet abbreviations.
Mrs Claus Crochet Pattern: Visual Guide
The tutorial shows the main pieces and assembly order. Both tabletop diagrams are generated schematics; use the written tables for granny groups, the apron foundation, and all shaping.